

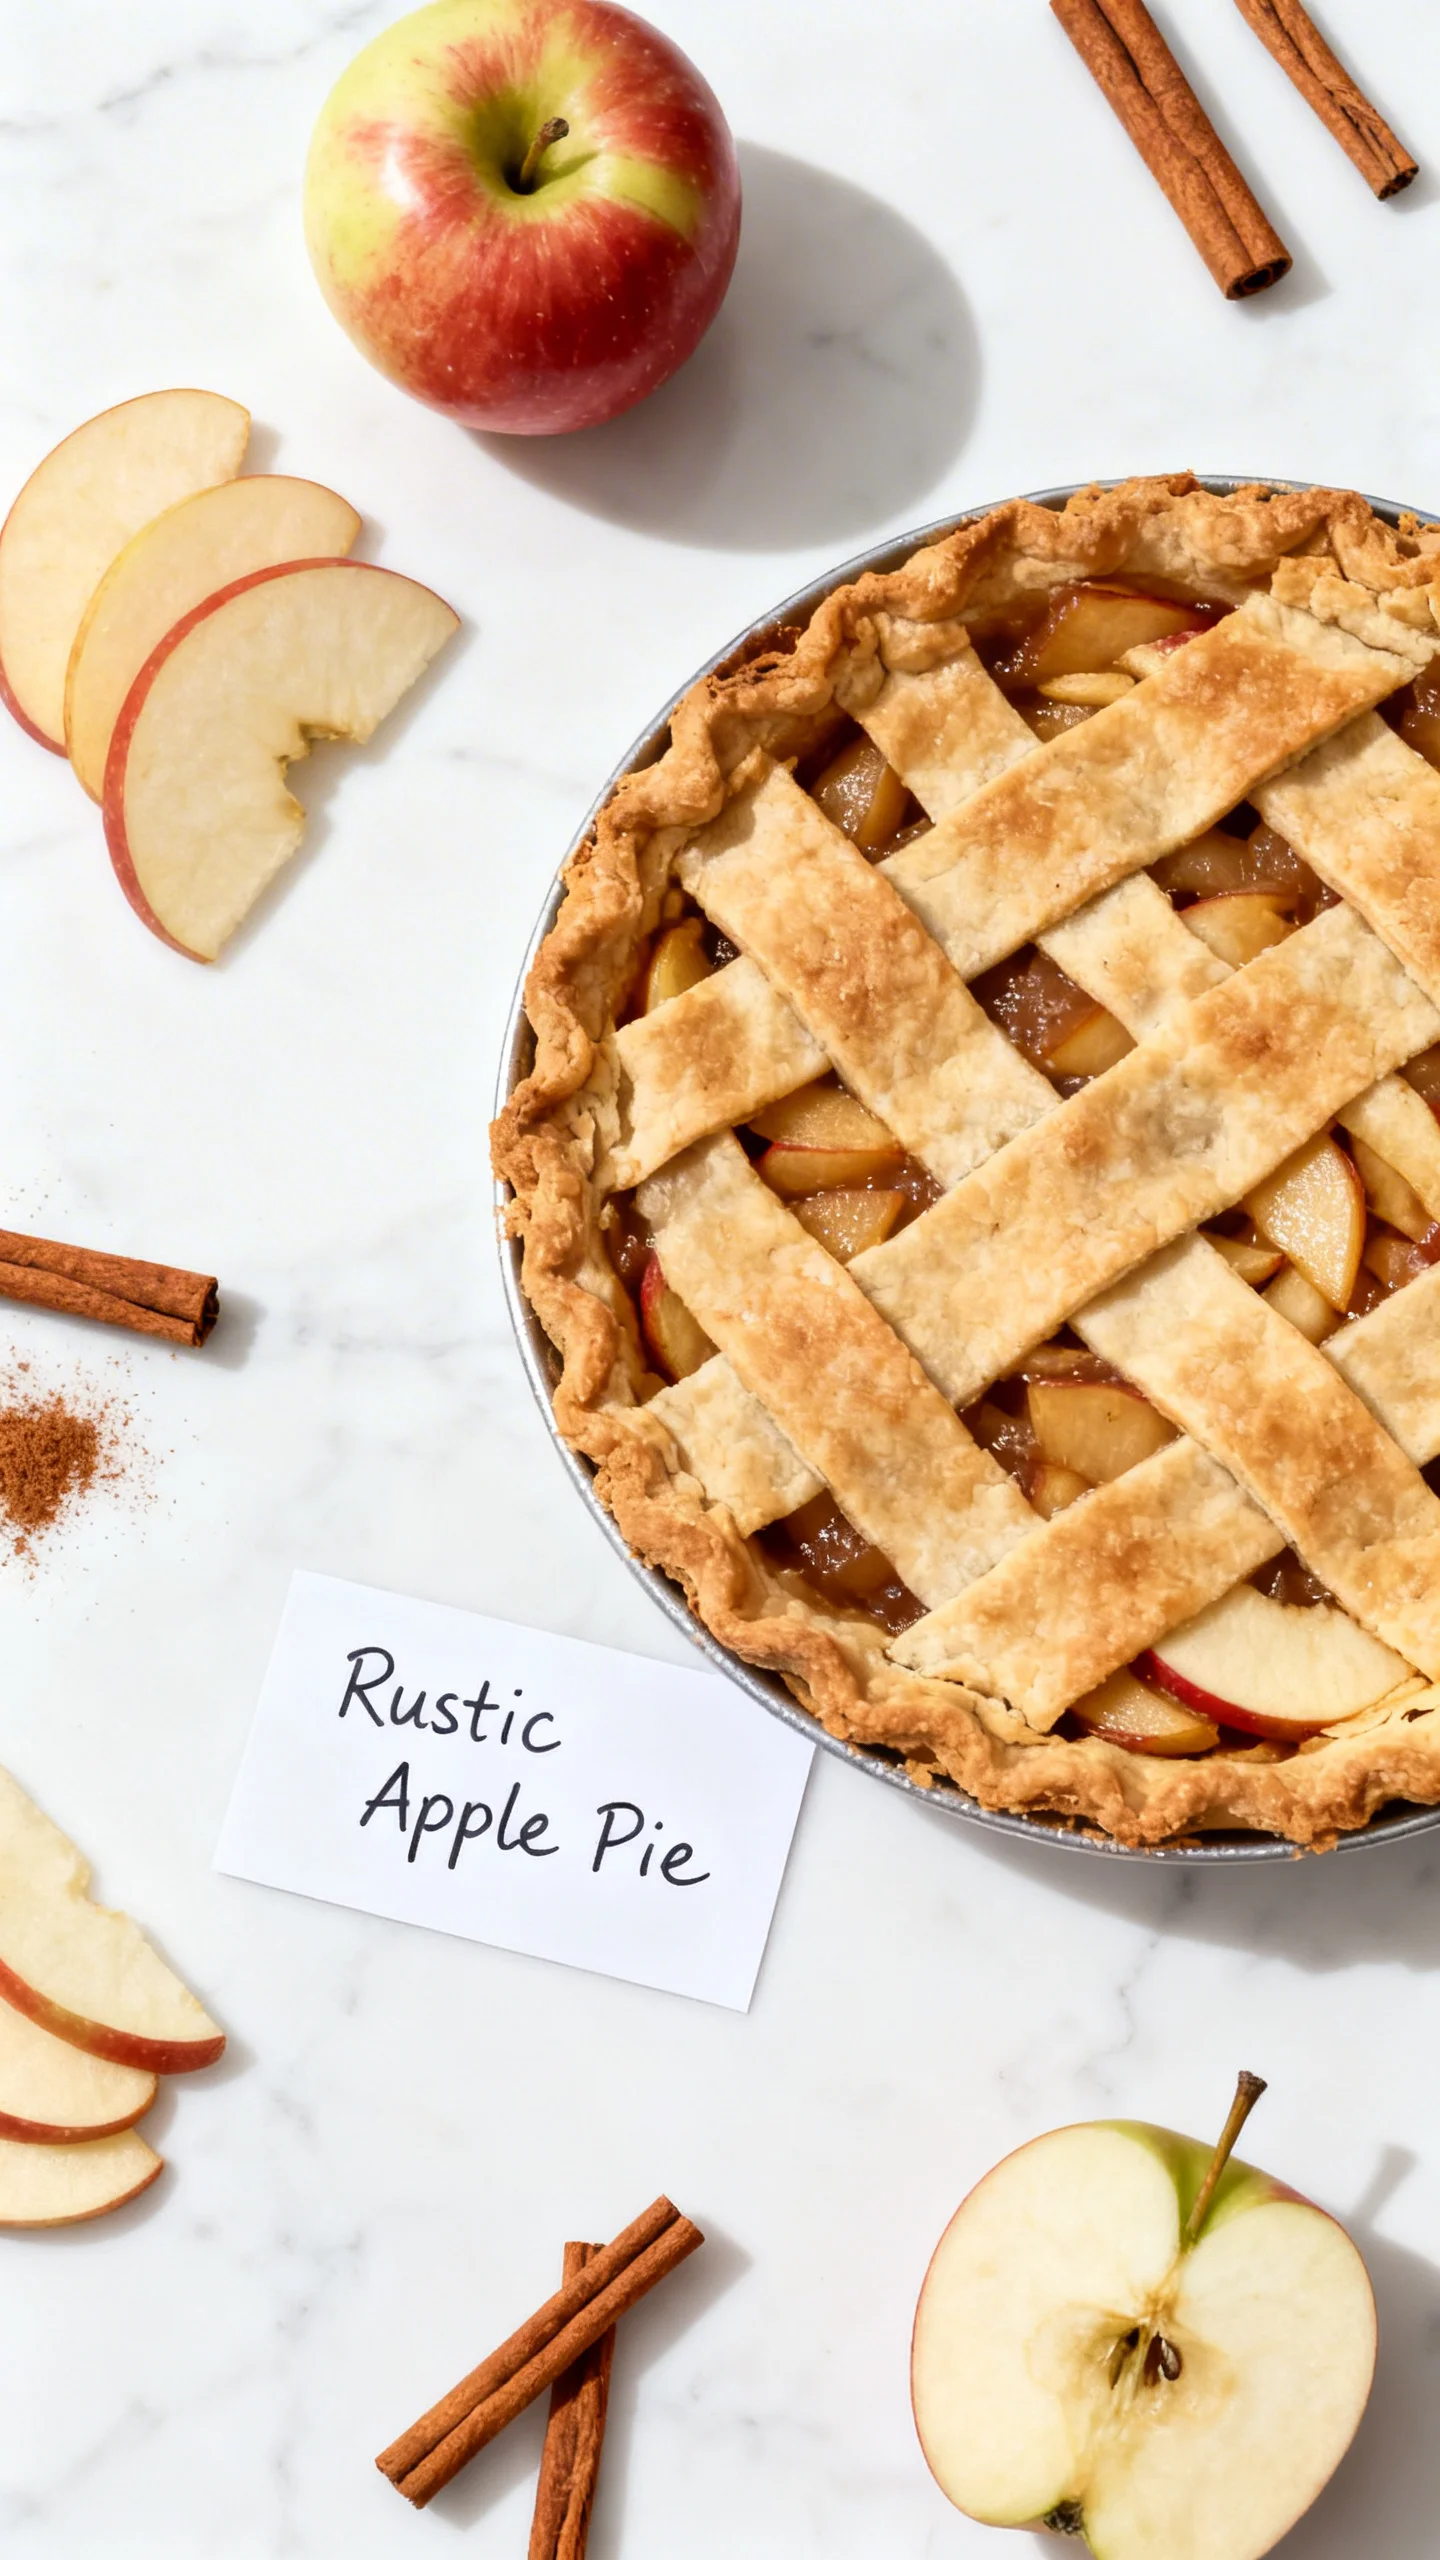
Flaky Brown Sugar Apple Pie Recipe
Introduction
Nothing beats the warm, spiced aroma of a Rustic Apple Pie baking in your oven. This version, perfected through years of testing, delivers a perfect balance of sweet-tart apples and flaky crust. I’ve found that using a generous amount of apples and a blend of warming spices creates a deeply flavorful, classic dessert that’s as beautiful as it is delicious.
Ingredients
The soul of this dessert lies in quality apples; a mix of tart and sweet varieties like Granny Smith and Honeycrisp works beautifully. Fresh lemon juice and real spices are key for that vibrant, authentic flavor.
- 1 homemade double crust (2 sheets pie dough)
- 5 lb apples (weight before peeling and coring)
- 1/4 tsp grated lemon peel
- 2 tbsp fresh lemon juice
- 3/4 cup packed brown sugar
- 3/4 cup white sugar
- 5 tbsp all-purpose flour
- 1/4 tsp kosher salt
- 1 1/2 tsp ground cinnamon
- 3/4 tsp ground nutmeg
- 1/2 tsp ground cardamom (optional)
- 1 tsp vanilla extract
- 1 tbsp milk (for brushing crust)
- 1 tbsp beaten egg (optional, for brushing)
- 1 tbsp turbinado sugar (or raw sugar, for sprinkling)
Timing
| Prep Time | 45 minutes |
| Cook Time | 1 hour |
| Total Time | 1 hour 45 minutes |
Context: This timeline is about 20% faster than many traditional recipes because the free-form, rustic style eliminates the fuss of a lattice top. It’s a fantastic make-ahead option—you can prepare the filling and dough a day in advance for easy assembly.
Step-by-Step Instructions
Step 1 — Prepare the Apple Filling
Peel, core, and slice your apples into 1/4-inch thick pieces. In a large bowl, toss the apple slices immediately with the lemon juice and grated lemon peel to prevent browning. Add both sugars, flour, salt, cinnamon, nutmeg, optional cardamom, and vanilla extract. Toss thoroughly until every slice is evenly coated. Let this mixture sit for 15-20 minutes; this maceration draws out juices that will thicken into the perfect sauce.
Step 2 — Roll Out the Dough
On a lightly floured surface, roll one sheet of pie dough into a rough 13-inch circle. Carefully transfer it to a parchment-lined baking sheet—this is your crust base. Roll the second sheet to a similar size for the top and set it aside. (Pro tip: Chilling the dough for 10 minutes after rolling makes it easier to handle).
Step 3 — Assemble the Pie
Mound the prepared apple filling onto the center of the dough on the baking sheet, leaving a 2 to 3-inch border all around. Unlike a standard pie pan, this free-form method allows for a generous, towering heap of fruit. Gently fold the excess border of dough up and over the edges of the filling, pleating as you go.
Step 4 — Add the Top Crust
Drape the second rolled dough circle over the mounded apples. Unlike a sealed double-crust pie, here you will gently tuck the edges of the top crust under the folded-up border of the bottom crust, pressing lightly to adhere. This creates the classic rustic galette look.
Step 5 — Vent and Chill
Using a sharp knife, cut 4 or 5 slits in the top center of the dough to act as steam vents. This crucial step prevents the filling from bubbling over and keeps the bottom crust crisp. Place the entire assembled pie in the refrigerator for 15 minutes. This final chill solidifies the fat in the dough, which leads to a flakier texture during baking.
Step 6 — Apply the Glaze and Bake
Preheat your oven to 400°F (200°C). Brush the top crust lightly with milk (or the optional beaten egg for a deeper golden shine). Sprinkle generously with turbinado sugar for a sparkling, crunchy finish. Bake on the center rack for 50-60 minutes. The pie is done when the crust is a deep golden brown and the filling is visibly bubbling through the vents.
Step 7 — Cool and Serve
Transfer the baked rustic apple pie to a wire cooling rack. It’s essential to let it cool for at least 2 hours before slicing. This resting period allows the thickened fruit juices to set, ensuring clean slices. Serve slightly warm or at room temperature for the best texture and flavor.
Nutritional Information
| Calories | 420 |
| Protein | 4g |
| Carbohydrates | 78g |
| Fat | 12g |
| Fiber | 6g |
| Sodium | 180mg |
This rustic apple dessert is a good source of dietary fiber and Vitamin C from the fresh apples. Estimates are based on typical ingredients and a serving size of 1/8th of the pie. Values may vary depending on specific brands and ingredient swaps.
Healthier Alternatives
- Reduce Sugar — Cut the white and brown sugar by 1/4 cup total for a less sweet, more tart filling that lets the apple flavor shine.
- Whole Wheat Crust — Substitute half the all-purpose flour in your pie dough with whole wheat pastry flour for a nuttier flavor and extra fiber.
- Coconut Oil — Use refined coconut oil in place of butter in the crust for a dairy-free version with a subtly sweet, flaky result.
- Oat Flour Thickener — Replace the all-purpose flour in the filling with 2 tablespoons of oat flour for a gluten-free thickener that works beautifully.
- Spice Boost — Increase the cinnamon to 2 teaspoons and omit the added sugars; the natural sweetness of apples like Honeycrisp often needs less enhancement.
- Salt-Free Option — Omit the kosher salt in the filling for a low-sodium version, relying on the spices and lemon for flavor complexity.
Serving Suggestions
- Top a warm slice with a scoop of vanilla bean ice cream for the classic à la mode experience.
- For a festive brunch, serve smaller wedges alongside a sharp cheddar cheese board.
- Drizzle with a simple salted caramel sauce for an extra-decadent dessert presentation.
- Pair with a hot mug of spiced chai tea or strong black coffee to balance the sweetness.
- Garnish with a dusting of powdered sugar and a few fresh mint leaves for a beautiful photo-ready plate.
- Serve at room temperature as the perfect end to a casual autumn dinner party.
This easy apple pie is incredibly versatile. For meal prep, bake it on a Sunday and enjoy slices throughout the week as a satisfying treat.
Common Mistakes to Avoid
- Mistake: Using only one type of apple. Fix: Always use a mix, like Granny Smith and Honeycrisp, for a balanced flavor and texture that holds up during baking.
- Mistake: Skipping the maceration time for the filling. Fix: Let the sugared apples sit for the full 15-20 minutes to draw out juices; this prevents a soggy bottom crust.
- Mistake: Rolling the dough too thin. Fix: Aim for a consistent 1/8-inch thickness to support the heavy fruit filling without tearing.
- Mistake: Not creating enough steam vents. Fix: In Step 5, cut at least 4-5 generous slits to allow steam to escape, which is crucial for a crisp crust.
- Mistake: Slicing the pie while it’s hot. Fix: Patience is key. Let it cool for a full 2 hours so the filling sets and you get clean, beautiful slices.
- Mistake: Overcrowding the baking sheet. Fix: Ensure there are at least 2 inches of space around the pie on the sheet to allow for proper air circulation and even browning.
Storing Tips
- Fridge: Once completely cool, cover the pie loosely with foil or transfer slices to an airtight container. It will stay fresh for up to 5 days in the refrigerator.
- Freezer: For long-term storage, wrap the whole cooled pie or individual slices tightly in plastic wrap and then foil. Freeze for up to 3 months. Thaw overnight in the fridge before serving.
- Reheat: To restore that fresh-baked warmth, place a slice on a parchment-lined baking sheet and warm in a 350°F (175°C) oven for 8-10 minutes, until the crust is crisp again.
In my tests, this rustic apple pie held its texture best when stored properly. For food safety, always refrigerate within 2 hours of baking, as the USDA recommends for perishable desserts containing dairy and eggs.
Conclusion
This rustic apple pie is the ultimate fuss-free dessert, delivering deep, spiced flavor with a beautifully flaky crust. Its free-form style makes it more forgiving and faster to assemble than a traditional pie. For another fantastic apple dessert, try this Cheesecake Stuffed Apples Recipe. I hope you love this recipe—please share your results in the comments!
Frequently Asked Questions
How many servings does this rustic apple pie make?
This pie yields 8 generous slices. Because it’s a free-form galette with a high mound of fruit, each serving is substantial. For a larger crowd, you can easily double the recipe and bake two pies side-by-side on separate baking sheets.
What can I use instead of brown sugar in the filling?
You can substitute an equal amount of coconut sugar or pure maple syrup for the brown sugar. Coconut sugar provides a similar deep molasses flavor, while maple syrup adds a distinct, rich sweetness. I’ve tested both, and maple syrup may make the filling slightly more liquid, so consider adding an extra tablespoon of flour to compensate.
Why is my bottom crust soggy even after baking?
A soggy bottom is usually caused by excess liquid from the apples. Ensure you let the filling macerate for the full 20 minutes as directed in Step 1, which allows the sugar and flour to bind the juices. Also, baking the pie directly on a preheated baking sheet or pizza stone for the first 15 minutes can help set the crust quickly for a crispier result.
PrintFlaky Brown Sugar Apple Pie
Ingredients
- 1 homemade double crust (2 sheets pie dough)
- 5 lb apples (weight before peeling and coring)
- 1/4 tsp grated lemon peel
- 2 tbsp fresh lemon juice
- 3/4 cup packed brown sugar
- 3/4 cup white sugar
- 5 tbsp all-purpose flour
- 1/4 tsp kosher salt
- 1 1/2 tsp ground cinnamon
- 3/4 tsp ground nutmeg
- 1/2 tsp ground cardamom (optional)
- 1 tsp vanilla extract
- 1 tbsp milk (for brushing crust)
- 1 tbsp beaten egg (optional, for brushing)
- 1 tbsp turbinado sugar (or raw sugar, for sprinkling)


One Comment