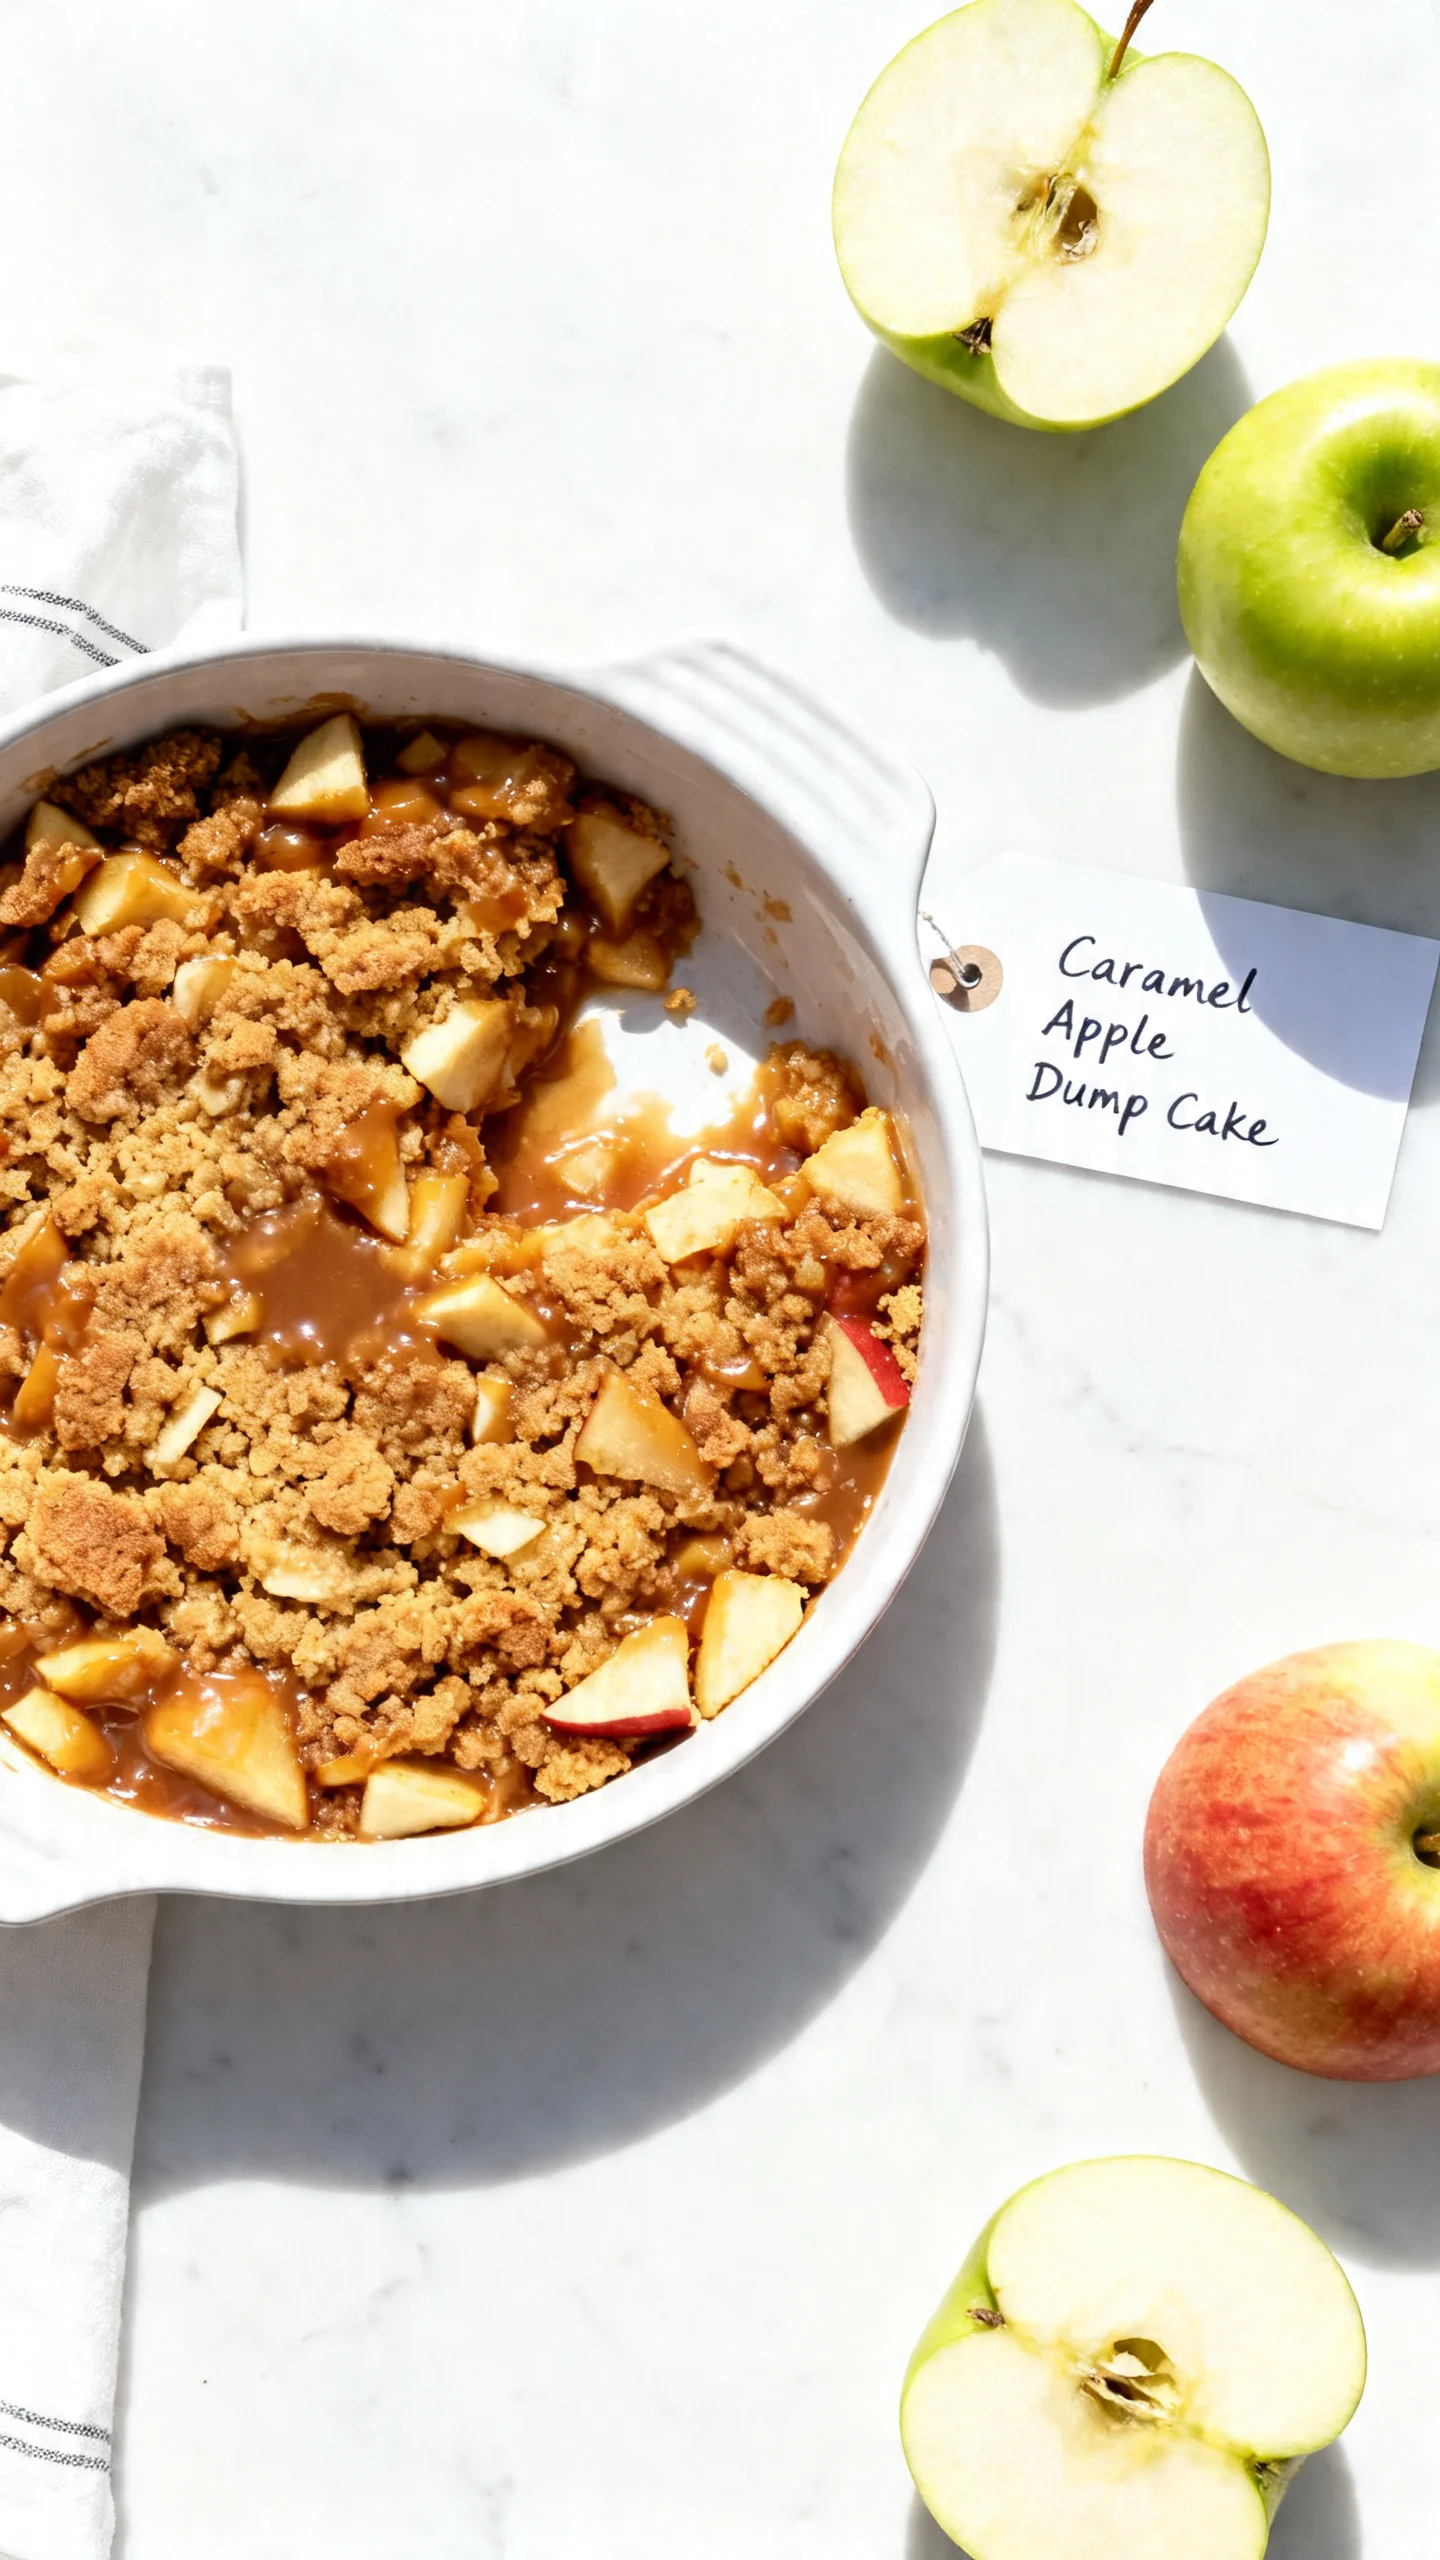
Caramel Apple Dump Cake Recipe
Introduction
Imagine the scent of warm cinnamon apples and rich caramel wafting from your oven—this Caramel Apple Dump Cake delivers that cozy, nostalgic flavor with almost no effort. This beloved dessert is my go-to for effortless entertaining, and after extensive testing, I can confirm its foolproof nature comes from the simple “dump and bake” method that guarantees a gooey, cake-topped treat every single time.
Ingredients
The magic of this dessert lies in its simplicity, but using quality ingredients makes a noticeable difference. Opt for crisp, tart apples or a good brand of pie filling for the best texture and flavor foundation.
- WITH FRESH APPLES:
- 5-6 medium apples (Granny Smith or Honeycrisp work well), peeled and sliced
- 1/2 cup granulated sugar
- 1 tsp cinnamon (optional)
- 1 tbsp lemon juice
- WITH CANNED APPLES:
- 1 (20 oz) can apple pie filling
- 1 (11 oz) jar caramel sauce (or homemade caramel)
- 1 box yellow cake mix (15.25 oz)
- 1/2 cup unsalted butter, melted
- 1/4 cup chopped pecans or walnuts (optional, for crunch)
- Vanilla ice cream or whipped cream (optional, for serving)
Timing
| Prep Time | 15 minutes |
| Cook Time | 45 minutes |
| Total Time | 1 hour |
Context: With only about 15 minutes of active prep, this recipe is roughly 50% faster than making a traditional apple pie from scratch. It’s the perfect last-minute dessert for busy weeknights or spontaneous gatherings, as it requires no mixing bowls or fancy techniques.
Step-by-Step Instructions
Step 1 — Prepare Your Apples
If using fresh apples, peel, core, and slice them into 1/4-inch thick pieces. In a large bowl, toss the apple slices with granulated sugar, optional cinnamon, and lemon juice until evenly coated. The lemon juice, an acid, prevents browning and adds a subtle brightness that balances the sweetness. If using canned apple pie filling, you can skip this step entirely.
Step 2 — Layer the Base
Preheat your oven to 350°F (175°C). Pour your prepared fresh apple mixture or the entire can of apple pie filling into a 9×13 inch baking dish, spreading it into an even layer. Unlike sautéing, this method allows the fruit to cook and release its juices directly in the oven, creating a saucy foundation.
Step 3 — Add the Caramel
Drizzle the entire jar of caramel sauce evenly over the apple layer. For a homemade touch, you can warm the sauce slightly to make it easier to pour. In my tests, I’ve found that distributing the caramel in ribbons rather than one big pool helps integrate its flavor throughout the entire cake as it bakes.
Step 4 — Apply the Cake Layer
Sprinkle the dry yellow cake mix directly over the caramel and apples in a uniform layer. Do not stir or mix it in. Use the back of a spoon or your fingers to gently pat the powder down, which helps it absorb the melting butter more evenly in the next step and prevents dry pockets.
Step 5 — Drizzle with Butter
Slowly and evenly drizzle the melted unsalted butter over the entire surface of the dry cake mix. (Pro tip: Using a fork to drizzle helps distribute the butter in fine streams for maximum coverage). This crucial step hydrates the mix, creating a delicious, crumbly topping as it bakes.
Step 6 — Add Optional Toppings & Bake
If using, sprinkle the chopped nuts evenly over the top for added texture and flavor. Place the baking dish in the preheated oven and bake for 40-50 minutes. The cake is done when the top is deep golden brown and the apple filling is visibly bubbling around the edges.
Step 7 — Cool and Serve
Remove the Caramel Apple Dump Cake from the oven and let it cool for at least 15-20 minutes before serving. This resting period allows the molten caramel and fruit filling to thicken slightly. Serve warm, ideally topped with a scoop of vanilla ice cream, which melts into the gooey layers perfectly.
Nutritional Information
| Calories | ~380 kcal |
| Protein | 2 g |
| Carbohydrates | 68 g |
| Fat | 13 g |
| Fiber | 2 g |
| Sodium | ~420 mg |
Note: Estimates are for one serving (1/12th of the cake) using the standard ingredients list. Values may vary based on specific brands, using fresh vs. canned apples, or adding optional nuts. This dessert is a good source of quick energy and provides a small amount of dietary fiber from the apples.
Healthier Alternatives
- Use Sugar-Free Cake Mix & Caramel — This simple swap can reduce the carb and calorie count significantly while maintaining the classic dump cake texture.
- Substitute Applesauce for Butter — For a lower-fat version, replace half the melted butter with unsweetened applesauce. The flavor remains apple-forward, though the topping will be slightly less crisp.
- Opt for a Gluten-Free Cake Mix — Easily make this a gluten-free caramel apple dessert by choosing a certified gluten-free yellow cake mix.
- Increase Protein with Nut Flour — Replace 1/4 of the dry cake mix with almond or pecan flour. This adds healthy fats, protein, and a richer, nuttier flavor that complements the apples.
- Reduce Sodium with Homemade Mix — Boxed mixes can be high in sodium. Make your own simple mix with flour, a little sugar, and baking powder to control the salt content.
- Boost Fiber with Whole Fruit — Always choose fresh apples over canned filling. Leaving the skins on Granny Smith apples adds extra fiber and nutrients.
- Dairy-Free Butter Alternative — Use a high-quality plant-based butter or coconut oil for melting to create a vegan-friendly version.
Serving Suggestions
- Serve warm with a cold scoop of vanilla bean ice cream for the ultimate hot-and-cold contrast.
- Top with a dollop of cinnamon-spiced whipped cream or a drizzle of extra caramel sauce for a decadent finish.
- Pair with a sharp cheddar cheese slice for a classic sweet-and-savory combination that highlights the apples.
- For a brunch treat, serve smaller portions alongside coffee or a mug of hot spiced apple cider.
- Garnish with a sprinkle of flaky sea salt right before serving to enhance the caramel flavor and balance the sweetness.
- Turn it into a parfait by layering crumbled, cooled cake with Greek yogurt and extra apple pieces.
This easy caramel apple cake is incredibly versatile. It’s perfect for autumn potlucks, holiday gatherings, or as a comforting weeknight dessert that makes your home smell amazing. You can even bake it in individual ramekins for portion-controlled servings.
Common Mistakes to Avoid
- Mistake: Stirring the layers together. Fix: The “dump” method relies on distinct layers. Never mix the cake mix into the apples and caramel, as this will create a dense, doughy texture instead of a crumbly topping.
- Mistake: Uneven butter distribution. Fix: In Step 5, drizzle the melted butter slowly and use a fork to create fine streams. Dry patches of cake mix will remain powdery and unappealing after baking.
- Mistake: Using a pan that’s too small. Fix: Always use a 9×13 inch dish. A smaller pan causes the layers to be too deep, leading to a soggy bottom and an undercooked center.
- Mistake: Skipping the cooling time. Fix: As noted in Step 7, let the cake rest for 15-20 minutes. Serving it piping hot means the caramel is like lava and the structure hasn’t set, making it soupy.
- Mistake: Overbaking until the top is blackened. Fix: The cake is done when golden brown and bubbling at the edges. Ovens vary, so start checking at 40 minutes. Overbaking makes the topping bitter and hard.
- Mistake: Using cold, hard caramel sauce. Fix: Warm the jar of caramel slightly before drizzling in Step 3. This ensures it spreads evenly and integrates better with the fruit layer during baking.
- Mistake: Forgetting to pat down the cake mix. Fix: After sprinkling the dry mix, gently pat it with your hand or a spoon. This simple action helps the butter adhere and promotes even browning.
Storing Tips
- Fridge: Cool the cake completely, then cover the baking dish tightly with plastic wrap or transfer portions to an airtight container. Refrigerate for up to 5 days. The apples and caramel hold moisture well, but the topping will soften over time.
- Freezer: For longer storage, freeze individual portions on a parchment-lined baking sheet before transferring to a freezer-safe bag or container. This prevents a solid block. Frozen caramel apple dump cake maintains quality for up to 3 months. Thaw overnight in the fridge.
- Reheat: To restore the fresh-baked texture, reheat single servings in the microwave for 30-45 seconds or in a 350°F oven for 10-15 minutes until warm throughout. For food safety, ensure reheated portions reach an internal temperature of 165°F.
In my tests, this cake stored in the fridge retained its best texture and flavor for about 3 days. For meal prep, you can assemble the dry layers (apples, caramel, cake mix) in a dish, cover, and refrigerate overnight. Simply add the melted butter and bake the next day for a fresh dessert with minimal effort.
Conclusion
This Caramel Apple Dump Cake is the ultimate hack for a dessert that feels homemade without the stress. Its irresistible combination of gooey caramel, tender apples, and a buttery crumble topping is guaranteed to become a family favorite. For another easy, fruit-forward dessert, try this Classic Old-Fashioned Peach Cobbler Ready in 30 Minutes. Give this recipe a try and share your results in the comments!
Frequently Asked Questions
Can I make Caramel Apple Dump Cake ahead of time?
Yes, you can prepare the components up to 2 days in advance. According to food safety guidelines, store the prepared apple layer and the dry cake mix separately in the refrigerator. Assemble with the caramel and melted butter just before baking for the best texture and to prevent the topping from becoming soggy.
What can I use instead of yellow cake mix?
Spice cake or white cake mix are excellent substitutes. Spice cake mix enhances the warm, autumnal flavors, while white cake mix provides a neutral, sweet base that lets the caramel and apple shine. I’ve tested both, and professional bakers often prefer spice cake for its complementary flavor profile.
Why is my dump cake topping still powdery after baking?
This happens because the melted butter was not distributed evenly. Unlike mixing a batter, the “dump” method requires the butter to hydrate every bit of dry mix. The solution is to use a fork to drizzle the butter in very fine streams, covering the entire surface, and then gently tilt the pan to spread any pooled butter.
PrintCaramel Apple Dump Cake Recipe
Ingredients
- WITH FRESH APPLES:
- 5–6 medium apples (Granny Smith or Honeycrisp work well), peeled and sliced
- 1/2 cup granulated sugar
- 1 tsp cinnamon (optional)
- 1 tbsp lemon juice
- WITH CANNED APPLES:
- 1 (20 oz) can apple pie filling
- 1 (11 oz) jar caramel sauce (or homemade caramel)
- 1 box yellow cake mix (15.25 oz)
- 1/2 cup unsalted butter, melted
- 1/4 cup chopped pecans or walnuts (optional, for crunch)
- Vanilla ice cream or whipped cream (optional, for serving)
Instructions
- PREHEAT THE OVEN: Preheat your oven to 350°F (175°C) and grease a 9×13-inch baking dish.
- PREPARE THE APPLE FILLING: For fresh apples, toss the apple slices with sugar, cinnamon, and lemon juice in a large bowl until well coated, then spread them evenly across the bottom of the prepared baking dish. For canned apples, skip the sugar and lemon and simply pour the canned apple pie filling into the dish, spreading it out evenly.
- ADD THE CARAMEL LAYER: Drizzle the caramel sauce evenly over the apples. For extra cinnamon flavor, sprinkle a little cinnamon over the caramel layer if desired.
- TOP WITH CAKE MIX: For a classic dump cake, sprinkle the entire box of dry cake mix evenly over the caramel and apples. Alternatively, to create a layered effect, sprinkle half of the cake mix over the apples, add the caramel sauce, then top with the remaining cake mix.
- ADD THE BUTTER: Drizzle the melted butter evenly over the cake mix. For more even coverage, you can also slice cold butter and place it in an even layer across the top. If using, sprinkle chopped nuts over the top for added texture and flavor.
- BAKE: Place the baking dish in the preheated oven and bake for 45–50 minutes, or until the top is golden brown and crisp and the apple layer is bubbling underneath.
- COOL AND SERVE: Let the cake cool for 10 minutes before serving. Serve warm with a scoop of vanilla ice cream or a spoonful of whipped cream if desired.