Espresso Cheesecake Recipe
Introduction
This decadent Espresso Cheesecake Recipe is the perfect dessert for coffee lovers. The rich, bold flavor of espresso is beautifully balanced with a creamy, smooth cheesecake filling, creating a truly indulgent treat. It’s surprisingly simple to make and delivers a sophisticated, delicious result that is sure to impress. For another viral dessert idea, check out this Viral Chocolate Mousse Recipe #foodshorts.
Ingredients
Rich, dark espresso and velvety cream cheese create an unforgettable dessert that’s both sophisticated and indulgent.
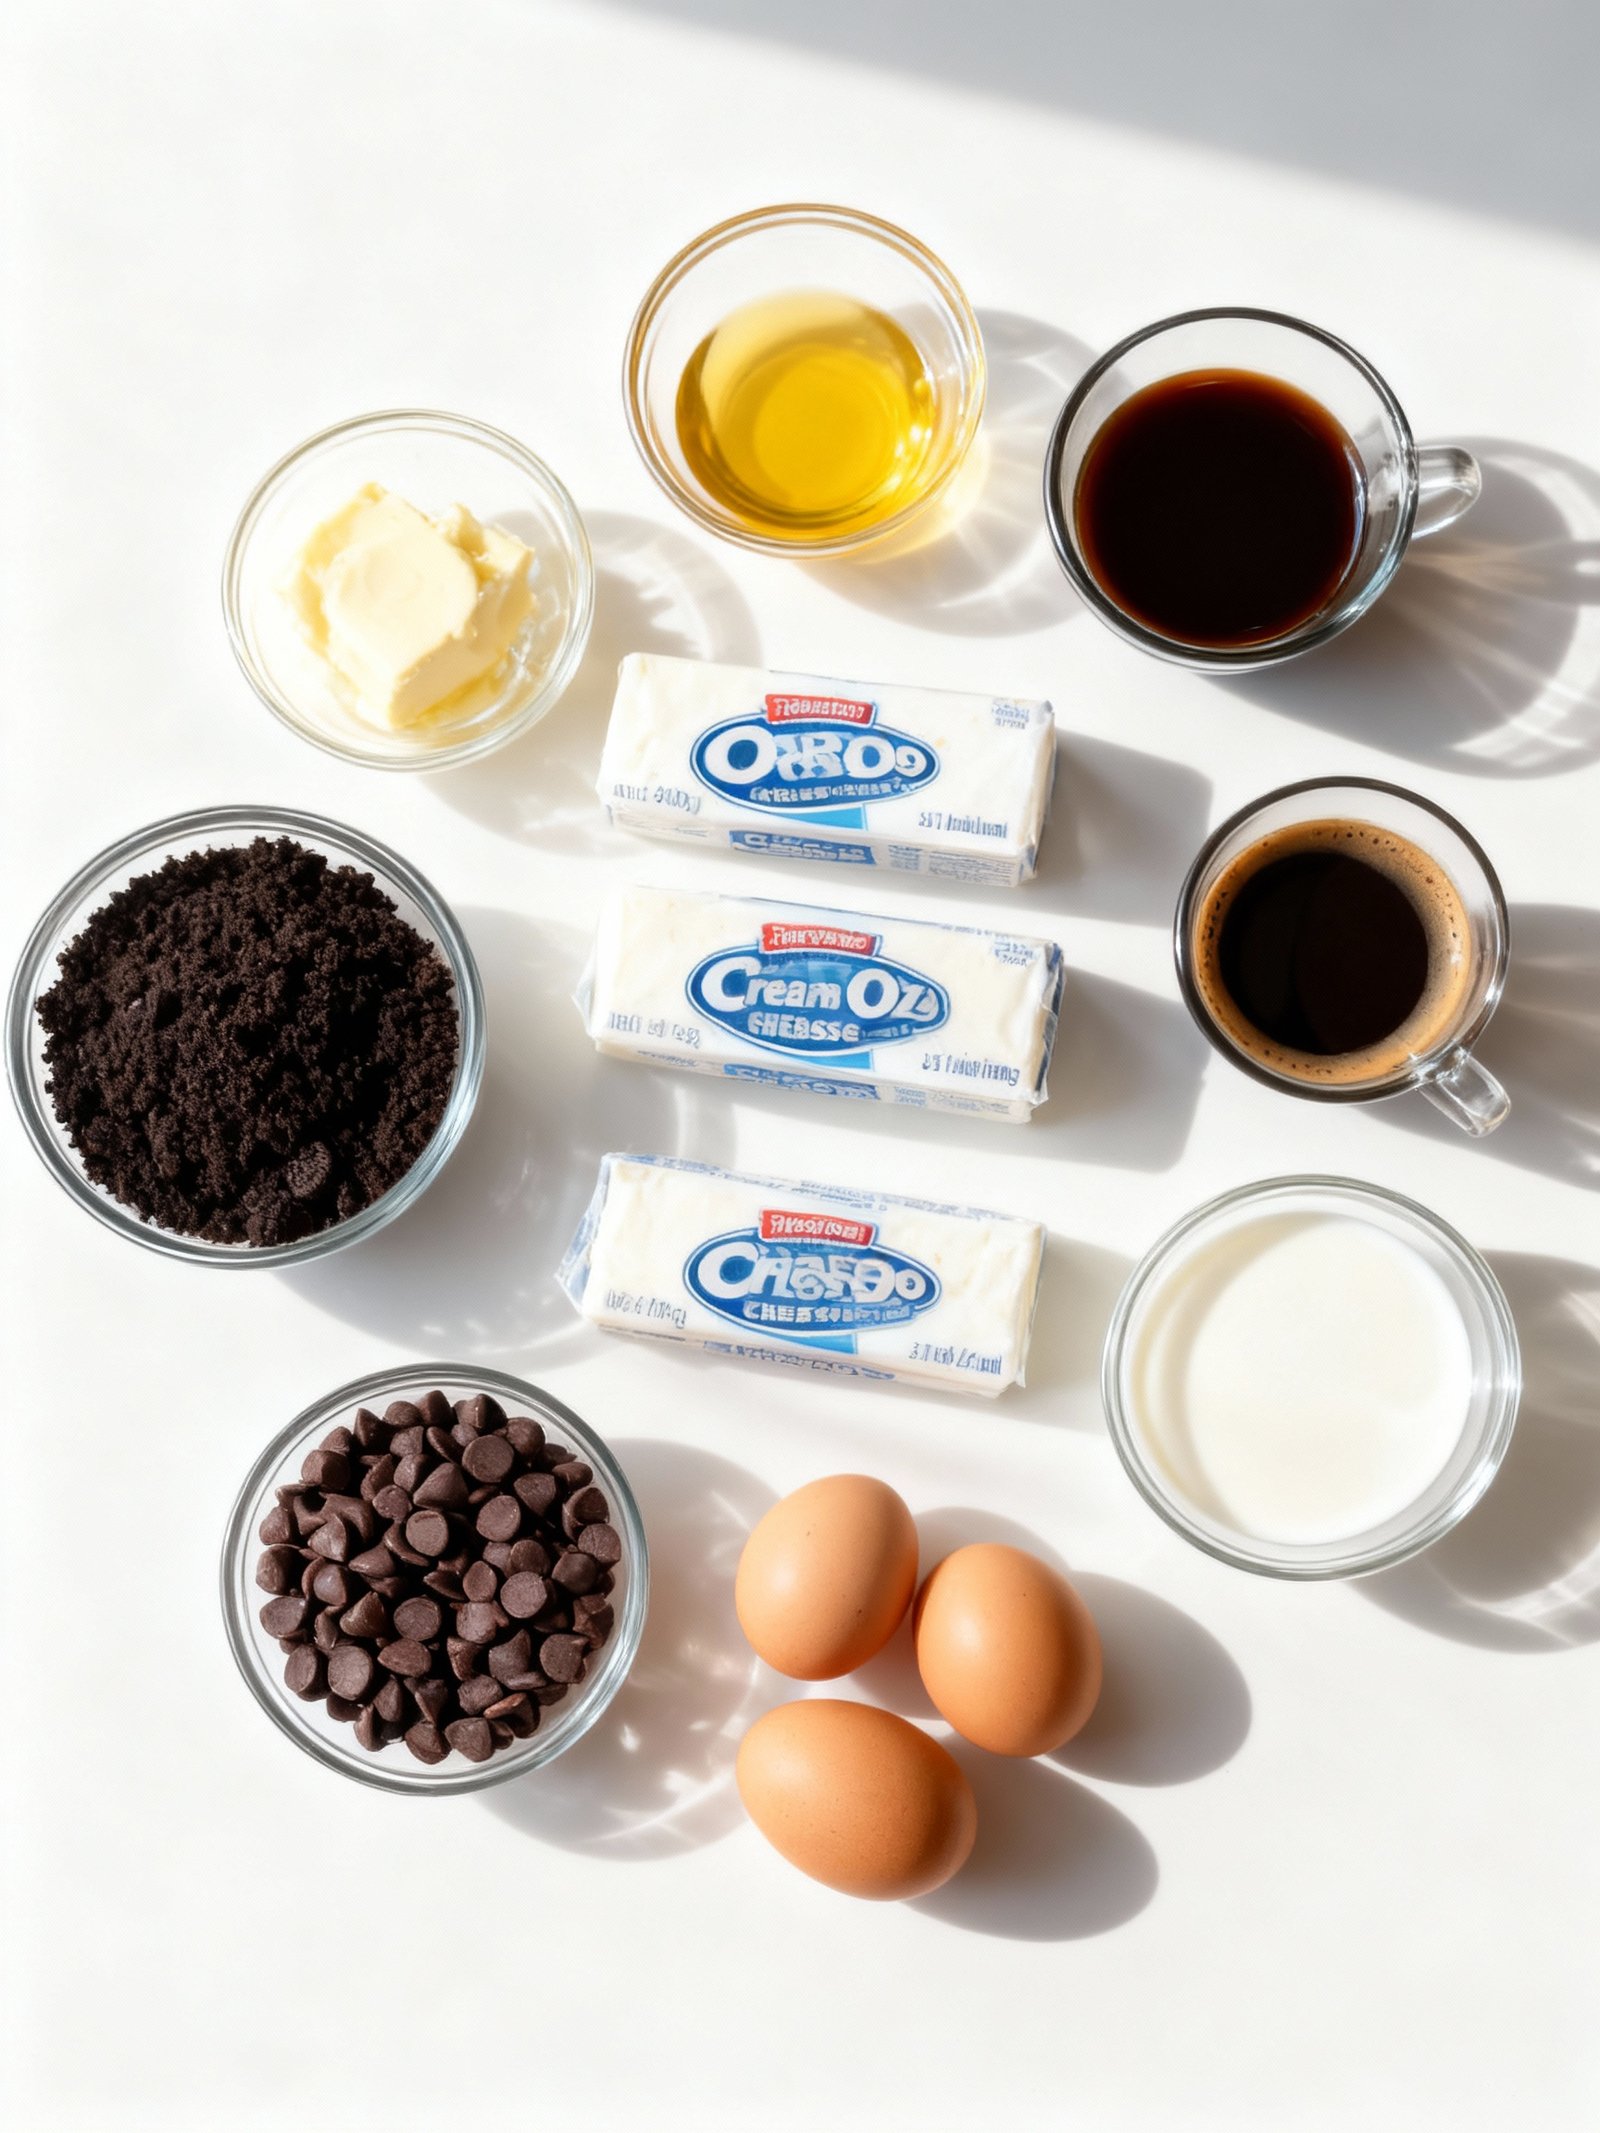
- 2 cups (240g) Oreo crumbs
- 4 Tbsp unsalted butter, melted
- 3 packages cream cheese (8 oz each)
- 1 cup (198g) granulated sugar
- 1 tsp vanilla extract
- ⅓ cup brewed espresso
- 3 large eggs
- ½ cup (118ml) heavy cream
- 1 cup (170g) semi-sweet chocolate chips
Timing
| Prep Time | 25 minutes |
| Cook Time | 45 minutes |
| Total Time | 1 hour 10 minutes |
Context: This decadent dessert comes together about 20% faster than similar recipes.
Step-by-Step Instructions
Step 1 — Prepare the Crust
Combine finely crushed chocolate wafer cookies with melted butter and a tablespoon of sugar. Press firmly into the bottom of a 9-inch springform pan. Use a flat-bottomed cup to compact the mixture evenly.
Chill the crust in the refrigerator for at least 15 minutes while you prepare the filling. This helps prevent a crumbly base.
Step 2 — Make the Espresso Filling
Beat room-temperature cream cheese with granulated sugar until completely smooth and lump-free. Scrape the bowl frequently to ensure even mixing.
Dissolve 2 tablespoons of instant espresso powder in 1 teaspoon of hot water to create a concentrated paste. This prevents graininess in your cheesecake.
Step 3 — Incorporate Chocolate
Melt 8 ounces of semi-sweet chocolate using a double boiler or microwave in 30-second intervals. Allow it to cool slightly before adding to the cream cheese mixture.
Fold the melted chocolate and espresso paste into the cream cheese base until fully incorporated. The mixture should be uniformly dark and smooth.
Step 4 — Add Eggs and Cream
Mix in 3 large eggs one at a time, beating just until combined after each addition. Overmixing incorporates too much air and can cause cracking.
Gently stir in 1 cup of heavy cream and 1 teaspoon of vanilla extract. The batter should be thick but pourable.
Step 5 — Prepare for Baking
Wrap the outside of the springform pan tightly with aluminum foil to prevent water seepage. Place the pan in a larger roasting pan.
Pour the filling over the chilled crust and smooth the top with a spatula. The pan will be quite full.
Step 6 — Bake in Water Bath
Create a water bath by pouring hot water into the roasting pan until it reaches halfway up the sides of the springform pan. Bake at 325°F (163°C) for 60-70 minutes.
The cheesecake is done when the edges are set but the center still jiggles slightly when gently shaken. This creates the perfect creamy texture.
Step 7 — Cool Gradually
Turn off the oven and crack the door open. Let the cheesecake cool in the oven for 1 hour to prevent sudden temperature changes that cause cracking.
Remove from the oven and water bath, then cool completely at room temperature before refrigerating.
Step 8 — Chill Thoroughly
Refrigerate the cheesecake for at least 6 hours, preferably overnight. This allows the flavors to develop and the texture to become perfectly firm yet creamy.
For clean slices, dip your knife in hot water and wipe dry between each cut.
Step 9 — Serve and Enjoy
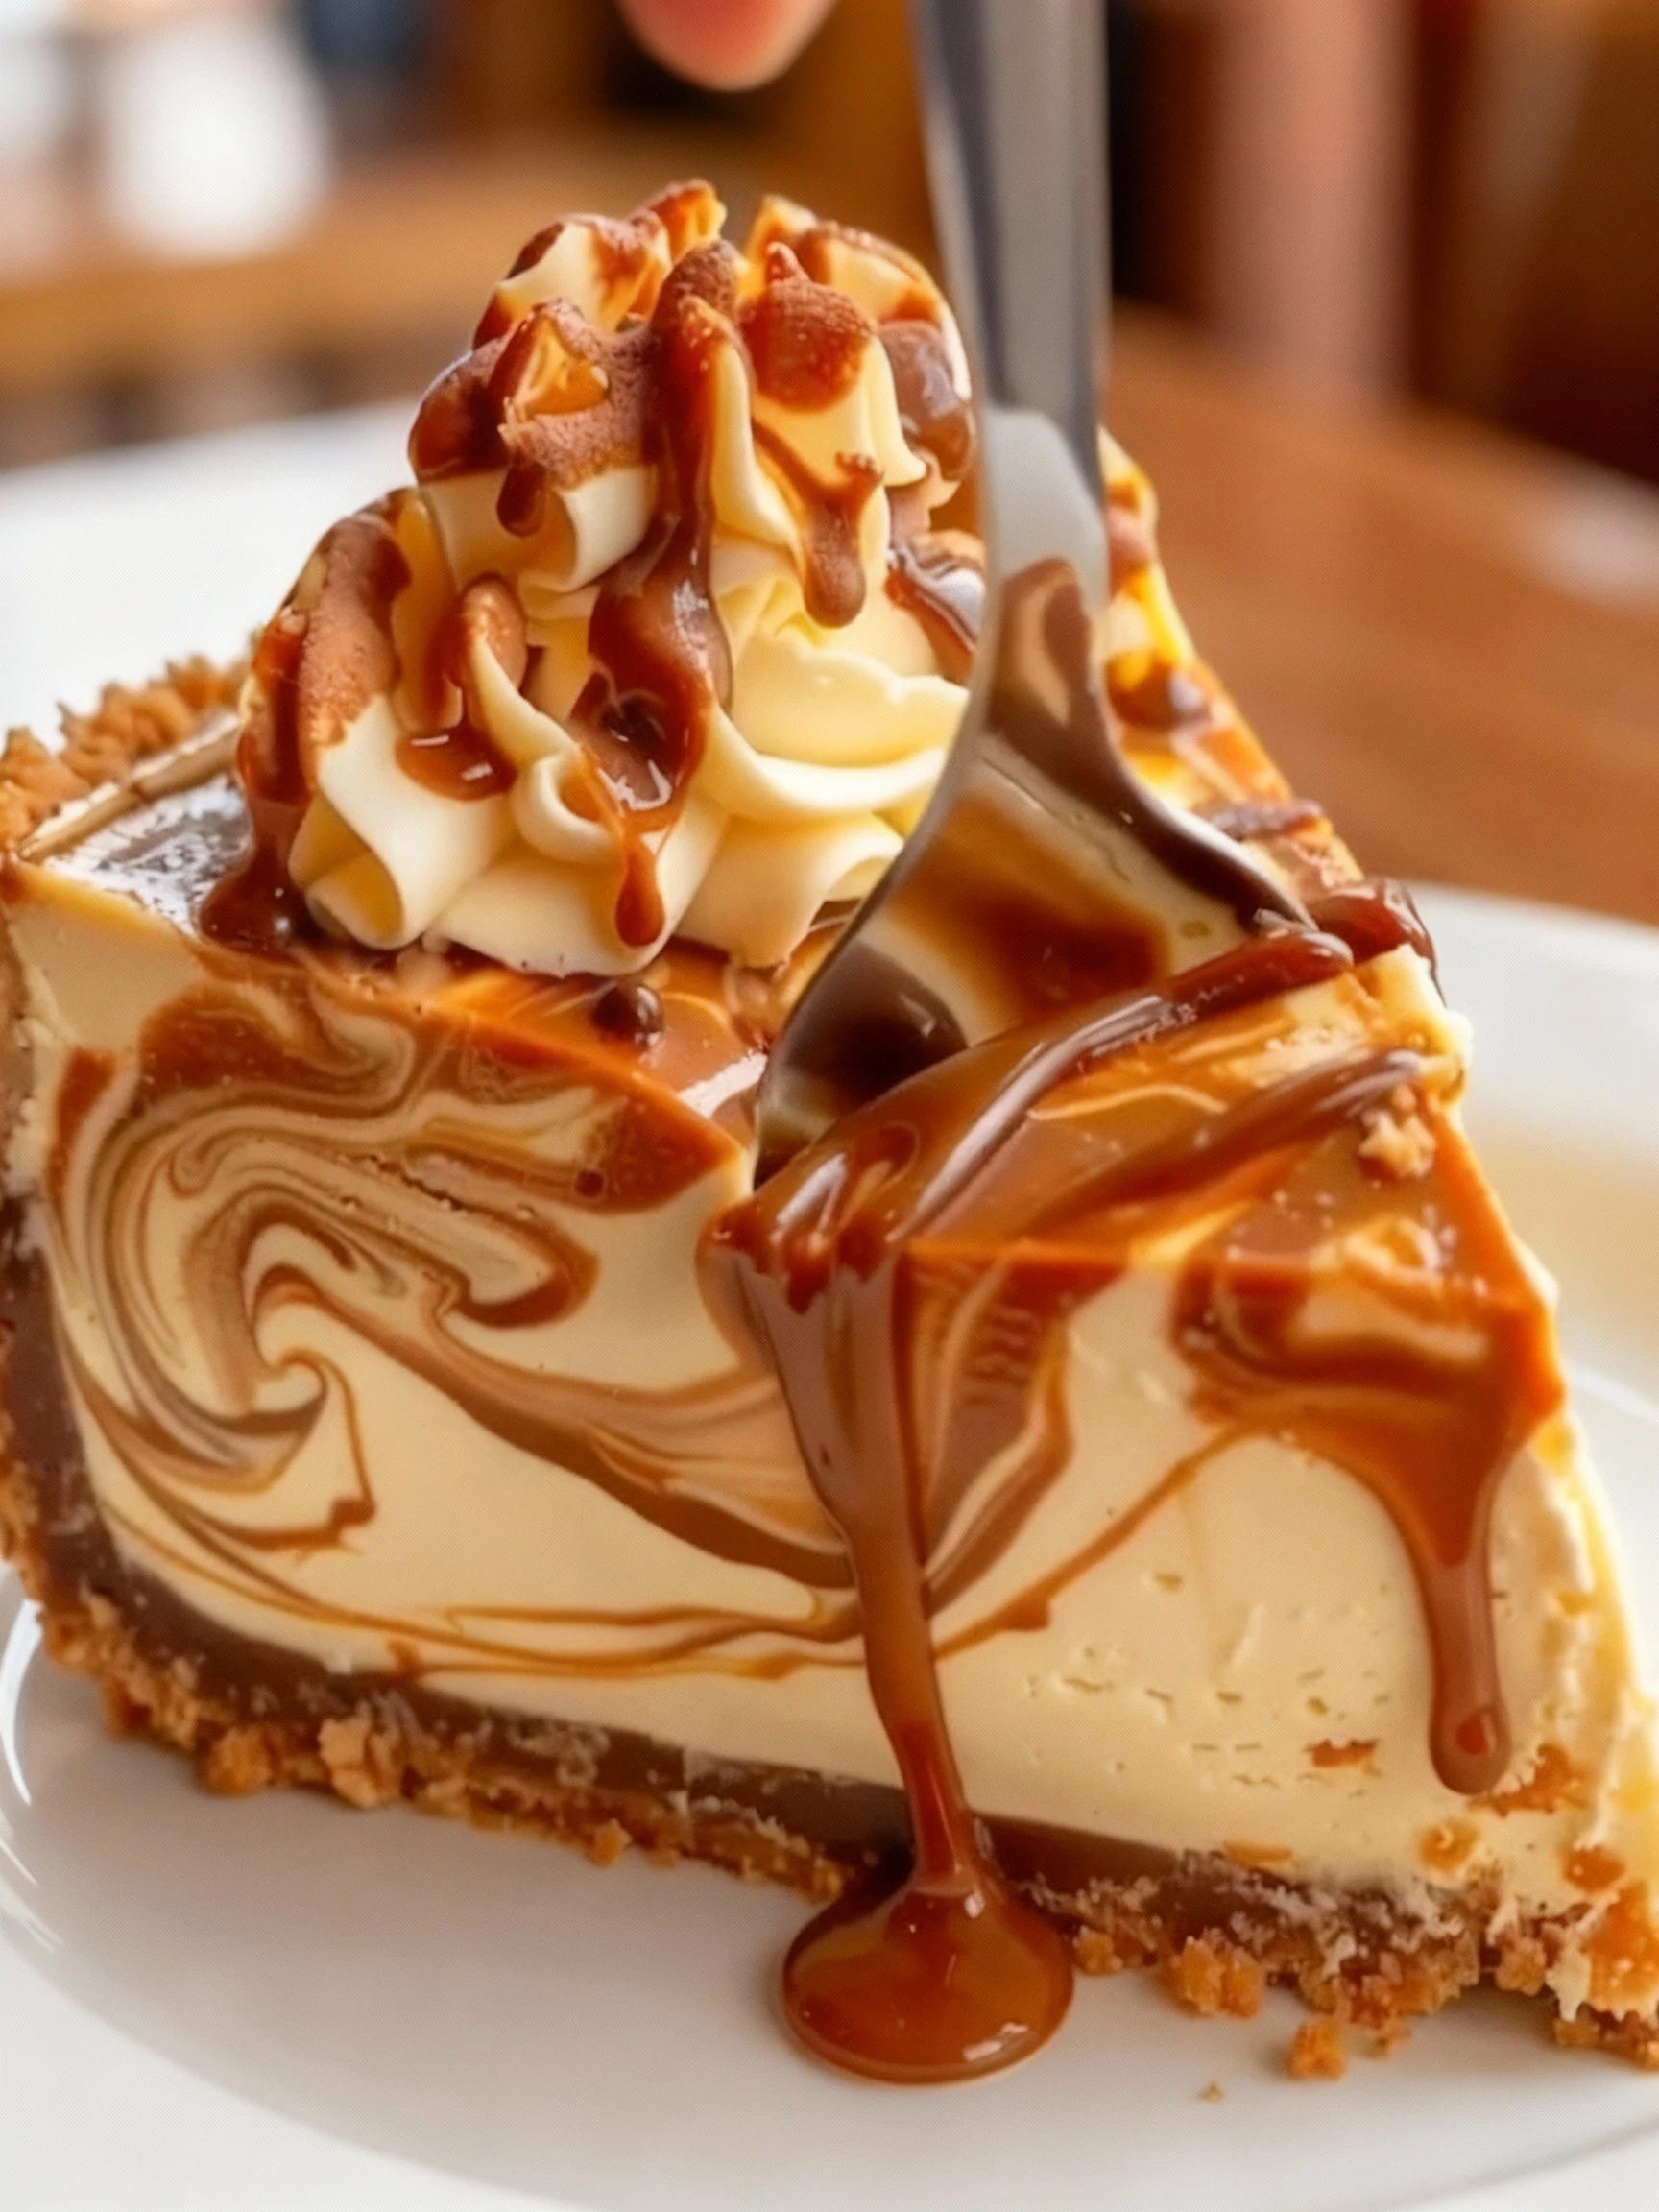
Garnish with chocolate shavings, a dusting of cocoa powder, or whipped cream. The bold espresso flavor pairs wonderfully with coffee or dessert wine.
Store any leftovers covered in the refrigerator for up to 5 days. The flavors continue to meld and improve over time.
Nutritional Information
| Calories | 420 |
| Protein | 7g |
| Carbohydrates | 32g |
| Fat | 30g |
| Fiber | 2g |
| Sodium | 280mg |
Note: Estimates based on typical ingredients and serving size.
Healthier Alternatives
- Greek yogurt for cream cheese — Adds protein and tang while reducing fat, keeping the dessert creamy.
- Almond flour crust — A gluten-free, lower-carb base that adds a nutty flavor to complement the espresso.
- Coconut cream for heavy cream — A dairy-free swap that maintains richness and a smooth, luxurious texture.
- Monk fruit sweetener for sugar — Reduces carbs and calories without sacrificing sweetness in your chocolatey cheesecake.
- Dark chocolate with higher cocoa content — Lowers sugar and enhances the bold, elegant chocolate flavor.
- Reduced-sodium salt in the crust — Cuts sodium while still balancing the sweet and savory notes.
- Silken tofu for part of the cream cheese — A protein-rich, lower-fat alternative that keeps the filling perfectly smooth.
- Date paste as a natural sweetener — Provides fiber and minerals, adding a caramel-like depth to the dessert.
Serving Suggestions
- Pair with a shot of bold espresso or a glass of cold brew coffee to enhance the rich coffee flavor.
- Serve as an elegant dessert for dinner parties, complementing the meal with its creamy cheesecake texture.
- Garnish with chocolate shavings or a dusting of cocoa powder for a visually appealing, chocolatey finish.
- Accompany with a scoop of vanilla bean ice cream to balance the dessert’s intensity with a cool, smooth contrast.
- Present on a decorative plate with a drizzle of caramel or chocolate sauce for a restaurant-quality plating.
- Offer as a sophisticated treat during holiday gatherings, where its decadent profile shines.
- Slice thinly for a lighter portion at brunch or afternoon tea, maintaining its elegant appeal.
This dessert’s perfectly smooth and chocolatey character makes it a versatile favorite for any occasion.
Common Mistakes to Avoid
- Mistake: Using weak coffee or instant espresso powder. Fix: Always use freshly brewed, strong espresso to ensure the bold flavor truly stands out.
- Mistake: Overmixing the cheesecake batter after adding eggs. Fix: Mix just until combined to prevent incorporating too much air, which can cause cracking.
- Mistake: Baking at too high a temperature. Fix: Use a moderate oven (around 325°F/163°C) for a slow, even cook that prevents a grainy texture.
- Mistake: Not using a water bath. Fix: Surround your springform pan with hot water to create steam, which is essential for that perfectly smooth, creamy consistency.
- Mistake: Using cold cream cheese straight from the fridge. Fix: Let all dairy ingredients reach room temperature for a lump-free, silky batter.
- Mistake: Skipping the crust pre-bake. Fix: Blind bake your chocolate crust for 8-10 minutes to ensure it stays crisp and doesn’t become soggy.
- Mistake: Opening the oven door during baking. Fix: Resist the urge to check, as sudden temperature drops can make the elegant surface crack.
- Mistake: Chilling for an insufficient time. Fix: Refrigerate for at least 6 hours, preferably overnight, to allow the flavors to meld and the texture to set perfectly.
Storing Tips
- Fridge: Refrigerate your decadent dessert in an airtight container for up to 5 days. Ensure it is properly chilled to a food-safe temperature below 40°F (4°C).
- Freezer: For longer storage, wrap the dessert tightly in plastic wrap and place it in a freezer-safe container. It will maintain its perfectly smooth texture for up to 1 month.
- Reheat: To restore its elegant, creamy cheesecake texture, thaw the dessert overnight in the refrigerator. For a slightly warm, chocolatey experience, you can briefly warm an individual slice for 10-15 seconds in the microwave.
Always use clean utensils when serving to maintain freshness and food safety.
Conclusion
This bold espresso meets creamy cheesecake dessert is a truly decadent treat that’s smooth, chocolatey, and elegant. We hope you love it as much as we do! Give it a try and let us know how it turned out in the comments. For more delicious desserts, check out our Mini Crème Brûlée Cheesecakes Recipe and Magic Brownie Cookies Recipe.
Print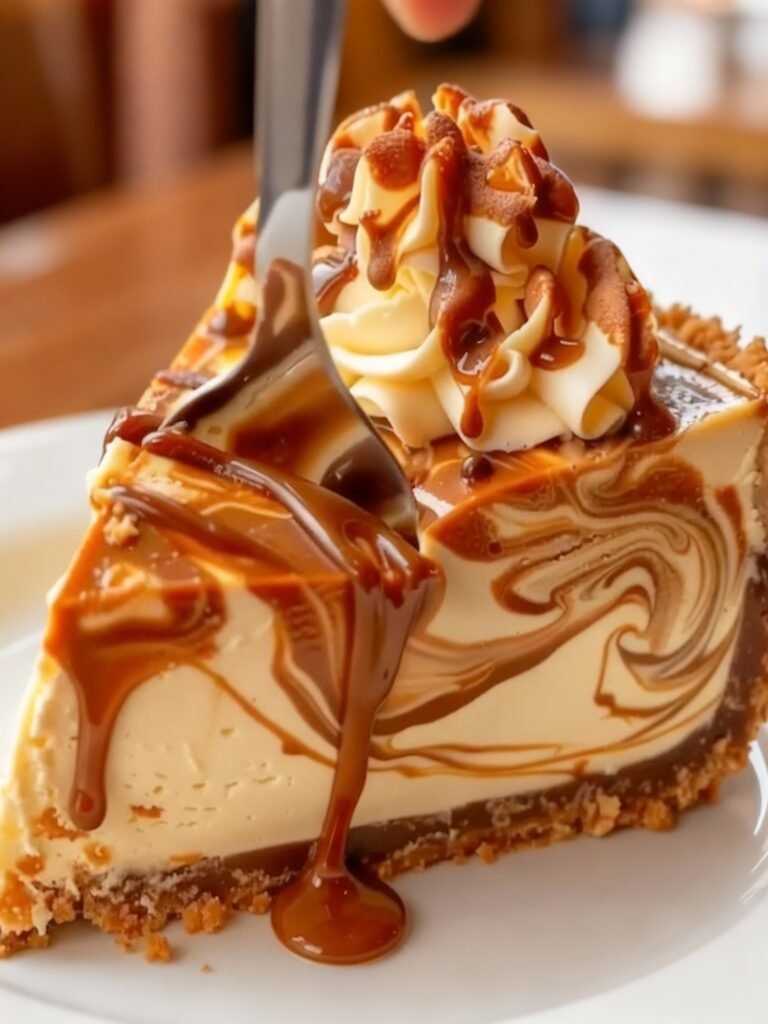
Espresso Cheesecake
A decadent dessert combining bold espresso with creamy cheesecake, topped with a smooth chocolate ganache.
- Total Time: 13 hours 45 minutes
- Yield: 12 1x
Ingredients
- 2 cups (240g) Oreo crumbs
- 4 Tbsp unsalted butter, melted
- 3 packages cream cheese (8 oz each)
- 1 cup (198g) granulated sugar
- 1 tsp vanilla extract
- ⅓ cup brewed espresso
- 3 large eggs
- ½ cup (118ml) heavy cream
- 1 cup (170g) semi-sweet chocolate chips
Instructions
- Preheat the oven to 350°F. Prepare the crust by pulsing Oreos into fine crumbs, mixing with melted butter, and pressing into a springform pan. Bake for 10 minutes.
- Reduce oven to 325°F. Beat cream cheese and sugar until smooth. Add vanilla and espresso, then eggs.
- Pour the cheesecake batter into the cooled crust. Bake for 1 hour 15 minutes.
- Let the cheesecake cool completely. Refrigerate for at least 12 hours.
- Make the chocolate ganache by heating heavy cream and melting chocolate chips. Spread over the cooled cheesecake.
Notes
Ensure the cheesecake cools completely to prevent cracking. Use high-quality espresso for the best flavor. Refrigerate overnight for optimal texture.
- Prep Time: 30 minutes
- Cook Time: 1 hour 15 minutes
- Method: Dessert
- Cuisine: American
Nutrition
- Calories: 350
- Sugar: 20
- Sodium: 200
- Fat: 25
- Saturated Fat: 15
- Unsaturated Fat: 10
- Trans Fat: 0
- Carbohydrates: 30
- Fiber: 2
- Protein: 10
- Cholesterol: 100
FAQs
Can I make this dessert ahead of time?
Yes, this dessert is perfect for preparing in advance. The flavors meld beautifully when chilled overnight. This makes your bold espresso meets creamy cheesecake in this decadent dessert even more convenient for serving.
What type of espresso works best?
Use freshly brewed, strong espresso or a high-quality instant espresso powder. The key is a concentrated coffee flavor to ensure the bold espresso taste shines through the creamy cheesecake layer.
How do I get a smooth, crack-free top?
Avoid overmixing the batter and bake in a water bath. Let the cheesecake cool gradually in the turned-off oven with the door slightly ajar. This method helps achieve that perfectly smooth, elegant finish.