

Beef and Cheese Chimichangas Recipe
Introduction
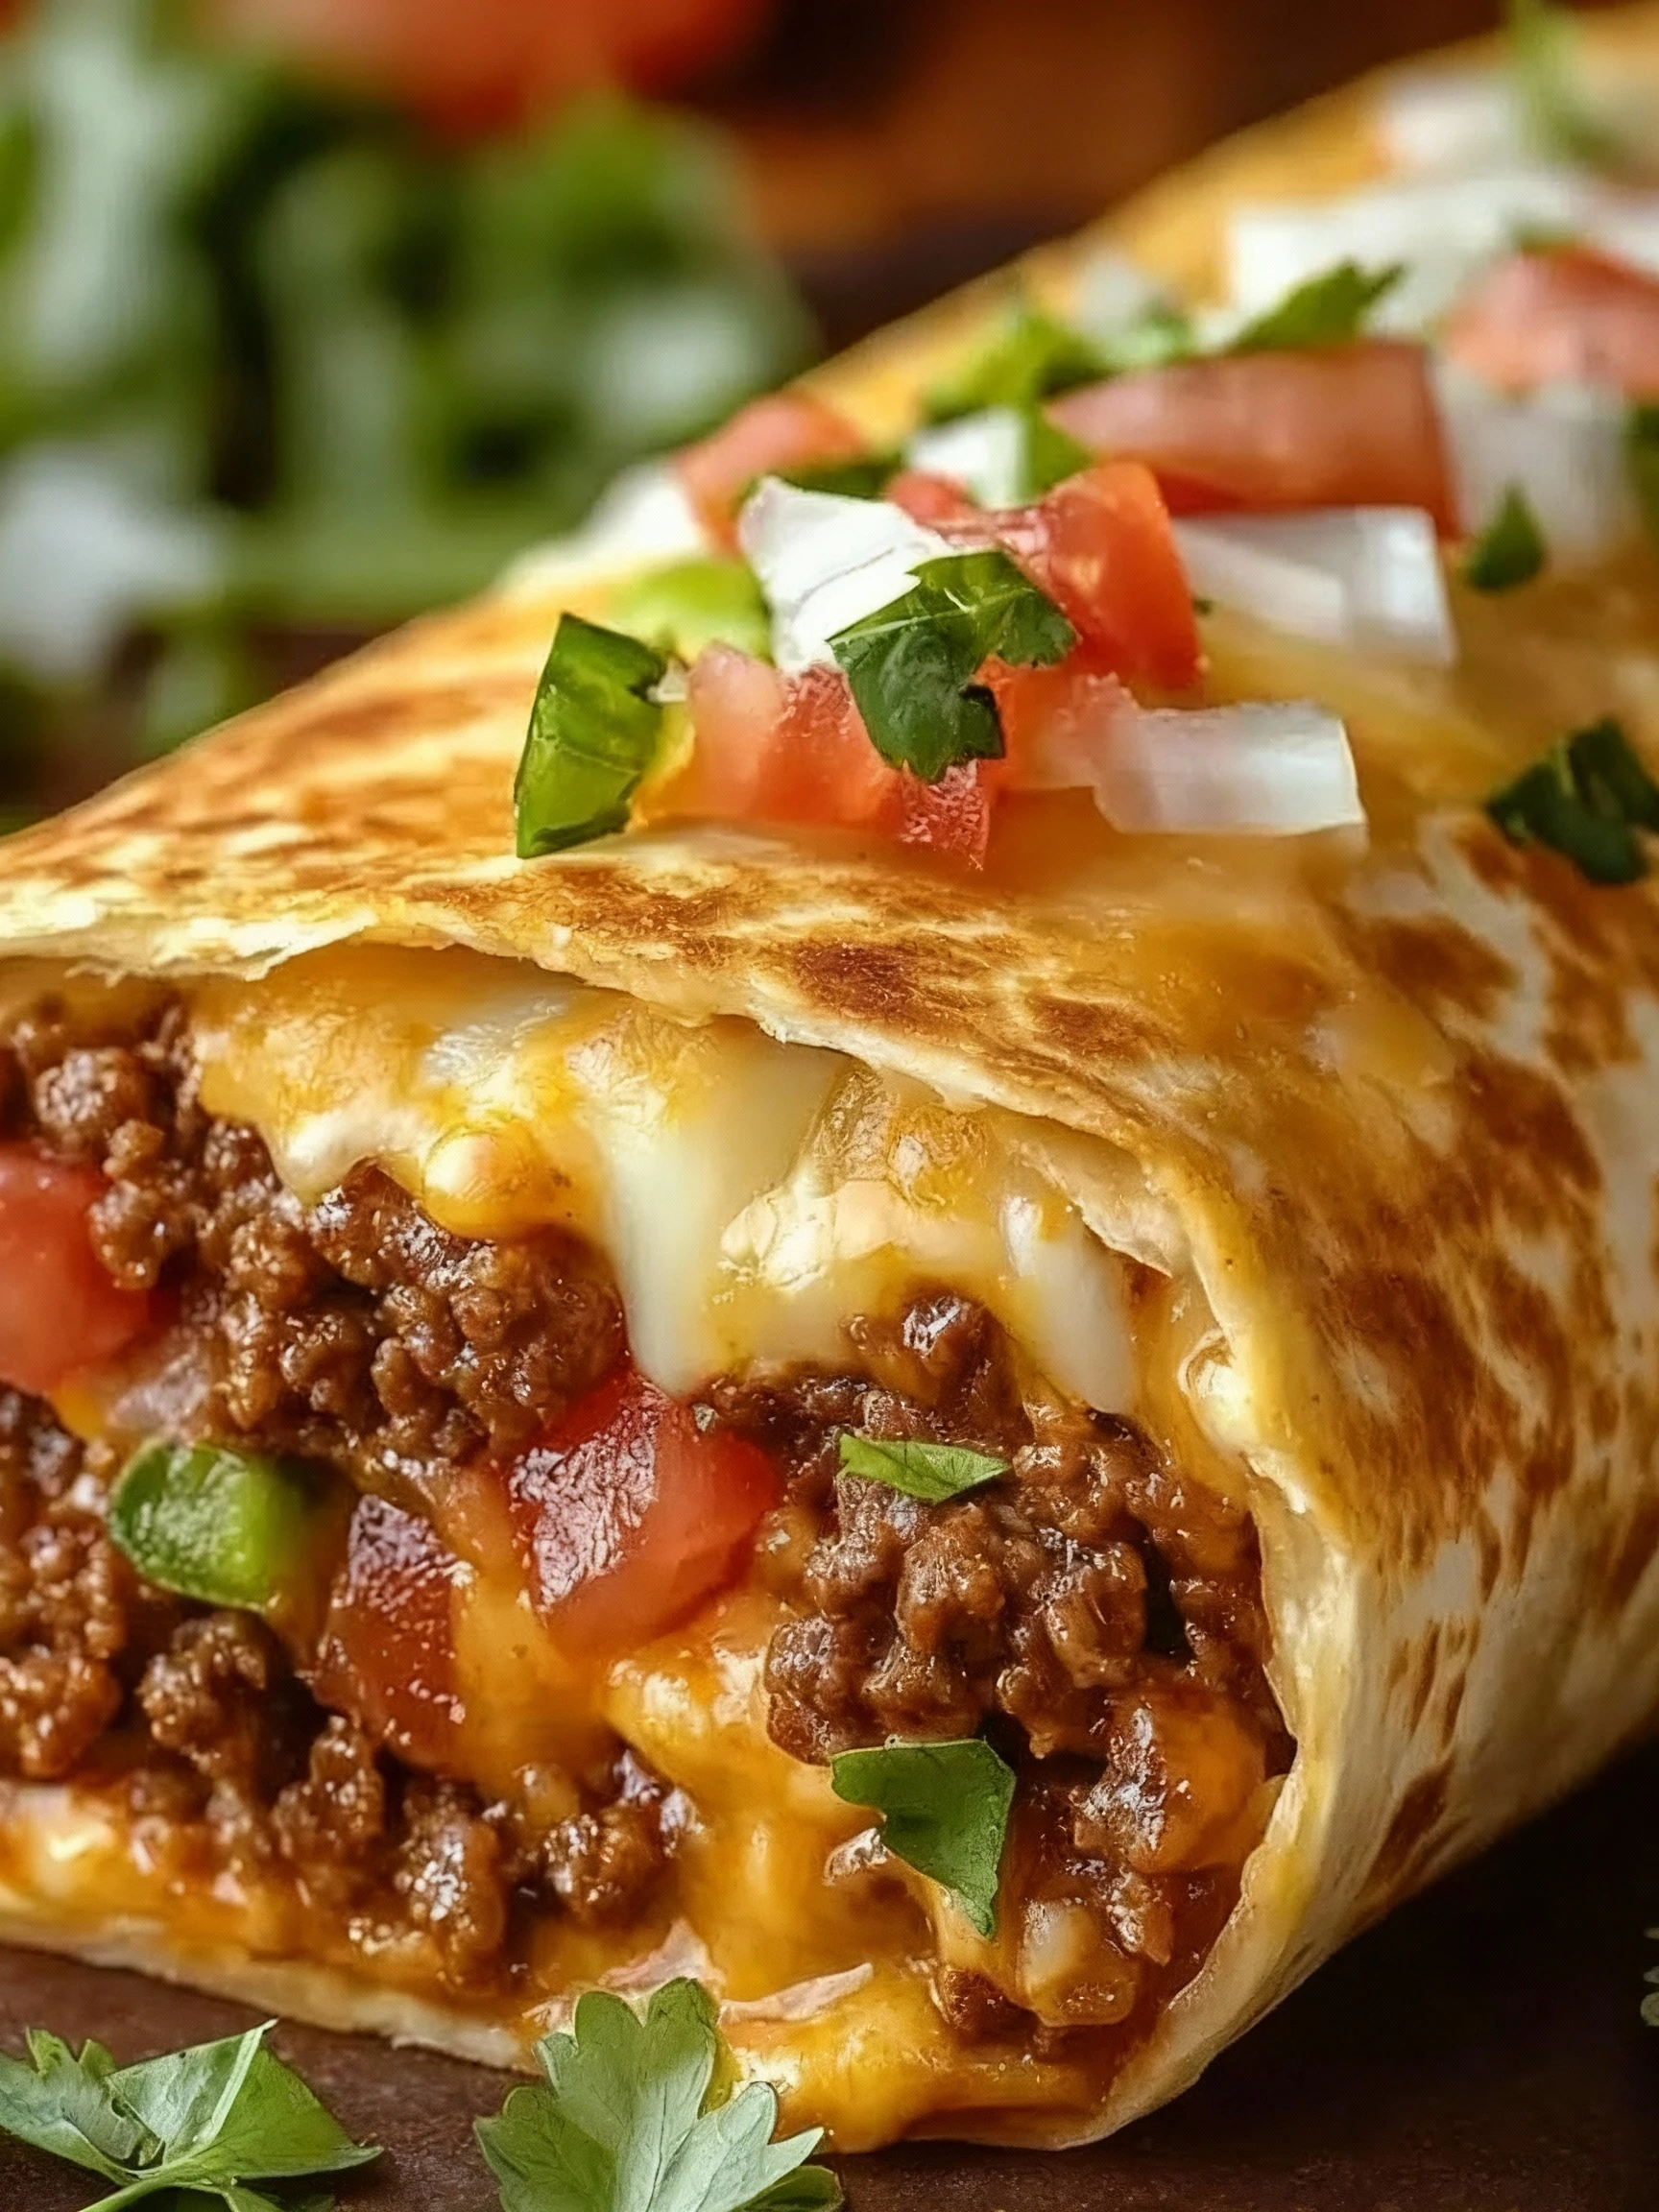
These Cheesy Beef Chimichangas are a perfect easy weeknight dinner that delivers maximum flavor with minimal effort. This Beef and Cheese Chimichangas Recipe features a savory ground beef and melty cheese filling wrapped in a crispy tortilla. For another delicious variation, try these Easy Chicken Chimichangas – Crispy and Flavorful.
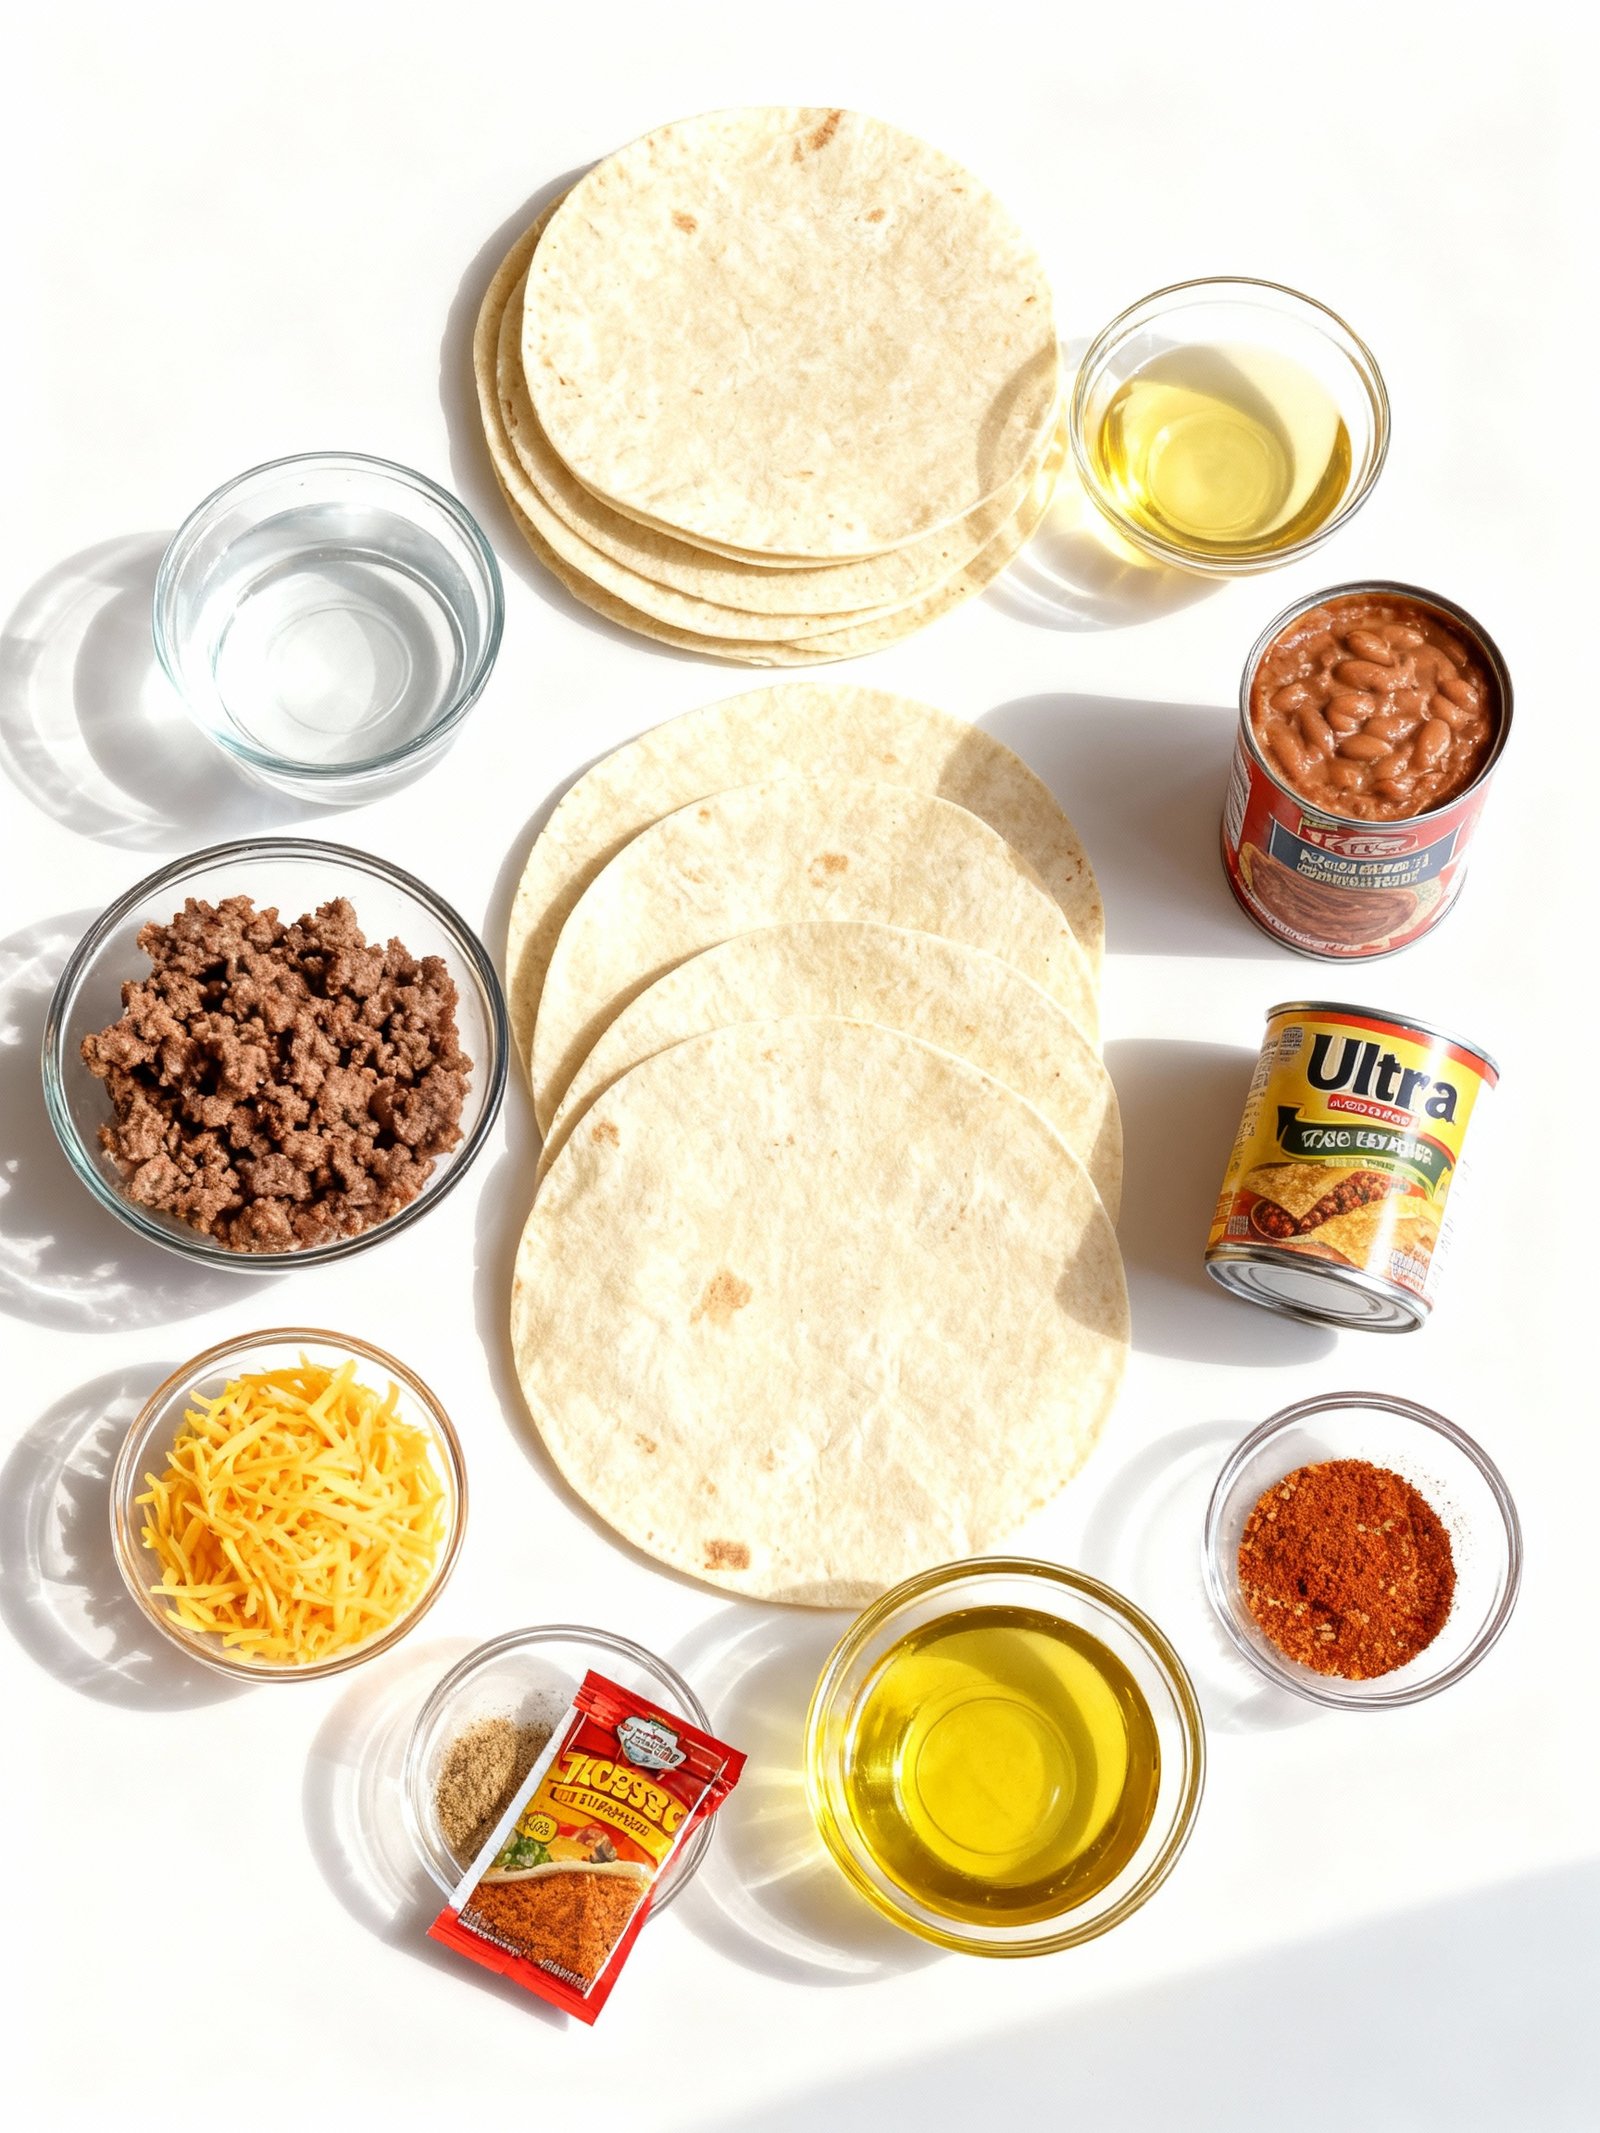
Ingredients
These Cheesy Beef Chimichangas deliver a satisfying crunch on the outside with a warm, savory, and melty filling inside.
- 6 large flour tortillas
- 1 pound ground beef
- 1 cup water
- 1 can refried beans
- 2 cups shredded cheese (Mexican blend or cheddar)
- 1 packet taco seasoning
- Oil for frying
Timing
| Prep Time | 15 minutes |
| Cook Time | 10 minutes |
| Total Time | 25 minutes |
Context: These Cheesy Beef Chimichangas come together about 20% faster than similar recipes.
Step-by-Step Instructions
Step 1 — Prepare the Beef Filling
In a large skillet, brown 1 pound of ground beef over medium-high heat until fully cooked, breaking it into small crumbles. Drain any excess fat from the pan.
Stir in 1 packet of taco seasoning and 1/4 cup of water. Simmer for 5 minutes until the liquid is absorbed and the beef is well-coated.
Step 2 — Combine with Cheese
Remove the skillet from heat and let the beef mixture cool slightly. Stir in 1 1/2 cups of shredded cheddar or Monterey Jack cheese until evenly distributed.
For extra creamy Cheesy Beef Chimichangas, you can also mix in 4 ounces of softened cream cheese.
Step 3 — Warm the Tortillas
Place 6 large flour tortillas between damp paper towels and microwave for 30–45 seconds until soft and pliable.
Warm tortillas are less likely to tear when folding your Cheesy Beef Chimichangas.
Step 4 — Fill and Fold
Spoon about 1/2 cup of the beef and cheese mixture onto the lower third of each tortilla. Fold the sides inward, then roll tightly from the bottom to enclose the filling.
Secure each chimichanga with a toothpick if needed to hold its shape during frying.
Step 5 — Heat the Oil
Pour vegetable oil into a heavy skillet to a depth of 1 inch and heat to 350°F (175°C). Use a cooking thermometer for accuracy.
Proper oil temperature ensures your Cheesy Beef Chimichangas fry up crisp and golden without absorbing excess oil.
Step 6 — Fry to Golden Brown
Carefully place 2–3 chimichangas seam-side down into the hot oil. Fry for 2–3 minutes per side until golden brown and crisp.
Do not overcrowd the pan—this keeps the oil temperature stable for even cooking.
Step 7 — Drain and Serve
Transfer the fried Cheesy Beef Chimichangas to a paper towel-lined plate to drain any excess oil. Remove toothpicks before serving.
Serve immediately with toppings like sour cream, guacamole, or salsa for the best flavor and texture.
Nutritional Information
| Calories | 520 |
| Protein | 28g |
| Carbohydrates | 35g |
| Fat | 29g |
| Fiber | 3g |
| Sodium | 890mg |
Note: Estimates based on typical ingredients and serving size.
Healthier Alternatives
- Ground Turkey or Chicken — Leaner protein option that still delivers savory flavor for your Cheesy Beef Chimichangas
- Lettuce Wraps — Fresh, low-carb alternative to traditional tortillas that adds crisp texture
- Whole Wheat Tortillas — Higher fiber option that maintains the classic chimichanga experience
- Nutritional Yeast or Vegan Cheese — Dairy-free alternatives that provide the cheesy element
- Black Beans or Lentils — Plant-based protein swaps that add earthy flavors and fiber
- Low-Sodium Taco Seasoning — Custom blend lets you control salt while keeping bold Mexican spices
- Cauliflower Rice Filling — Reduces carbs while adding vegetable content and light texture
- Baked Instead of Fried — Crispy results with significantly less oil for lighter Cheesy Beef Chimichangas
Serving Suggestions
- Pair these Cheesy Beef Chimichangas with cool, creamy sides like guacamole, sour cream, or a simple pico de gallo to balance the rich, savory filling.
- Serve with a side of Mexican rice and refried beans for a complete and satisfying fiesta-style meal.
- Perfect for casual weeknight dinners, game day gatherings, or potlucks where a crowd-pleasing main dish is needed.
- For a lighter meal, serve a single Cheesy Beef Chimichanga alongside a crisp green salad with a tangy lime vinaigrette.
- Cut chimichangas in half on a diagonal before plating to showcase the delicious, cheesy beef interior.
- Drizzle with a spicy crema or enchilada sauce and garnish with fresh cilantro for a restaurant-quality presentation.
- These are ideal for make-ahead meals; assemble them ahead of time and bake just before serving for a stress-free dinner.
No matter how you serve them, these Cheesy Beef Chimichangas are sure to be a hit with family and friends.
Common Mistakes to Avoid
- Mistake: Using overly lean ground beef. Fix: Opt for 80/20 beef for juicier, more flavorful filling.
- Mistake: Overfilling the tortillas. Fix: Use about ½ cup filling to prevent bursting during frying.
- Mistake: Frying with cold oil. Fix: Heat oil to 350–375°F for a crisp, non-greasy exterior.
- Mistake: Using cold tortillas. Fix: Warm tortillas briefly to make them pliable and less likely to tear.
- Mistake: Adding watery ingredients to the filling. Fix: Drain salsa and cooked beef well to avoid soggy shells.
- Mistake: Sealing with too much filling exposed. Fix: Fold tightly, tucking in sides completely to lock in the cheesy beef.
- Mistake: Frying too many at once. Fix: Cook in batches to maintain oil temperature for even browning.
- Mistake: Skipping the resting step after frying. Fix: Let Cheesy Beef Chimichangas drain on a rack for a minute to stay crisp.
Storing Tips
- Fridge: Store leftover Cheesy Beef Chimichangas in an airtight container for up to 3 days. Ensure they cool to room temperature within 2 hours before refrigerating.
- Freezer: Wrap each chimichanga individually in foil or plastic wrap, then place in a freezer bag. They will keep for up to 3 months.
- Reheat: For best results, bake frozen Cheesy Beef Chimichangas at 375°F (190°C) for 20-25 minutes, or until the internal temperature reaches 165°F (74°C). Thawed or refrigerated chimichangas can be reheated for 10-15 minutes.
Always use a food thermometer to ensure your Cheesy Beef Chimichangas reach a safe internal temperature of 165°F (74°C) when reheating.
Conclusion
These Cheesy Beef Chimichangas are a guaranteed crowd-pleaser, delivering crispy tortillas filled with savory beef and melted cheese. Serve them with our Best Homemade Salsa Recipe for a complete meal. Try this recipe and let us know how it turns out in the comments, and subscribe for more delicious family-friendly meals!
Print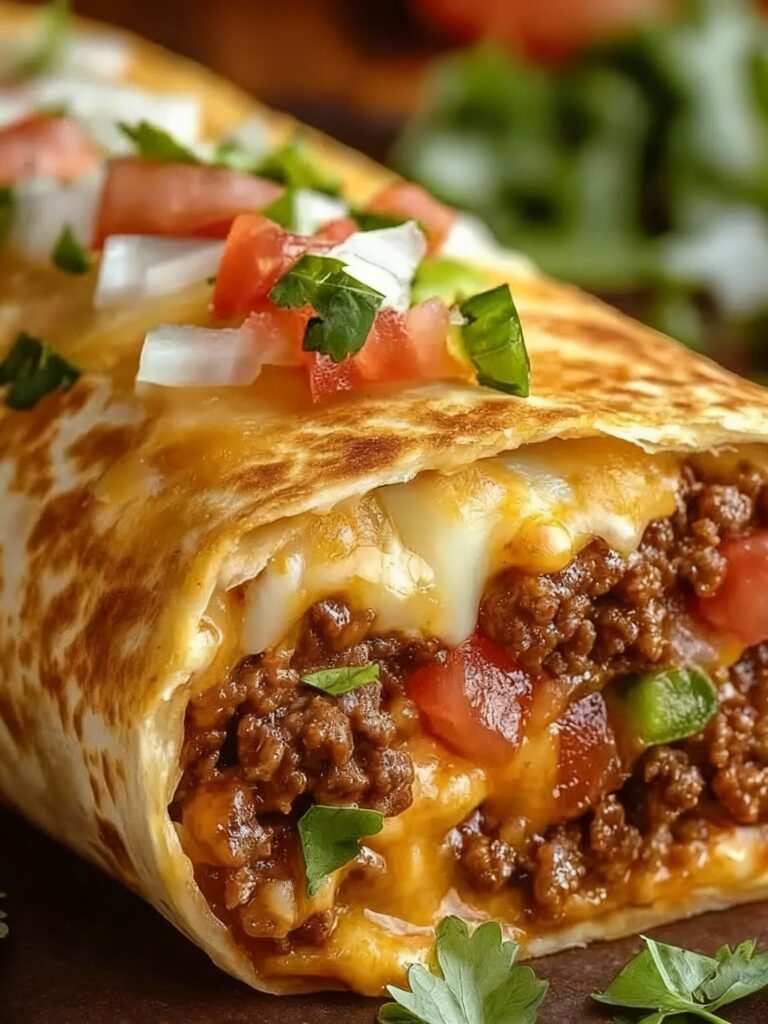
Beef and Cheese Chimichangas
Large flour tortillas filled with savory ground beef, refried beans, and shredded cheese, then fried to golden perfection. A quick and easy Tex-Mex dinner that can be made ahead and frozen.
- Total Time: 30 minutes
- Yield: 6 1x
Ingredients
- 6 large flour tortillas
- 1 pound ground beef
- 1 cup water
- 1 can refried beans
- 2 cups shredded cheese (Mexican blend or cheddar)
- 1 packet taco seasoning
- Oil for frying
Instructions
- In a skillet over medium heat, cook ground beef until browned; drain excess fat.
- Add taco seasoning and water to the beef; simmer until thickened.
- Stir in refried beans and mix well.
- Remove from heat and let cool slightly.
- Place a large spoonful of the beef and bean mixture onto each tortilla.
- Sprinkle shredded cheese over the filling.
- Fold the sides of the tortilla over the filling and roll tightly to form chimichangas.
- Heat oil in a deep skillet over medium-high heat.
- Fry chimichangas until golden brown and crispy on all sides, about 2-3 minutes per side.
- Drain on paper towels before serving.
Notes
For a lighter version, bake chimichangas at 400°F for 20 minutes, turning halfway through. Serve with sour cream, salsa, and guacamole for added flavor.
- Prep Time: 15 minutes
- Cook Time: 15 minutes
- Method: Main Course
- Cuisine: Mexican
Nutrition
- Calories: 450
- Sugar: 3g
- Sodium: 700mg
- Fat: 25g
- Saturated Fat: 10g
- Unsaturated Fat: 12g
- Trans Fat: 0g
- Carbohydrates: 35g
- Fiber: 5g
- Protein: 25g
- Cholesterol: 70mg
FAQs
Can I make Cheesy Beef Chimichangas ahead of time?
Yes, you can assemble these Cheesy Beef Chimichangas ahead of time. Keep them covered in the refrigerator for up to a day before frying or baking. This makes them a great option for easy meal prep.
What is the best way to seal the chimichangas so they don’t burst?
To seal your Cheesy Beef Chimichangas, avoid overfilling the tortillas. Place the filling in the center, fold in the sides, then roll tightly from the bottom up. Use a little water or beaten egg to moisten the final edge to help it stick and seal completely.
Can I bake Cheesy Beef Chimichangas instead of frying them?
Absolutely. Baking is a healthier alternative for making Cheesy Beef Chimichangas. Brush the assembled chimichangas lightly with oil and bake at 400°F (200°C) for about 20-25 minutes, flipping halfway, until they are golden brown and crispy.


3 Comments