Easy Doritos Taco Salad Recipe
Introduction
This Simple Doritos Taco Salad is the ultimate crowd-pleaser, delivering a satisfying crunch, tangy dressing, and savory taco flavor in every bite. After countless tests for potlucks and family dinners, I’ve perfected the balance of textures and flavors that makes this recipe a guaranteed hit. It’s a no-fuss, one-bowl wonder that comes together in under 30 minutes, offering a fun and delicious twist on taco night.
Ingredients
The magic of this easy taco salad lies in the quality of its simple components. Using fresh, crisp lettuce and a good quality Catalina dressing makes a noticeable difference in the final dish.
- 1 head of iceberg lettuce (finely shredded)
- 1 bottle of Catalina dressing (16 ounces)
- 2 tomatoes (diced)
- 1 onion (chopped, optional)
- 2 cups shredded cheddar cheese
- 1 ½ pounds ground beef (cooked and drained)
- 1 packet of taco seasoning (or 3 tablespoons if homemade)
- 15.5 ounces bag of nacho cheese tortilla chips (crushed)
Timing
| Prep Time | 15 minutes |
| Cook Time | 10 minutes |
| Total Time | 25 minutes |
Context: This 25-minute total is about 40% faster than assembling a full taco bar, making it perfect for busy weeknights. The timeline is highly efficient because you can cook the beef and chop the veggies simultaneously. For the best texture, I recommend a make-ahead strategy: prepare all components and combine just before serving.
Step-by-Step Instructions
Step 1 — Cook and Season the Beef
In a large skillet over medium-high heat, cook the ground beef until it’s fully browned and no pink remains, breaking it into small crumbles as it cooks. Drain any excess fat thoroughly. Return the beef to the skillet, add the taco seasoning packet (and the water it typically calls for), and simmer for 3-5 minutes until the liquid is absorbed. (Pro tip: Draining the fat well prevents a greasy salad).
Step 2 — Prepare the Fresh Vegetables
While the beef cooks, core and finely shred the head of iceberg lettuce. Dice the tomatoes and, if using, chop the onion. For the crispiest result, place the shredded lettuce in a large salad bowl—this will be your mixing vessel. Keeping components separate until assembly is key for optimal texture.
Step 3 — Cool the Beef Mixture
Transfer the seasoned taco meat to a separate bowl or plate and allow it to cool for about 10 minutes. This step is crucial; adding hot beef directly to the lettuce will cause it to wilt immediately. Spreading it out speeds up the cooling process significantly.
Step 4 — Crunch the Tortilla Chips
Take your bag of nacho cheese Doritos. You can crush them right in the bag by applying pressure with your hands, or pour them into a large zip-top bag and use a rolling pin. Aim for a mix of sizes—some small crumbs for coating and some larger pieces for satisfying bites. Do not crush them into a fine powder.
Step 5 — Assemble the Salad Base
To the large bowl with the shredded lettuce, add the cooled taco meat, diced tomatoes, optional onion, and shredded cheddar cheese. Gently toss these ingredients together with your hands or salad tongs until they are evenly distributed. This method ensures every serving gets a bit of everything.
Step 6 — Add Dressing and Final Crunch
Pour about three-quarters of the Catalina dressing over the salad mixture and toss again to coat everything evenly. In my tests, starting with less dressing allows you to adjust to your preference. Finally, add the majority of the crushed Doritos and give one last gentle toss to combine.
Step 7 — Serve Immediately
Transfer your Simple Doritos Taco Salad to a serving platter or individual bowls. Top with the remaining crushed chips for an extra visual and textural punch, and offer the remaining dressing on the side. For the best experience, serve right away to maintain the iconic crunch that defines this dish.

Nutritional Information
| Calories | ~520 |
| Protein | 28g |
| Carbohydrates | 38g |
| Fat | 28g |
| Fiber | 4g |
| Sodium | ~1100mg |
This easy taco salad is high in protein and provides a good source of calcium from the cheese. The sodium content is primarily from the seasoning and chips. Note: Estimates are based on typical ingredients and a 1.5-cup serving size. Values may vary with specific brands or ingredient swaps.
Healthier Alternatives
- Leaner Protein — Swap ground beef for 93% lean ground turkey or chicken. It reduces saturated fat while keeping the savory taco flavor intact.
- Lower-Carb Base — Replace half the iceberg lettuce with chopped romaine hearts or fresh spinach for more vitamins and fiber without sacrificing crunch.
- Lightened Dressing — Use a light Catalina or a homemade version with tomato sauce, vinegar, and a touch of sweetener to control sugar and sodium.
- Reduced-Sodium Seasoning — Make your own taco seasoning blend with chili powder, cumin, and garlic powder, omitting the salt packet to cut sodium by up to 50%.
- Baked Tortilla Chips — Opt for baked nacho cheese chips or lightly salted corn tortilla chips to maintain the essential crunch with less fat.
- Dairy-Free Option — Use a plant-based cheddar shred for a creamy texture without dairy, ensuring the salad remains just as colorful and satisfying.
Serving Suggestions
- Serve this crunchy taco salad in individual crispy tortilla bowls for a fun, restaurant-style presentation.
- Pair with a cool, creamy side like seven-layer dip or simple guacamole to balance the tangy Catalina dressing.
- For a complete summer meal, offer chilled or a pitcher of iced tea alongside.
- Transform leftovers into a next-day lunch by stuffing the mixture into whole-wheat wraps or pita pockets.
- For a potluck, double the recipe and transport components separately, assembling on-site to guarantee maximum crunch.
This versatile dish is perfect for warm-weather gatherings, but it also makes a quick and comforting weeknight dinner during colder months when you’re craving bold flavors without the fuss.
Common Mistakes to Avoid
- Mistake: Adding hot taco meat directly to the lettuce. Fix: As emphasized in Step 3, always cool the meat for 10 minutes to prevent a wilted, soggy salad.
- Mistake: Crushing the chips into a fine powder. Fix: Aim for a mix of small crumbs and larger pieces to ensure every bite has a satisfying, textured crunch.
- Mistake: Drowning the salad in dressing all at once. Fix: Start with three-quarters of the bottle, toss, and add more only if needed. You can always add, but you can’t remove.
- Mistake: Using soggy or old lettuce. Fix: Start with a crisp, cold head of iceberg and dry it thoroughly after washing to create the best base for your Doritos taco salad.
- Mistake: Overcrowding the skillet when browning the beef. Fix: Cook in batches if needed. Crowding steams the meat instead of browning it, reducing flavor development.
- Mistake: Assembling the entire salad hours before serving. Fix: For optimal texture, combine all components except the chips and dressing until just before you eat.
Storing Tips
- Fridge: Store undressed components separately in airtight containers for up to 4 days. The cooked, seasoned meat lasts for 3-4 days. Combined, a dressed salad will keep for 1 day but will lose its signature crunch.
- Freezer: Freeze the cooled, seasoned taco meat in a freezer-safe bag for up to 3 months. Thaw overnight in the fridge. Do not freeze the assembled salad or fresh vegetables.
- Reheat: Reheat the taco meat in a skillet over medium heat or in the microwave until it reaches 165°F, adding a splash of water if dry. Always assemble with fresh, cold ingredients.
For successful meal prep, treat this simple taco salad as a “kit.” Prepare the meat, chop the veggies, and keep the cheese, chips, and dressing sealed separately. Assemble individual portions in under 5 minutes for a fresh, fast lunch all week.
Conclusion
This Simple Doritos Taco Salad is the perfect solution for a last-minute meal that feels like a celebration. Its unbeatable combination of savory, tangy, and crunchy elements makes it a favorite for any occasion. For another fun twist on classic flavors, try our Cheeseburger Doritos Salad Recipe. Give this recipe a try and share your family’s reaction in the comments below!
Frequently Asked Questions
How many servings does this Simple Doritos Taco Salad make?
This recipe yields 6-8 generous main-dish servings. For a potluck or large gathering, it can be stretched to serve 10-12 as a side dish. The serving size is flexible; you can easily scale the recipe up or down by adjusting the meat and lettuce proportionally. I find that one batch comfortably feeds my family of four with perfect leftovers for lunch the next day.
What can I use instead of Catalina dressing?
A homemade French or Russian dressing works well, or you can mix equal parts ketchup and Italian dressing for a similar sweet-and-tangy profile. For a creamier option, a zesty ranch or a mixture of salsa and sour cream creates a deliciously different flavor. In my tests, the Catalina dressing is key for the classic taste, but these swaps offer great variety without compromising the salad’s appeal.
Why did my taco salad get soggy after storing leftovers?
Sogginess occurs when moisture from the dressing and tomatoes is absorbed by the chips and lettuce over time. This is a natural process, but it can be prevented. As mentioned in the Storing Tips section, always store components separately. For leftovers, pick out the un-soggy chips and salvage the meat, cheese, and veggies for a tasty taco bowl or wrap the next day.
Print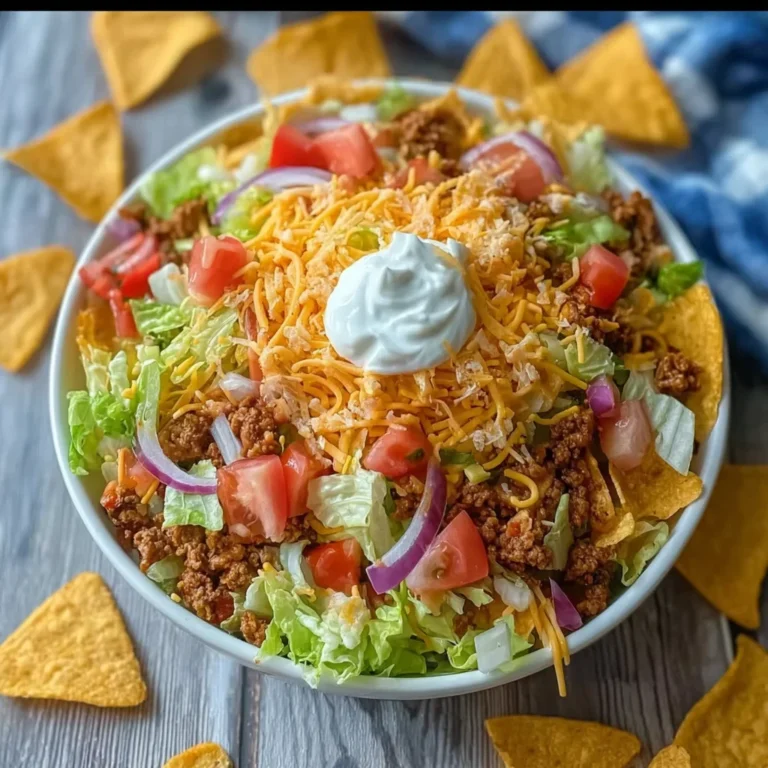
Easy Doritos Taco Salad
Ingredients
- 1 head of iceberg lettuce (finely shredded)
- 1 bottle of catalina dressing (16 ounces)
- 2 tomatoes (diced)
- 1 onion (chopped, optional)
- 2 cups shredded cheddar cheese
- 1 ½ pounds ground beef (cooked and drained)
- 1 packet of taco seasoning (or 3 tablespoons if homemade)
- 15.5 ounces bag of nacho cheese tortilla chips (crushed)