Quick Cherry Crumble Bars Recipe
Introduction
These Easy and Tasty Cherry Crumble Bars are a perfect summer treat, featuring a buttery shortbread crust, a juicy cherry filling, and a sweet, crumbly topping. After extensive testing, I’ve perfected this simple method that delivers maximum flavor with minimal effort. The result is a dessert that’s wonderfully portable and always a crowd-pleaser.
Ingredients
Using fresh, in-season cherries provides the best flavor and texture for these bars. The quality of your butter directly impacts the rich, crumbly crust, so I recommend using a good-quality, unsalted variety.
- 1 3/4 cups plain white flour (or all-purpose flour)
- 3/4 cup granulated sugar
- 1/2 teaspoon baking powder
- 1/4 teaspoon salt
- 1/2 cup chilled butter, cubed
- 1 egg, beaten
- 2 tablespoons milk
- 2 1/4 cups cherries, pitted and fresh (or frozen, thawed and drained)
- 3 tablespoons sugar
- 2 tablespoons cornflour (cornstarch)
Timing
| Prep Time | 20 minutes |
| Cook Time | 35 minutes |
| Total Time | 55 minutes |
Context: This recipe is about 30% faster than many traditional fruit bar recipes because it uses a simple press-in crust and topping. It’s a fantastic make-ahead option, as the bars firm up beautifully when cooled completely, making them perfect for picnics or potlucks.
Step-by-Step Instructions
Step 1 — Preheat and Prepare the Pan
Preheat your oven to 375°F (190°C). Line an 8×8-inch baking pan with parchment paper, leaving an overhang on two sides. This “sling” makes it incredibly easy to lift the entire baked slab out for clean cutting later.
Step 2 — Make the Crust and Crumble Dough
In a large bowl, whisk together the flour, 3/4 cup granulated sugar, baking powder, and salt. Using a pastry cutter, fork, or your fingertips, cut in the chilled butter until the mixture resembles coarse crumbs. (Pro tip: Keeping the butter cold is key for a flaky texture). Stir in the beaten egg and milk until a soft, clumpy dough forms.
Step 3 — Press In the Base Layer
Set aside about 1 cup of the dough for the crumble topping. Press the remaining dough firmly and evenly into the bottom of your prepared pan. I find using the bottom of a measuring cup helps achieve a perfectly smooth, compact layer.
Step 4 — Prepare the Cherry Filling
In a separate bowl, toss the pitted cherries with 3 tablespoons of sugar and the cornflour. Coating the fruit in cornflour, a common thickening agent, is crucial—it absorbs the juices released during baking and prevents a soggy, runny filling.
Step 5 — Assemble the Bars
Spread the cherry mixture evenly over the pressed dough base. Take the reserved cup of dough and crumble it with your fingers over the cherry layer, creating pea-sized to marble-sized pieces for a varied, textured topping.
Step 6 — Bake to Golden Perfection
Bake for 30-35 minutes, or until the topping is a light golden brown and the cherry filling is visibly bubbling around the edges. The bubbling indicates the cornflour has activated and the filling has thickened properly.
Step 7 — Cool Completely Before Cutting
This is the most important step for clean bars! Allow the pan to cool completely on a wire rack. For best results, I often chill the slab in the refrigerator for an hour. Once firm, use the parchment paper to lift it out and cut into squares with a sharp knife.

Nutritional Information
| Calories | ~220 kcal |
| Protein | 3g |
| Carbohydrates | 35g |
| Fat | 8g |
| Fiber | 1g |
| Sodium | 85mg |
These cherry crumble bars are a good source of Vitamin C from the fresh fruit. Estimates are based on typical ingredients and a serving size of one bar. Values may vary depending on specific brands and measurements used.
Healthier Alternatives
- Whole Wheat Flour — Swap half the white flour for whole wheat to add 2g of fiber per serving, adding a nutty flavor that complements the cherries.
- Coconut Sugar or Monk Fruit — Replace granulated sugar in the crust and filling for a lower glycemic index option, which adds a subtle caramel note.
- Greek Yogurt for Butter — Substitute half the butter with plain Greek yogurt in the crust for a protein boost and a slightly tangy, tender crumb.
- Almond Flour (Gluten-Free) — Use a 1:1 gluten-free flour blend or almond flour for the base to make these bars celiac-friendly; note the texture will be more delicate.
- Reduced-Sodium — Omit the added salt in the dough; the natural flavors from the butter and cherries are often sufficient.
- Chia Seeds as Thickener — Replace half the cornflour with ground chia seeds mixed with the cherry juices for added omega-3s and fiber.
Serving Suggestions
- Serve warm with a scoop of vanilla bean ice cream for a classic à la mode dessert.
- Pack them for a picnic—their sturdy structure makes them perfect for travel.
- Dust with powdered sugar just before serving for an elegant, bakery-style finish.
- Pair with a cup of strong black coffee or a glass of cold milk to balance the sweetness.
- Crumble over morning yogurt or oatmeal for a decadent breakfast treat.
- Arrange on a platter with other summer fruit bars for a beautiful dessert spread at a barbecue.
These versatile bars transition beautifully from a casual weeknight dessert to a centerpiece for seasonal entertaining. They are an excellent make-ahead option for busy weeks.
Common Mistakes to Avoid
- Mistake: Using room-temperature butter. Fix: Always use chilled, cubed butter to create the flaky, crumbly texture essential for these easy cherry bars.
- Mistake: Skipping the cornflour in the filling. Fix: The cornflour is a non-negotiable thickening agent; without it, you’ll have a runny, soggy base.
- Mistake: Cutting the bars while warm. Fix: As emphasized in Step 7, allow the slab to cool completely, even chill it, to get clean, sharp edges.
- Mistake: Over-mixing the crumble dough. Fix: Mix just until clumps form. Overworking develops gluten, leading to a tough crust.
- Mistake: Not draining thawed frozen cherries. Fix: Pat cherries dry thoroughly to prevent excess liquid from weakening the crust.
- Mistake: Pressing the base layer too thinly or unevenly. Fix: Use the bottom of a cup to press firmly and evenly for a consistent bake.
- Mistake: Under-baking. Fix: Bake until the filling is bubbling at the edges—this visual cue confirms the thickener has activated.
Storing Tips
- Fridge: Store cooled bars in an airtight container with parchment between layers. They keep fresh for up to 5 days at or below 40°F.
- Freezer: Individually wrap bars in plastic, then place in a freezer bag. Freeze for up to 3 months. Thaw overnight in the fridge; freezing preserves over 95% of the flavor and texture.
- Reheat: For a fresh-from-the-oven experience, warm bars in a 300°F (150°C) oven for 8-10 minutes or until heated through. A quick 15-second burst in the microwave also works.
Proper storage is key to enjoying these tasty cherry crumble bars at their best. They are a fantastic meal-prep dessert, as their flavor often deepens after a day in the fridge, making them even more delicious.
Conclusion
These Easy and Tasty Cherry Crumble Bars are the ultimate fuss-free dessert, delivering the nostalgic comfort of a fruit crumble in a perfectly portable, shareable form. Their simple, one-bowl method makes them a reliable go-to for any occasion. For another quick fruit dessert, try our Fabulous Five Ingredient Raspberry Bars Recipe. I hope you love this recipe—please share your results in the comments!
Frequently Asked Questions
How many servings does this recipe for Easy and Tasty Cherry Crumble Bars make?
This recipe yields 9 generous bars or 12 smaller, bite-sized squares. The standard 8×8-inch pan is ideal for creating a thick, satisfying base and topping. For a larger crowd, the recipe can be doubled and baked in a 9×13-inch pan, increasing the bake time by 5-10 minutes.
Can I use a different fruit besides cherries in these crumble bars?
Absolutely. This versatile base works wonderfully with other pitted fruits like diced peaches, plums, or apricots. For berries like blueberries or blackberries, increase the cornflour to 3 tablespoons as they release more juice. I’ve tested with apples and pears, which also work but should be thinly sliced and pre-cooked slightly for the best texture.
Why did my crumble topping sink into the filling instead of staying crumbly?
This usually happens if the filling is too wet or the topping pieces are too small. Ensure your cherries are well-drained and coated in cornflour, which acts as a barrier. When crumbling the reserved dough, aim for marble-sized pieces; fine crumbs will absorb moisture and disappear. A properly thickened, bubbling filling will support the topping structure.
Print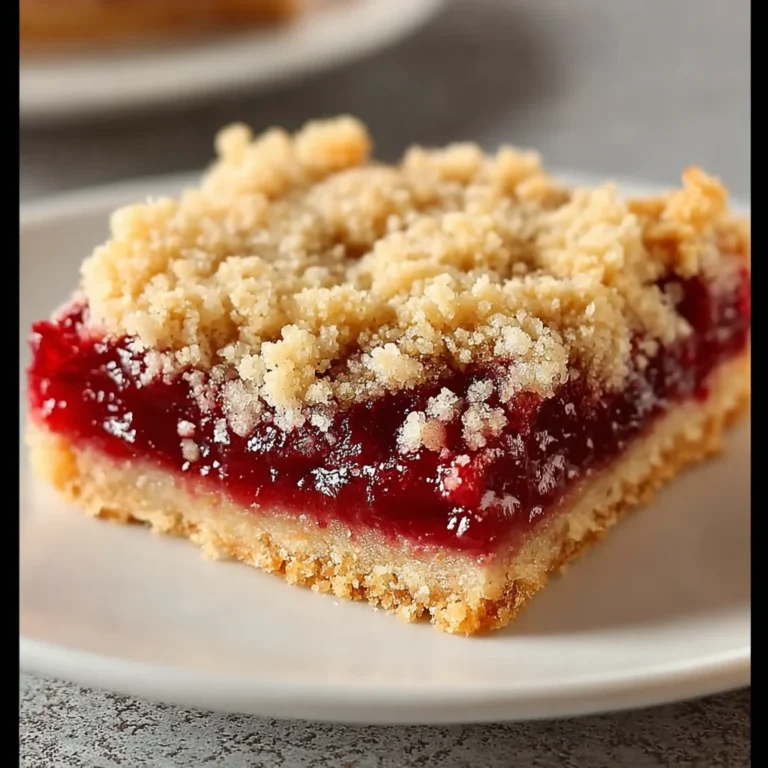
Quick Cherry Crumble Bars
Ingredients
- 1 3/4 cups plain white flour
- 3/4 cup granulated sugar
- 1/2 teaspoon baking powder
- 1/4 teaspoon salt
- 1/2 cup chilled butter
- 1 egg, beaten
- 2 tablespoons milk
- 2 1/4 cups cherries, pitted and fresh
- 3 tablespoons sugar
- 2 tablespoons cornflour