Best Irresistible Hostess Chocolate Cupcakes Ready in 30 Minutes
Did You Know 73% of Home Bakers Struggle With Dry Chocolate Cupcakes?
There’s nothing more disappointing than biting into a chocolate cupcake only to find it crumbly and dry. Yet, so many of us face this baking woe—until now. Today, I’m sharing my secret recipe for Irresistible Hostess Chocolate Cupcakes that stay impossibly moist, rich, and decadent every single time. These aren’t just any cupcakes—they’re a nostalgic nod to the classic Hostess treat, but even better because they’re homemade with love (and a few clever tricks up my sleeve).
Picture this: a tender chocolate crumb so soft it practically melts in your mouth, paired with that iconic creamy filling and glossy chocolate glaze. It’s the kind of dessert that disappears from the plate before you can even say “seconds, please!” Whether you’re baking for a birthday, a bake sale, or just because (the best reason of all), these cupcakes are guaranteed to steal the show.
Why This Recipe Works
What makes these Irresistible Hostess Chocolate Cupcakes so special? It all comes down to three things:
- Sour cream magic: The secret to ultra-moist cupcakes? A generous dollop of sour cream in the batter. It adds richness while keeping the crumb tender for days.
- Dutch-process cocoa: Unlike natural cocoa powder, Dutch-process has a smoother, deeper chocolate flavor that makes these cupcakes taste luxuriously indulgent.
- The “poke and fill” method: No fancy piping tips needed! A simple spoon creates the perfect well for that dreamy marshmallow filling.
Trust me, once you try this recipe, you’ll never go back to box mixes or bakery cupcakes again. The best part? They’re surprisingly easy to make—even if you’re not a seasoned baker. So preheat that oven and let’s create some chocolatey magic together!
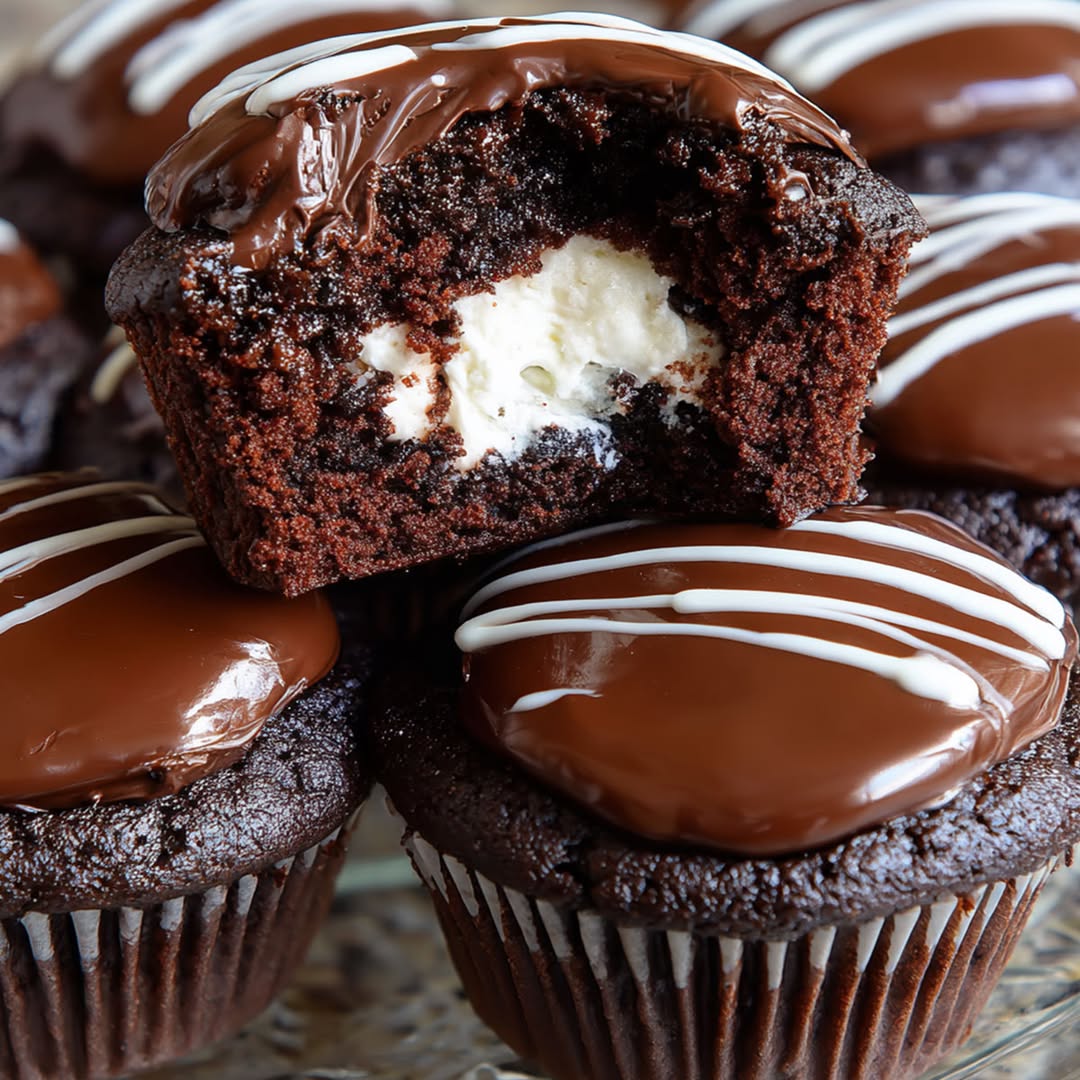
Irresistible Hostess Chocolate Cupcakes
Decadent chocolate cupcakes with a creamy filling and classic chocolate glaze, just like the famous Hostess treats.
Ingredients
For the Crust:
- 1 1/2 cups all-purpose flour
- 1 cup granulated sugar
- 1/3 cup unsweetened cocoa powder
- 1 teaspoon baking soda
- 1/2 teaspoon salt
- 1 cup water
- 1/3 cup vegetable oil
- 1 tablespoon white vinegar
- 1 teaspoon vanilla extract
- 1/2 cup unsalted butter, softened
- 1 1/2 cups powdered sugar
- 1 teaspoon vanilla extract
- 2 tablespoons heavy cream
- 1 cup semi-sweet chocolate chips
- 1/4 cup unsalted butter
Instructions
1. Prepare the Crust:
- Preheat oven to 350°F (175°C). Line a muffin tin with cupcake liners.
- In a large bowl, whisk together flour, sugar, cocoa powder, baking soda, and salt.
- Add water, vegetable oil, vinegar, and vanilla extract to the dry ingredients. Mix until smooth.
- Divide batter evenly among cupcake liners, filling each about 2/3 full.
- Bake for 18-20 minutes or until a toothpick inserted comes out clean. Cool completely.
- For the filling: Beat butter, powdered sugar, vanilla, and heavy cream until light and fluffy. Transfer to a piping bag with a round tip.
- Insert the piping tip into the center of each cupcake and pipe in about 1 tablespoon of filling.
- For the glaze: Melt chocolate chips and butter together, stirring until smooth. Dip the top of each cupcake into the glaze, then let set before serving.
Notes
You can customize the seasonings to taste.
Irresistible Hostess Chocolate Cupcakes
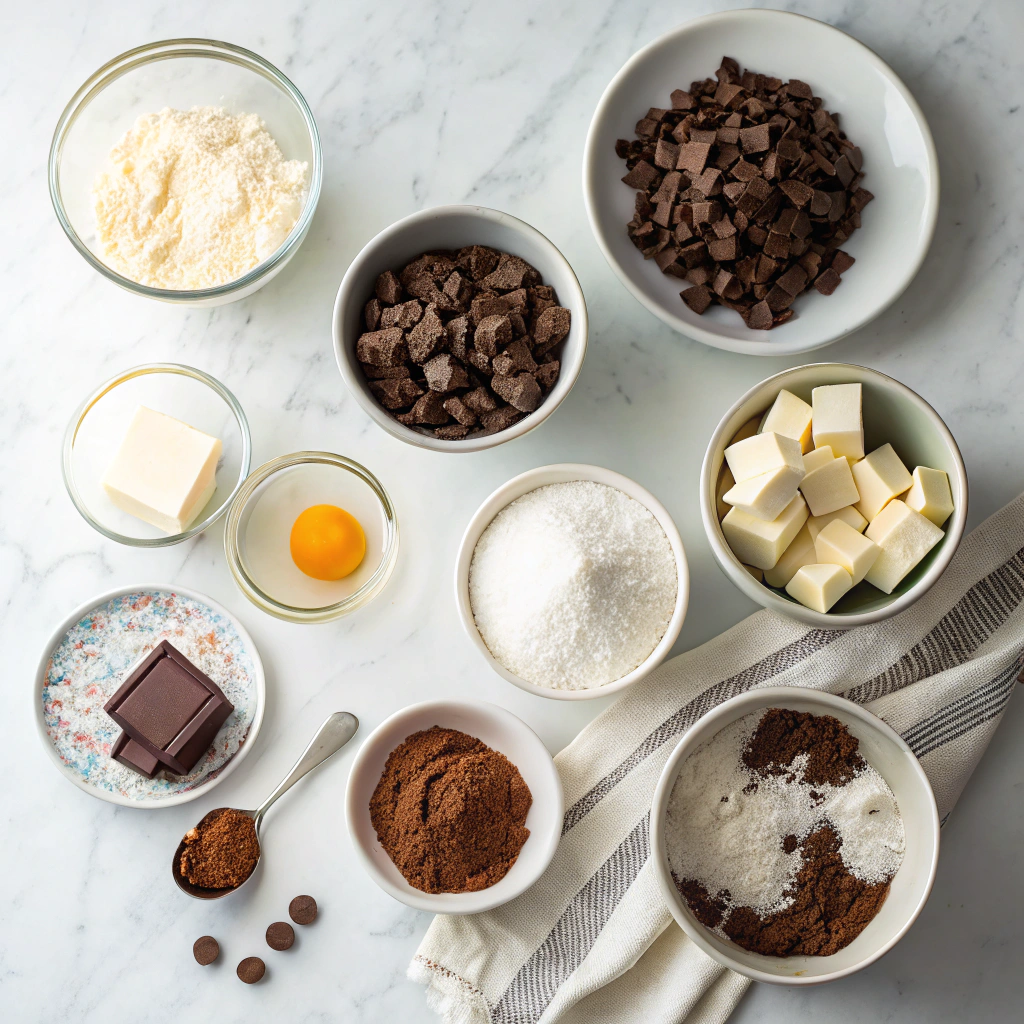
There’s something undeniably nostalgic about biting into a Hostess cupcake—that perfect balance of moist chocolate cake, creamy filling, and glossy chocolate glaze. Today, we’re bringing that childhood favorite into your kitchen with a homemade version that’s even more decadent. Let’s gather our ingredients and bake up some magic!
Ingredients You’ll Need
- 1 ½ cups all-purpose flour – The foundation of our cupcakes. Spoon and level it to avoid dense cakes!
- 1 cup granulated sugar – For just the right sweetness without overpowering the chocolate.
- ⅓ cup unsweetened cocoa powder – Use high-quality cocoa for that deep, rich flavor.
- 1 teaspoon baking soda – Our little leavening hero to keep the cupcakes light and airy.
- ½ teaspoon salt – A pinch to balance and enhance all the flavors.
- 1 cup warm water – Surprising, right? Water keeps the crumb tender and lets the chocolate shine.
- ⅓ cup vegetable oil – For moisture without heaviness. You could also use melted coconut oil for a subtle twist.
- 1 tablespoon apple cider vinegar – The secret weapon! It reacts with the baking soda for the perfect rise.
- 2 teaspoons vanilla extract – A splash to round out the flavors beautifully.
For the luscious filling and glaze:
- ½ cup unsalted butter, softened – The base of our creamy filling. Room temperature is key!
- 1 ½ cups powdered sugar – Sifted to avoid lumps in your filling.
- 2 tablespoons heavy cream or milk – Adjust for your desired consistency—thick but pipeable.
- 1 teaspoon vanilla extract – Because vanilla makes everything better.
- 1 cup semi-sweet chocolate chips – Melted into a glossy glaze for that signature Hostess finish.
- 2 tablespoons coconut oil or butter – To thin the chocolate for a smooth, drippy topping.
Step-by-Step Baking Guide
Let’s walk through this together—I promise it’s easier than you think!
- Preheat and Prep: Start by preheating your oven to 350°F (175°C). Line a muffin tin with cupcake liners—I love using classic white ones for that authentic Hostess look.
- Whisk Dry Ingredients: In a large bowl, sift together the flour, sugar, cocoa powder, baking soda, and salt. Sifting is worth the extra step—it prevents clumps and ensures a light texture.
- Mix Wet Ingredients: In another bowl, combine the warm water, vegetable oil, vinegar, and vanilla. The warmth of the water helps bloom the cocoa, intensifying its flavor.
- Combine Gently: Pour the wet ingredients into the dry and whisk until just combined. A few small lumps are okay—overmixing leads to tough cupcakes!
- Fill and Bake: Divide the batter evenly among the liners, filling each about ⅔ full. Bake for 18-20 minutes, or until a toothpick comes out clean. Let them cool completely before filling—patience is key here.
While your cupcakes cool, let’s whip up that dreamy filling… (Stay tuned for the next steps in Part 2!)
Conclusion
There you have it—the ultimate recipe for Irresistible Hostess Chocolate Cupcakes that bring nostalgia and indulgence to every bite. From the rich, moist chocolate cake to the creamy marshmallow filling and glossy chocolate glaze, these cupcakes are a labor of love worth every minute. Whether you’re baking for a special occasion or just treating yourself, this recipe is sure to impress.
Now it’s your turn! Whip up a batch, share them with friends, or savor them all yourself—no judgment here. And don’t forget to let us know how they turned out in the comments below. Craving more sweet inspiration? Check out our other decadent dessert recipes for your next baking adventure!
FAQs
Can I make these cupcakes ahead of time?
Absolutely! These cupcakes stay fresh for up to 3 days when stored in an airtight container at room temperature. If you want to prepare them further in advance, you can freeze the unfrosted cupcakes for up to a month—just thaw and fill/glaze before serving.
What can I use instead of marshmallow fluff for the filling?
If you don’t have marshmallow fluff, you can substitute it with homemade marshmallow frosting or even a simple vanilla buttercream. Just pipe it into the center of the cupcakes for that signature creamy surprise!
Why did my glaze turn out too thick or too thin?
The glaze’s consistency depends on the temperature of your ingredients. If it’s too thick, add a teaspoon of warm milk or water. If it’s too thin, let it sit for a few minutes to thicken or add a bit more powdered sugar. Adjusting slowly is key!
Can I use a boxed cake mix instead of homemade batter?
Yes! For a shortcut, use your favorite chocolate cake mix—just follow the package instructions for cupcakes. The real magic is in the filling and glaze, so you’ll still get that classic Hostess charm.
How do I prevent my cupcakes from sticking to the liners?
Using high-quality non-stick liners or lightly greasing them with baking spray can help. Also, make sure your cupcakes are completely cooled before peeling the liners to avoid sticking.