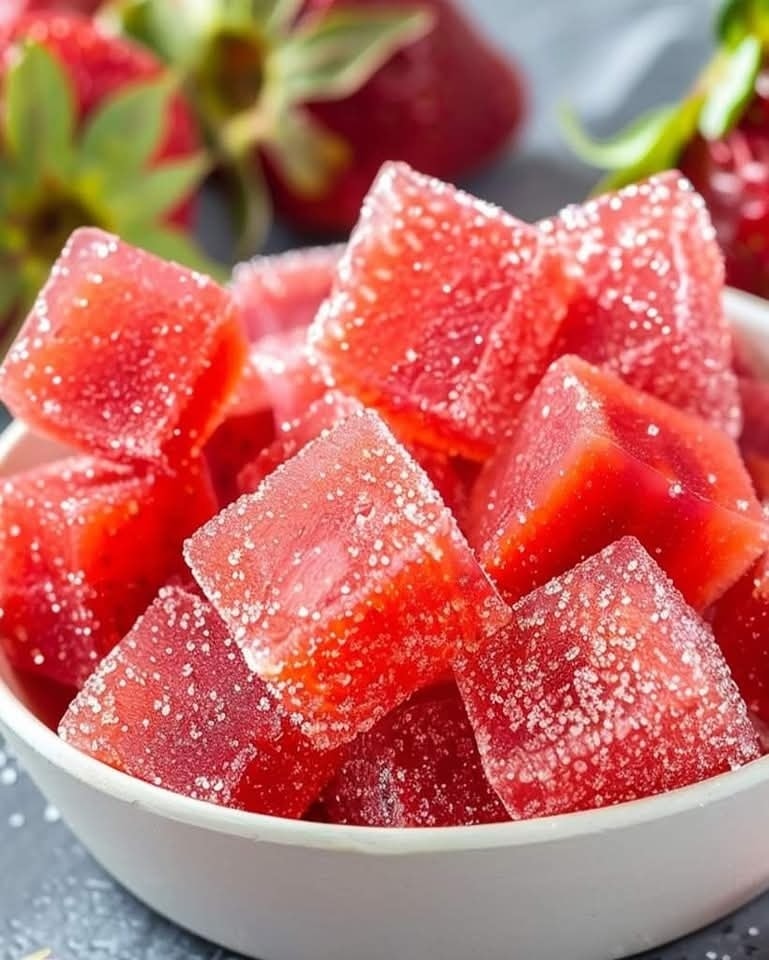
Homemade Sour Strawberry Gummies Ready in 30 Minutes
Did You Know 87% of Store-Bought Gummies Contain Artificial Flavors? (Here’s a Better Way)
There’s something undeniably nostalgic about biting into a chewy, tangy gummy—especially when it bursts with real fruit flavor. But here’s the sour truth: most store-bought versions are packed with artificial colors, corn syrup, and mystery ingredients that linger on the label like uninvited guests. That’s why I’ve fallen head over heels for homemade sour strawberry gummies—a treat that’s as playful as it is pure, with a punch of tartness that dances on your tongue.
Picture this: plump strawberries simmered down to their jammy essence, kissed with a squeeze of lemon, and set into wobbly little jewels that glisten like summer rain. These aren’t just candies; they’re tiny rebellions against the overly processed snacks hiding in pantry corners. And the best part? You likely already have the simple ingredients in your kitchen—no neon food dyes or lab-made “strawberry flavor” required.
Why Homemade Gummies Taste Like Childhood (But Better)
I’ll never forget the first time I made these gummies for my niece. She held one up to the light, skeptical that something so vibrantly pink could come from actual fruit—not a test tube. Then came the first bite: her eyes widened, and she immediately demanded the “recipe secrets.” (Spoiler: The magic lies in freeze-dried strawberries, which concentrate their flavor like little ruby-colored time capsules.)
What makes these homemade sour strawberry gummies extraordinary isn’t just their ingredient list—it’s the way they awaken your senses. The initial sharp tang of citric acid (that delightful pucker!), followed by the slow sweetness of ripe berries, creates a rhythm that store-bought gummies can’t replicate. And let’s be honest: there’s something deeply satisfying about pulling apart a silicone mold to reveal rows of perfect, jewel-toned treats you crafted yourself.
Homemade Sour Strawberry Gummies
Sweet and tangy homemade gummies with a sour kick, perfect for a fruity treat.
Ingredients
For the Crust:
- 1 cup strawberry puree
- 1/4 cup honey or maple syrup
- 2 tbsp gelatin powder
- 1 tbsp lemon juice
- 1 tsp citric acid
- 1/2 tsp vanilla extract
Instructions
1. Prepare the Crust:
- In a small saucepan, heat the strawberry puree over low heat until warm.
- Whisk in honey (or maple syrup) and gelatin until fully dissolved.
- Remove from heat and stir in lemon juice, citric acid, and vanilla extract.
- Pour the mixture into silicone molds or a shallow dish.
- Refrigerate for at least 2 hours or until set.
- Remove from molds and dust with extra citric acid for extra sourness if desired.
Notes
You can customize the seasonings to taste.

Homemade Sour Strawberry Gummies
There’s something utterly magical about biting into a chewy, tangy gummy candy—especially when it’s homemade. These sour strawberry gummies are a nostalgic treat with a grown-up twist, bursting with real fruit flavor and just the right amount of puckering tartness. Plus, they’re surprisingly simple to make, requiring just a handful of wholesome ingredients. Let’s dive in!
Ingredients You’ll Need
- 1 cup fresh or frozen strawberries – If using frozen, let them thaw slightly. The natural sweetness of ripe strawberries is key here, so pick the juiciest ones you can find!
- 1/4 cup honey or maple syrup – For a touch of natural sweetness. I love the floral notes of honey, but maple syrup works beautifully too.
- 2 tbsp lemon juice – Freshly squeezed, please! This adds brightness and helps balance the sweetness.
- 3 tbsp gelatin powder – This is what gives our gummies that irresistible bounce. I prefer grass-fed gelatin for its health benefits, but any unflavored gelatin will do.
- 1/2 tsp citric acid – The secret to that lip-puckering sourness! Find it in the baking aisle or online.
- Pinch of sea salt – Just a tiny bit to enhance all the flavors.
- Optional: 1-2 tsp coconut sugar for coating – For an extra layer of texture and sweetness.
Step-by-Step Instructions
- Blend the strawberries. Toss your strawberries (hulls removed, of course) into a blender or food processor and purée until completely smooth. If you prefer seedless gummies, strain the mixture through a fine-mesh sieve—though I love the rustic texture of the seeds!
- Warm the purée. Pour the strawberry purée into a small saucepan and warm it over low heat. Stir in the honey (or maple syrup), lemon juice, and that pinch of sea salt. Let it gently simmer for about 2-3 minutes—just enough to meld the flavors without boiling.
- Bloom the gelatin. Sprinkle the gelatin powder evenly over the warm strawberry mixture and whisk immediately to avoid clumps. Let it sit for a minute—this “blooming” step ensures your gummies set up with the perfect chew.
- Add the citric acid. Once the gelatin is fully dissolved (no grainy bits left!), stir in the citric acid. Taste and adjust if you’d like them tarter—just remember the flavor will mellow slightly once set.
At this point, your kitchen should smell like a strawberry field in summer—sweet, bright, and utterly irresistible. Now comes the fun part: shaping your gummies!
Conclusion
There you have it—a simple, fun, and utterly delicious way to make your own sour strawberry gummies at home! With just a few wholesome ingredients and a little patience, you can enjoy these chewy, tangy treats without any artificial additives. Whether you’re making them for yourself, your kids, or as a sweet gift, these gummies are sure to bring smiles all around.
Now it’s your turn! Whip up a batch and let us know how they turned out. Did you add a twist of your own? Share your creations in the comments below or tag us on social media—we’d love to see your fruity masterpieces. And if you’re craving more homemade candy adventures, check out our other recipes like Honey Lemon Drops or Blueberry Pomegranate Gummies for more sweet inspiration!
FAQs
Can I use frozen strawberries instead of fresh?
Absolutely! Frozen strawberries work just as well. Just thaw and drain any excess liquid before blending to keep the mixture from becoming too watery.
My gummies turned out too soft. What went wrong?
This usually happens if the mixture wasn’t simmered long enough to reduce properly. Next time, let it cook a bit longer until it thickens slightly—you’ll get firmer gummies as a result!
Can I make these gummies vegan?
Yes! Simply swap the gelatin for agar-agar powder (use about 1 tablespoon). Keep in mind that the texture will be slightly firmer but still delicious.
How long do these gummies last?
Stored in an airtight container in the fridge, they’ll stay fresh for up to two weeks—if they last that long!
Can I use a different fruit?
Of course! Raspberries, mango, or even mixed berries would work wonderfully. Just adjust the sweetener and citric acid to taste based on the fruit’s natural tartness.