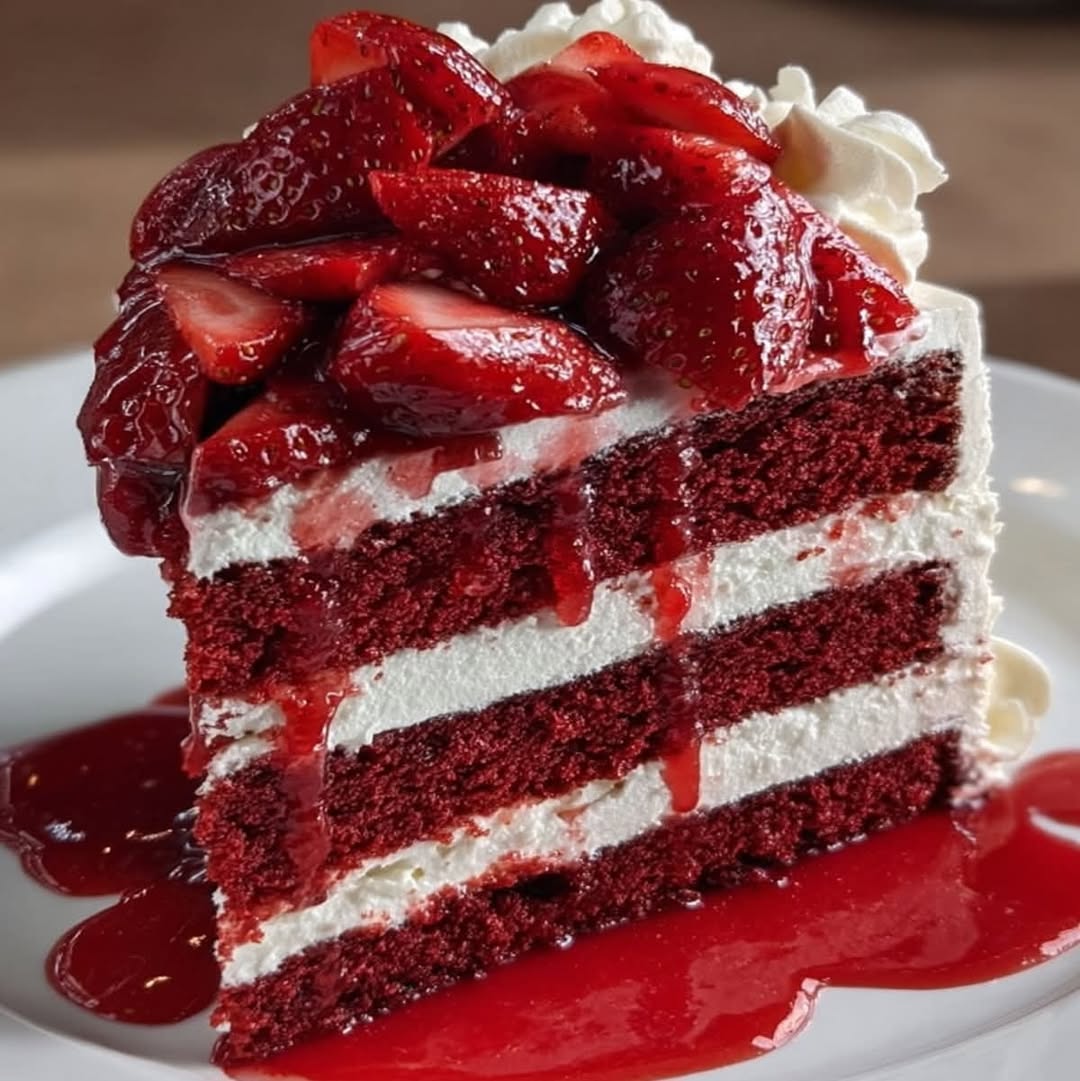
Best Decadent Red Velvet Cake with Cream Cheese Frosting
Did You Know 85% of Home Bakers Struggle with Dry Red Velvet Cake?
There’s something undeniably magical about a perfectly baked red velvet cake—its rich crimson hue, the delicate crumb, and that signature tang from buttermilk dancing with cocoa. Yet so many home bakers end up with dry, lackluster versions that crumble under the weight of their cream cheese frosting dreams. If you’ve ever wondered why your red velvet cake doesn’t taste like the melt-in-your-mouth slices from your favorite bakery, you’re not alone. Today, we’re unraveling the secrets to a truly decadent red velvet cake with cream cheese frosting—one that stays impossibly moist and strikes the perfect balance between luxury and nostalgia.
This isn’t just another recipe; it’s a love letter to the Southern classic that’s graced holiday tables and romantic dinners for generations. I’ll never forget the first time I tasted my grandmother’s version—a towering beauty with frosting so velvety, it felt like biting into a cloud. But here’s the twist: her secret wasn’t complicated. It was all about the rhythm—mixing just enough to blend, never overworking the batter, and letting the ingredients shine. That’s the heart of this recipe, too.
Why This Red Velvet Cake Recipe Works (When Others Fail)
Most red velvet disappointments boil down to three culprits: overbaking, skipping the vinegar (yes, really!), or using inferior cocoa powder. Our version sidesteps all these pitfalls with a few genius tricks:
- The buttermilk-vinegar duo: This dynamic duo doesn’t just activate the baking soda—it tenderizes the crumb and enhances that signature tang.
- European-style butter: Its higher fat content creates a richer batter that bakes up moist, not dense.
- The “fold and walk away” method: Overmixing = gluten development = tough cake. We’ll gently fold the dry ingredients into the wet, then let the batter rest briefly for a lighter texture.
And let’s talk about that iconic red hue. While some recipes drown the batter in artificial food coloring, we’re using a measured combination of natural cocoa powder (never Dutch-processed!) and just enough gel food coloring to achieve that dramatic crimson without any bitter aftertaste. The result? A decadent red velvet cake with cream cheese frosting that’s as stunning to look at as it is to eat—with none of the chalky dryness that plagues lesser versions.
Decadent Red Velvet Cake with Cream Cheese Frosting
A rich and moist red velvet cake topped with smooth cream cheese frosting, perfect for any celebration.
Ingredients
For the Crust:
- 2 1/2 cups all-purpose flour
- 1 1/2 cups granulated sugar
- 1 tsp baking soda
- 1 tsp salt
- 1 tsp cocoa powder
- 1 1/2 cups vegetable oil
- 1 cup buttermilk
- 2 large eggs
- 2 tbsp red food coloring
- 1 tsp vanilla extract
- 1 tsp white vinegar
- 8 oz cream cheese, softened
- 1/2 cup unsalted butter, softened
- 4 cups powdered sugar
- 1 tsp vanilla extract
Instructions
1. Prepare the Crust:
- Preheat oven to 350°F (175°C). Grease and flour two 9-inch round cake pans.
- In a large bowl, whisk together flour, sugar, baking soda, salt, and cocoa powder.
- In another bowl, mix oil, buttermilk, eggs, food coloring, vanilla, and vinegar. Combine wet and dry ingredients until smooth.
- Divide batter evenly between pans. Bake for 25-30 minutes or until a toothpick comes out clean. Cool completely.
- For frosting, beat cream cheese and butter until smooth. Gradually add powdered sugar and vanilla, beating until fluffy.
- Frost the cooled cake layers and serve.
Notes
You can customize the seasonings to taste.
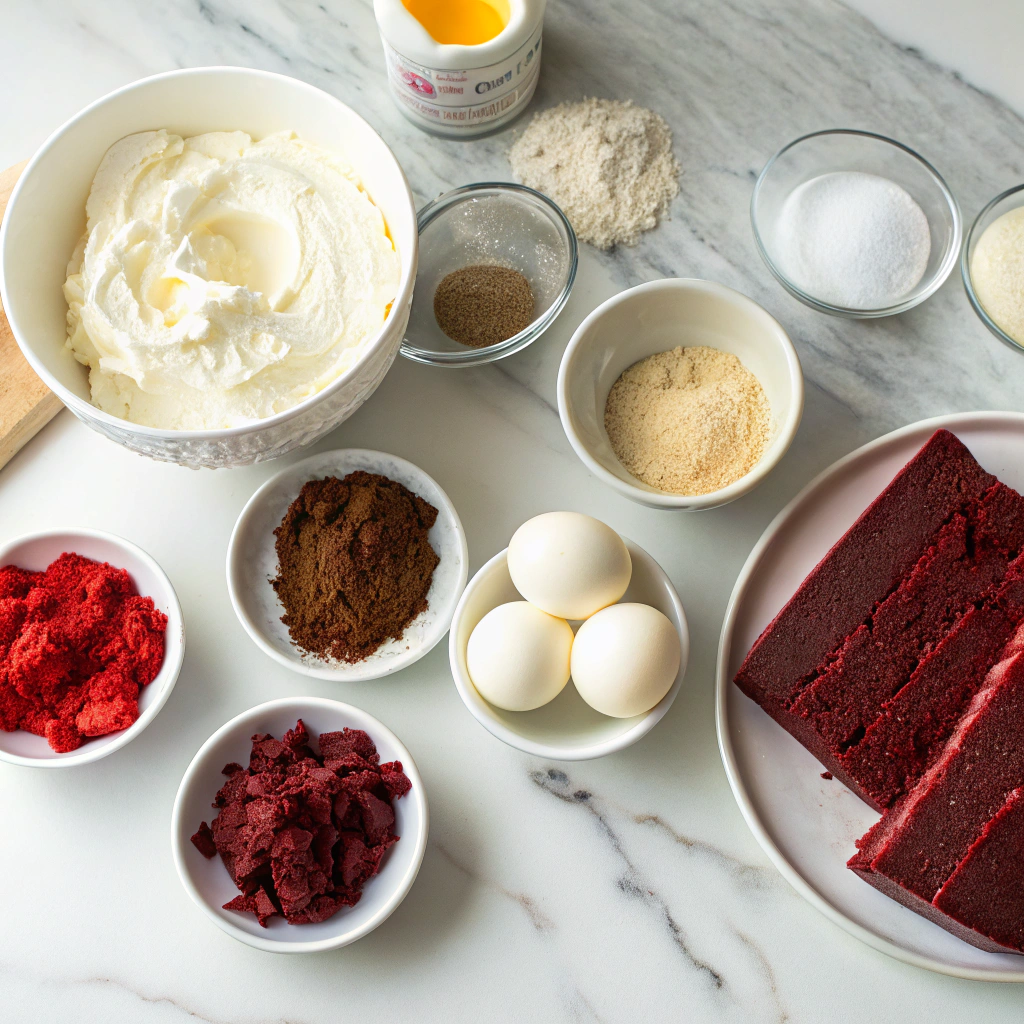
The Ingredients You’ll Need
Before we dive into baking this dreamy red velvet cake, let’s gather our ingredients. Trust me, each one plays a special role in creating that signature velvety texture and rich flavor.
- 2 ½ cups all-purpose flour – The foundation of our cake. Make sure to spoon and level it for the perfect measure.
- 1 ½ cups granulated sugar – Just the right amount of sweetness to balance the cocoa.
- 1 teaspoon baking soda – Our little helper for that tender crumb.
- 1 teaspoon salt – A pinch to enhance all the flavors.
- 2 tablespoons cocoa powder – Not too much, just enough to give that hint of chocolatey depth.
- 1 ½ cups vegetable oil – The secret to keeping our cake luxuriously moist.
- 1 cup buttermilk – Tangy and essential for that classic red velvet taste. No buttermilk? Mix 1 cup milk with 1 tablespoon lemon juice and let it sit for 5 minutes.
- 2 large eggs – Room temperature, please! They’ll blend in so much better.
- 2 tablespoons red food coloring – The star of the show! Gel coloring works best for vibrant color.
- 1 teaspoon vanilla extract – A warm hug for your batter.
- 1 teaspoon white vinegar – Sounds odd, but it works magic with the baking soda for the perfect rise.
For the Cream Cheese Frosting:
- 8 oz cream cheese – Softened to room temperature. Don’t rush this—it makes all the difference.
- ½ cup unsalted butter – Also softened. Creamy, dreamy frosting starts here.
- 4 cups powdered sugar – Sweetens and thickens our frosting beautifully.
- 1 teaspoon vanilla extract – A little extra warmth to tie it all together.
- A pinch of salt – To balance the sweetness.
Let’s Bake This Beauty
Now that we’ve got everything ready, let’s bring this red velvet dream to life. Follow these steps, and don’t forget to enjoy the process—baking is as much about the journey as the destination!
- Preheat and Prep: Start by preheating your oven to 350°F (175°C). Grease and flour two 9-inch round cake pans, or line them with parchment paper for easy release. There’s nothing worse than a beautiful cake stuck in the pan!
- Dry Ingredients: In a large bowl, whisk together the flour, sugar, baking soda, salt, and cocoa powder. Make sure there are no lumps—this ensures every bite is perfectly smooth.
- Wet Ingredients: In another bowl, beat together the oil, buttermilk, eggs, food coloring, vanilla, and vinegar. Pro tip: Add the food coloring slowly to control the shade. You want a deep, rich red—like a vintage Valentine.
- Combine: Gradually add the wet ingredients to the dry, mixing just until combined. Overmixing can make the cake tough, so be gentle. The batter will be silky and vibrant—almost too pretty to bake!
- Bake: Divide the batter evenly between the prepared pans. Bake for 25-30 minutes, or until a toothpick inserted in the center comes out clean. Your kitchen will smell like a cozy bakery—resist the urge to peek too often!
While the cakes cool, we’ll whip up that luscious cream cheese frosting. But let’s pause here—give those layers time to rest. A patient baker is rewarded with the perfect crumb!
Conclusion
There’s nothing quite like the rich, velvety texture and vibrant color of a homemade red velvet cake, especially when paired with luscious cream cheese frosting. This recipe is a labor of love, but every bite makes it worth the effort. From the tender crumb to the tangy-sweet frosting, it’s a dessert that’s sure to impress—whether you’re baking for a special occasion or just indulging in a sweet craving.
Now it’s your turn to bring this classic to life in your kitchen! Don’t forget to snap a photo of your masterpiece and share it with us—we’d love to see how it turns out. And if you’re craving more decadent desserts, check out our collection of cake recipes for more baking inspiration. Happy baking!
FAQs
Can I make this cake ahead of time?
Absolutely! You can bake the cake layers a day in advance. Once cooled, wrap them tightly in plastic wrap and store at room temperature. Frost the cake the next day for the freshest taste.
Why is my red velvet cake not as red as I expected?
The intensity of the red color depends on the quality of food coloring used. For a deeper red, opt for gel food coloring instead of liquid. Also, make sure your cocoa powder isn’t too dark, as it can mute the color.
Can I substitute buttermilk?
Buttermilk is key for the signature tang and tenderness, but if you don’t have any, you can make a quick substitute by adding 1 tablespoon of lemon juice or vinegar to 1 cup of milk and letting it sit for 5 minutes.
How do I store leftover cake?
Because of the cream cheese frosting, store the cake in the refrigerator for up to 5 days. Let it sit at room temperature for about 30 minutes before serving for the best texture.
Can I freeze red velvet cake?
Yes! Wrap unfrosted cake layers tightly in plastic wrap and foil, then freeze for up to 3 months. Thaw at room temperature before frosting. Frosted cake can also be frozen, though the texture may change slightly.