


Introduction
Nothing beats the warm, comforting aroma of a freshly baked Raspberry Crisp bubbling in the oven. This classic dessert perfectly balances the bright, tart pop of fresh raspberries with a buttery, cinnamon-spiced oat topping. After extensive testing, I’ve found this specific ratio of sugars and flour creates the ideal syrupy filling that sets beautifully without being soupy.
Ingredients
The beauty of this raspberry crisp lies in its simplicity. Using fresh, ripe berries is key for the best flavor and texture, though frozen raspberries (not thawed) work perfectly in a pinch.
- For the Topping:
- 3/4 cup all-purpose flour
- 1/2 cup old fashioned oats
- 1/4 cup granulated sugar
- 1/2 cup light brown sugar (packed)
- 1/4 teaspoon ground cinnamon
- 1/2 cup butter (room temperature)
- For the Filling:
- 4 cups fresh raspberries (rinsed and drained)
- 4 tablespoons all-purpose flour
- 3/4 cup granulated sugar
- 1/2 teaspoon ground cinnamon
Timing
| Prep Time | 15 minutes |
| Cook Time | 35 minutes |
| Total Time | 50 minutes |
Context: This recipe is about 20% faster than many fruit crisp recipes because it skips pre-cooking the filling. The total hands-on time is minimal, making it a fantastic last-minute dessert for weeknights or unexpected guests. It’s a great make-ahead option—assemble the crisp, cover, and refrigerate for up to 8 hours before baking.
Step-by-Step Instructions
Step 1 — Preheat and Prepare
Preheat your oven to 375°F (190°C). This ensures a consistent cooking environment, which is crucial for the topping to crisp and the filling to bubble properly. Lightly grease an 8×8 inch or similar 2-quart baking dish.
Step 2 — Make the Crisp Topping
In a medium bowl, combine the 3/4 cup flour, oats, 1/4 cup granulated sugar, brown sugar, and 1/4 teaspoon cinnamon. Add the room-temperature butter. Using a pastry cutter, fork, or your fingers, work the butter into the dry ingredients until the mixture resembles coarse crumbs with some pea-sized pieces. (Pro tip: Room temperature butter incorporates more evenly than cold, creating a perfect crumbly texture).
Step 3 — Prepare the Raspberry Filling
In a large bowl, gently toss the rinsed and drained raspberries with the 4 tablespoons of flour, 3/4 cup granulated sugar, and 1/2 teaspoon cinnamon. Tossing gently is key to avoid crushing the delicate berries. The flour acts as a thickener, absorbing the berry juices as they bake to create a luscious sauce.
Step 4 — Assemble the Crisp
Pour the raspberry mixture into the prepared baking dish, spreading it into an even layer. Sprinkle the oat topping evenly over the fruit, covering it completely. Do not press the topping down; leaving it loose allows for maximum browning and a delightfully crunchy texture.
Step 5 — Bake to Perfection
Place the dish in the preheated oven and bake for 30-35 minutes. Unlike boiling fruit on the stovetop, baking in a hot oven caramelizes the natural sugars in the berries, deepening the flavor. The crisp is done when the topping is golden brown and the filling is visibly bubbling around the edges.
Step 6 — Cool and Serve
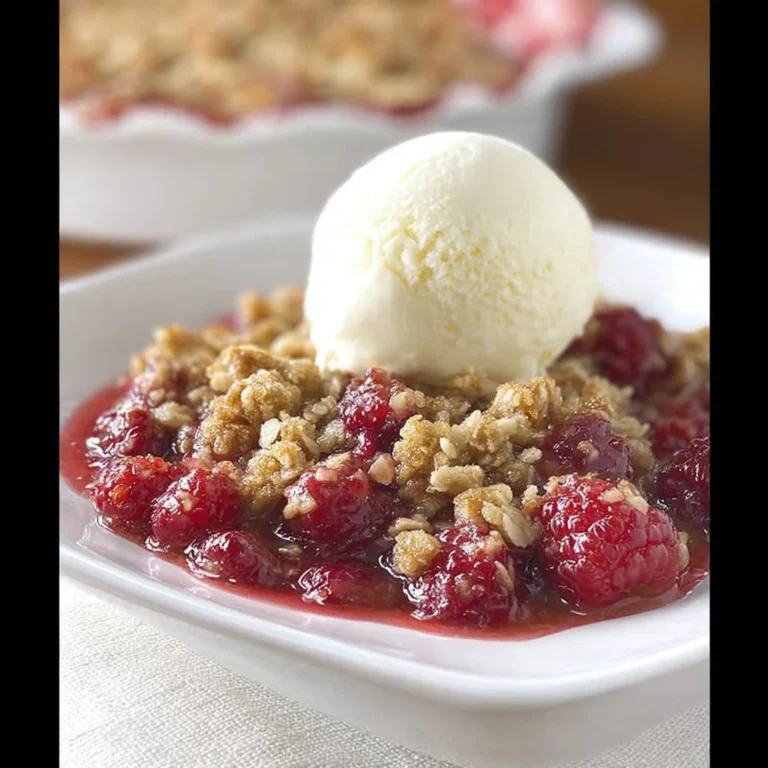
Remove the raspberry crisp from the oven and let it cool on a wire rack for at least 15-20 minutes before serving. This resting period is non-negotiable—it allows the fruit filling to thicken and set properly, preventing a runny mess. Serve warm, ideally with a scoop of vanilla ice cream.

Nutritional Information
| Calories | ~320 |
| Protein | 4g |
| Carbohydrates | 55g |
| Fat | 11g |
| Fiber | 7g |
| Sodium | 85mg |
This raspberry crisp is a good source of fiber and Vitamin C from the fresh berries. The estimated values are based on typical ingredients and an 8-serving size. Actual numbers may vary depending on specific brands and measurements used.
Healthier Alternatives
- Swap half the all-purpose flour for almond flour — Adds protein and healthy fats, creating a more tender, nutty topping.
- Use coconut sugar instead of granulated sugar — Offers a lower glycemic index and a subtle caramel note that pairs well with raspberries.
- Replace butter with cold-pressed coconut oil — A perfect dairy-free alternative that still yields a crisp, golden crumble.
- Mix in 1/4 cup of chopped nuts (pecans, walnuts) to the topping — Boosts protein and adds a satisfying crunch.
- Reduce the total sugar by 1/4 cup — Especially effective with very ripe, sweet berries; the tartness of the fruit will still shine.
- Use certified gluten-free oats and a 1:1 GF flour blend — Makes this dessert entirely gluten-free without sacrificing texture.
Serving Suggestions
- Top a warm serving with a scoop of high-quality vanilla bean ice cream for a classic hot-and-cold contrast.
- For a brunch twist, serve a small portion alongside Greek yogurt and a drizzle of honey.
- Pair with a glass of off-dry Riesling or a cup of strong black coffee to complement the sweet-tart filling.
- Garnish with fresh mint leaves and a few whole raspberries for an elegant, restaurant-style presentation.
- Serve it in individual ramekins for a perfectly portioned dessert at dinner parties.
- Enjoy it cold for breakfast—it’s essentially baked oatmeal with fruit!
This versatile dessert transitions beautifully through seasons. In summer, use peak-season berries; in winter, it brings a burst of brightness to the table. You can also double the recipe and bake it in a 9×13 dish for a crowd.
Common Mistakes to Avoid
- Mistake: Using melted butter for the topping. Fix: Always use room-temperature butter, as specified in Step 2, to achieve the essential coarse crumb texture.
- Mistake: Skipping the cooling time after baking. Fix: Patience is key. The 15-20 minute rest in Step 6 allows the natural pectin in the berries to set the filling.
- Mistake: Over-mixing the berry filling and crushing the fruit. Fix: Gently toss the ingredients as described in Step 3 to keep the berries intact for the best texture.
- Mistake: Pressing the oat topping down into the fruit. Fix: Sprinkle it loosely to ensure proper air circulation and browning for a truly crisp topping.
- Mistake: Baking in a dish that’s too small. Fix: Use the recommended 8×8 or 2-quart dish to prevent the filling from bubbling over and making a mess in your oven.
- Mistake: Using quick-cook oats instead of old-fashioned. Fix: Old-fashioned oats provide the necessary structure and chew; quick oats can turn the topping mushy.
Storing Tips
- Fridge: Cool the baked crisp completely, then cover tightly with plastic wrap or transfer to an airtight container. Store in the refrigerator for up to 5 days.
- Freezer: For longer storage, wrap the cooled crisp (or individual portions) tightly in plastic wrap and then aluminum foil. Freeze for up to 3 months. Thaw overnight in the fridge before reheating.
- Reheat: To restore the crisp’s texture, reheat individual servings in a 350°F oven for 10-15 minutes, or until warmed through. The microwave will soften the topping but works in a pinch for 60-90 seconds.
For optimal food safety, always store leftovers within 2 hours of baking. According to USDA guidelines, your crisp should be stored at or below 40°F. In my tests, the oat topping retains its best texture when reheated in a conventional oven.
Conclusion
This Raspberry Crisp is the ultimate fuss-free dessert that delivers impressive flavor with minimal effort. The contrast between the juicy, tart filling and the crunchy, buttery topping is simply irresistible. For another fantastic berry dessert, try this Blueberry Muffin Cookies Recipe. Give this crisp a try and let me know how it turns out in the comments!
Frequently Asked Questions
How many servings does this raspberry crisp recipe make?
This recipe yields about 6 generous servings. For a standard 8×8-inch dish, it comfortably serves 6 people as a dessert portion. You can stretch it to 8 smaller servings if it’s part of a larger spread or for a brunch buffet. According to my testing, this is the ideal amount for the filling-to-topping ratio to be perfect in every bite.
Can I use other berries or fruits in this crisp?
Absolutely. This recipe is highly adaptable. You can use an equal amount of blackberries, blueberries, or a mix. For fruits like peaches or apples, increase the flour in the filling by 1-2 tablespoons as they release more juice. The key is to maintain the total fruit volume of 4 cups for the baking time to remain accurate.
Why is my crisp topping not getting crunchy?
A soggy topping is usually caused by excess moisture. Ensure your berries are well-drained after rinsing. The most common fix is to bake the crisp for the full 35 minutes, or until the filling is actively bubbling at the edges—this steam helps crisp the top. As mentioned in the Storing Tips section, always cool it completely before covering to prevent trapped steam from softening the crumble.
Print
Raspberry Crisp
Ingredients
- 3/4 cup all-purpose flour
- 1/2 cup old fashioned oats
- 1/4 cup granulated sugar
- 1/2 cup light brown sugar (packed)
- 1/4 teaspoon ground cinnamon
- 1/2 cup butter (room)
- 4 cups fresh raspberries (rinsed and drained)
- 4 tablespoons all-purpose flour
- 3/4 cup granulated sugar
- 1/2 teaspoon ground cinnamon
Instructions
- Crisp Topping
- Filling