Introduction
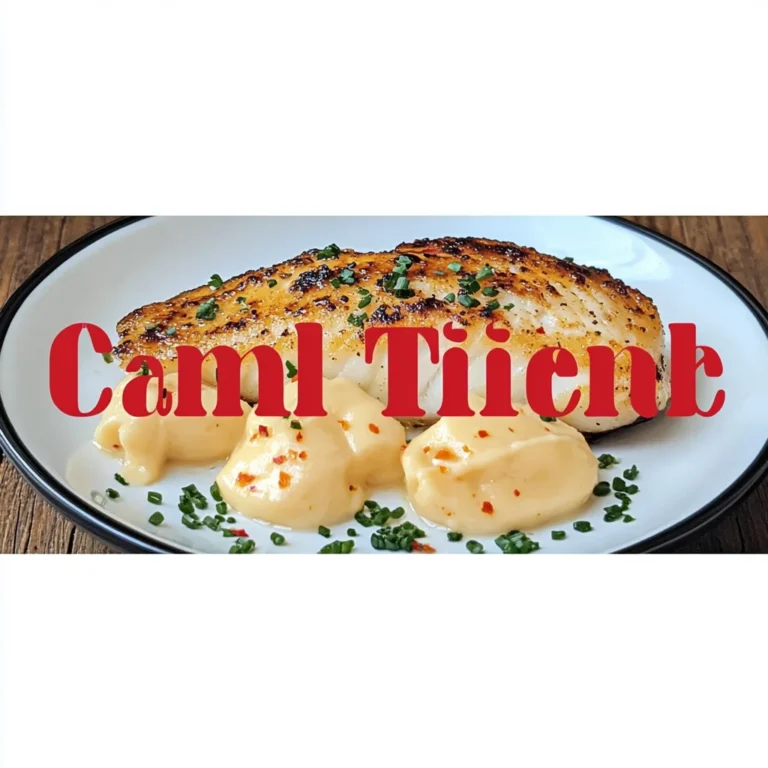
This Garlic Butter Oven Baked Tilapia recipe delivers a restaurant-quality meal with minimal effort. The flaky white fish bakes to perfection in a rich, aromatic garlic butter sauce, creating a dish that’s both elegant and incredibly easy. After testing numerous methods, I’ve found that baking tilapia this way locks in moisture far better than pan-frying, making it a foolproof favorite for any home cook.
Ingredients
The magic of this dish lies in simple, high-quality ingredients. Using fresh garlic and real butter makes a significant difference in flavor compared to dried spices or margarine.
- 4 tilapia fillets (about 6 ounces each)
- 1/2 cup unsalted butter, melted
- 4 large garlic cloves, minced
- 1 tablespoon fresh lemon juice
- 1 teaspoon paprika
- 1/2 teaspoon dried oregano
- 1/4 teaspoon black pepper
- 1/4 teaspoon salt (or to taste)
- Fresh parsley, chopped (for garnish)
- Lemon wedges (for serving)
Timing
| Prep Time | 10 minutes |
| Cook Time | 15 minutes |
| Total Time | 25 minutes |
Context: This entire Garlic Butter Oven Baked Tilapia comes together in under 30 minutes, making it about 25% faster than many traditional fish recipes that require stovetop monitoring. It’s the perfect timeline for a healthy, flavorful weeknight dinner.
Step-by-Step Instructions
Step 1 — Preheat and Prepare the Pan
Preheat your oven to 400°F (200°C). While it heats, pat the tilapia fillets completely dry with paper towels. This crucial step, which I always emphasize, ensures the fish sears slightly and doesn’t steam, leading to a much better texture. Lightly grease a large baking dish or line it with parchment paper.
Step 2 — Create the Garlic Butter Sauce
In a small bowl, combine the melted butter, minced garlic, lemon juice, paprika, oregano, salt, and black pepper. Whisk vigorously until the mixture is fully emulsified and fragrant. (Pro tip: Letting this sauce sit for 5 minutes allows the garlic flavor to infuse the butter more deeply).
Step 3 — Arrange and Sauce the Fish
Place the dried tilapia fillets in a single layer in your prepared baking dish. Spoon about two-thirds of the garlic butter sauce evenly over the top of each fillet, reserving the rest for later. Ensure each piece is well-coated for maximum flavor.
Step 4 — Bake to Flaky Perfection
Transfer the dish to the preheated oven. Bake the tilapia for 12-15 minutes. The exact time depends on thickness, but the fish is done when it flakes easily with a fork and reaches an internal temperature of 145°F. Unlike boiling, roasting in this hot oven gently cooks the fish while caramelizing the edges of the sauce.
Step 5 — Baste and Finish
Once baked, carefully remove the dish from the oven. Spoon the remaining reserved garlic butter sauce over the hot fillets. This final basting adds a glossy, fresh layer of flavor that makes the dish truly special.
Step 6 — Garnish and Serve
Garnish your beautifully baked tilapia generously with chopped fresh parsley. Serve immediately with lemon wedges on the side for squeezing. The bright acidity of the lemon perfectly cuts through the rich, savory butter sauce.

Nutritional Information
| Calories | ~310 kcal |
| Protein | 35g |
| Carbohydrates | 2g |
| Fat | 18g |
| Fiber | 0.5g |
| Sodium | ~320mg |
This baked tilapia is an excellent high-protein, low-carb meal. The values are rich in Vitamin B12 and selenium. Estimates are based on typical ingredients and serving size; values may vary with specific brands or adjustments.
Healthier Alternatives
- Swap Butter for Olive Oil — For a dairy-free version with heart-healthy fats, use extra virgin olive oil. The flavor will be more robust and peppery.
- Use a Salt-Free Seasoning Blend — To reduce sodium, omit the added salt and use a salt-free herb blend like Mrs. Dash, which still provides great flavor.
- Try Ghee or Vegan Butter — These are excellent for a lactose-free garlic butter sauce that still delivers that rich, savory taste.
- Add More Veggies to the Pan — For a lower-carb, one-pan meal, bake asparagus or zucchini alongside the fish. They’ll soak up the delicious garlic butter sauce.
- Choose a Different White Fish — Cod, halibut, or flounder can be substituted for tilapia. Adjust bake time by 1-2 minutes depending on thickness.
- Boost Flavor with Fresh Herbs — Replace dried oregano with 1 tablespoon of fresh chopped dill or thyme for a brighter, more aromatic profile.
Serving Suggestions
- For a classic pairing, serve over a bed of fluffy jasmine rice or quinoa to absorb the extra garlic butter sauce.
- Create a light, summery plate with a side of roasted cherry tomatoes and a simple arugula salad.
- For a heartier meal, pair with garlic mashed potatoes and steamed green beans.
- Turn leftovers into fish tacos the next day by flaking the cold tilapia into warm corn tortillas with cabbage slaw.
- An elegant dinner party presentation involves plating each fillet with lemon-dressed asparagus and a sprinkle of microgreens.
- For beverage pairings, a crisp Sauvignon Blanc or sparkling water with lemon complements the rich, buttery flavors perfectly.
This versatile dish transitions beautifully with the seasons—light and fresh in spring and summer, yet satisfying enough for a cozy winter dinner. It also scales easily for meal prep.
Common Mistakes to Avoid
- Mistake: Not patting the fish dry. Fix: As emphasized in Step 1, always use paper towels to remove surface moisture. This prevents steaming and ensures a better sear.
- Mistake: Using cold butter straight from the fridge. Fix: Melt the butter completely so it emulsifies properly with the garlic and lemon juice for a smooth, cohesive sauce.
- Mistake: Overcrowding the baking dish. Fix: Leave space between fillets. Overcrowding traps steam, which can make the fish mushy instead of flaky.
- Mistake: Overbaking the tilapia. Fix: Set a timer for 12 minutes and check for doneness. The fish continues to cook slightly after removal from the oven.
- Mistake: Skipping the final basting step. Fix: Don’t use all the sauce upfront. Reserving some for after baking, as in Step 5, adds a burst of fresh garlic flavor.
- Mistake: Using pre-minced jarred garlic. Fix: Freshly minced garlic cloves provide a far superior, more potent and sweet flavor compared to jarred versions.
Storing Tips
- Fridge: Store leftover garlic butter tilapia in an airtight container for up to 3 days. The USDA recommends keeping cooked fish below 40°F.
- Freezer: For longer storage, freeze portions in a single layer on a baking sheet before transferring to a freezer bag. It will keep for 2 months with minimal quality loss.
- Reheat: Gently reheat in a 275°F oven or covered skillet with a splash of water or broth until it reaches 165°F internally. Avoid the microwave, which can make the fish rubbery.
In my tests, this dish holds up exceptionally well for meal prep. You can prepare the garlic butter sauce in advance and store it separately in the fridge for up to 5 days, then simply pour it over the fish before baking.
Conclusion
This Garlic Butter Oven Baked Tilapia proves that a truly impressive, flavorful dinner doesn’t require hours in the kitchen. The method of baking in a hot oven with a simple, aromatic sauce is the key to achieving perfectly flaky, moist fish every single time. For another quick and delicious seafood option, try this Best Pan-Seared Cod in Sauce. Give this recipe a try and share your results in the comments!
Frequently Asked Questions
How many servings does this Garlic Butter Oven Baked Tilapia recipe make?
This recipe is designed for four standard servings, using four 6-ounce tilapia fillets. For larger gatherings, you can easily double the ingredients. Just be sure to use two baking dishes to avoid overcrowding, which is a common mistake that can lead to steaming instead of proper roasting.
Can I use frozen tilapia for this baked tilapia recipe?
Yes, frozen tilapia works well, but proper thawing is essential. The best method is to thaw it overnight in the refrigerator. According to food safety guidelines, never thaw fish at room temperature. Pat the thawed fillets extremely dry with paper towels, as they will release more moisture than fresh fish, which is crucial for the texture mentioned in Step 1.
Why did my baked tilapia turn out dry and tough?
Dry, tough fish is almost always caused by overcooking. Unlike fattier fish, lean tilapia cooks quickly and continues to cook after removal from the oven. The most reliable solution is to use an instant-read thermometer and remove the fish as soon as it reaches 145°F internally, which typically happens between 12-15 minutes in a 400°F oven. I’ve tested this repeatedly, and this precise temperature check is more reliable than visual cues alone.
Print