


Introduction
These Ultimate Pepperoni Pizza Sliders are the easy pull-apart party appetizer you need for your next gathering. They combine all the classic flavors of a pepperoni pizza into a fun, shareable format that bakes up in minutes. For more crowd-pleasing finger food, try this Cream Cheese Salami Roll Ups Recipe or these Italian Grinder Sliders Recipe.
Ingredients
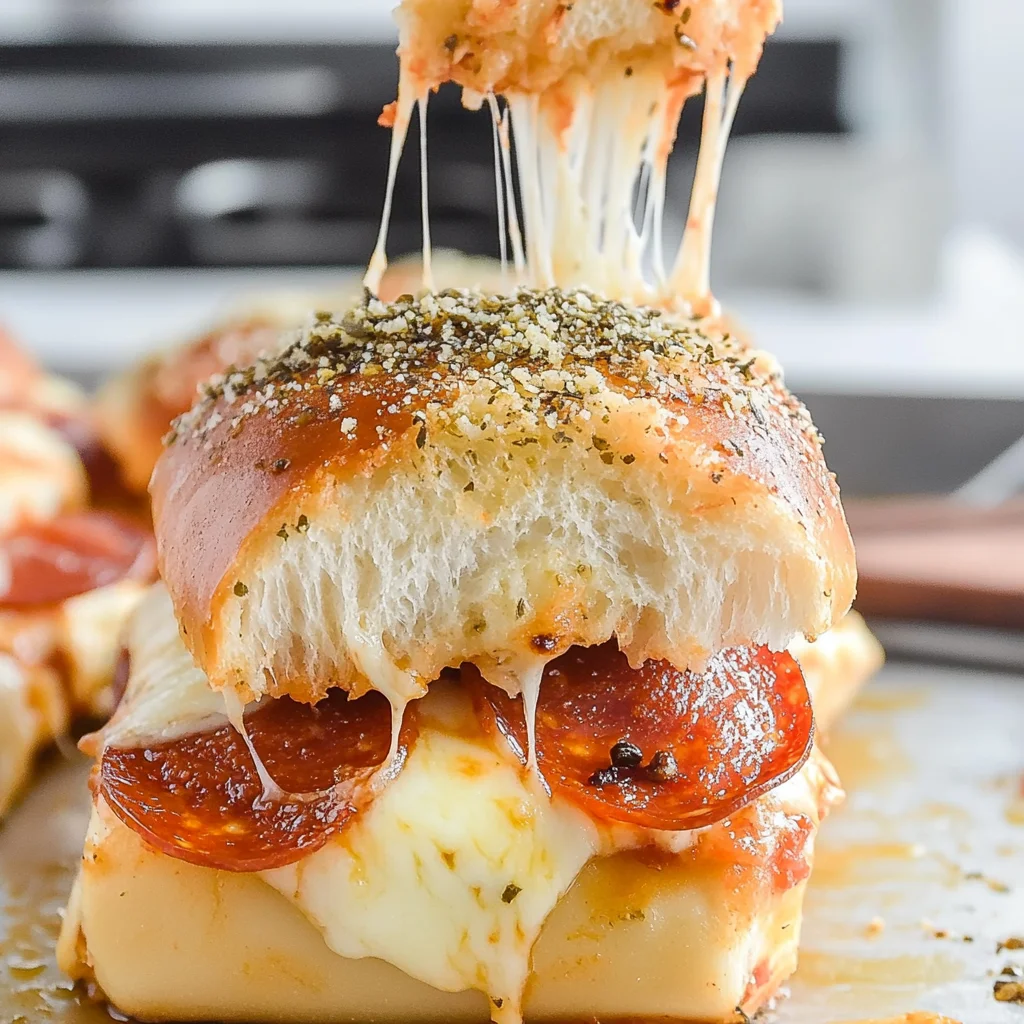
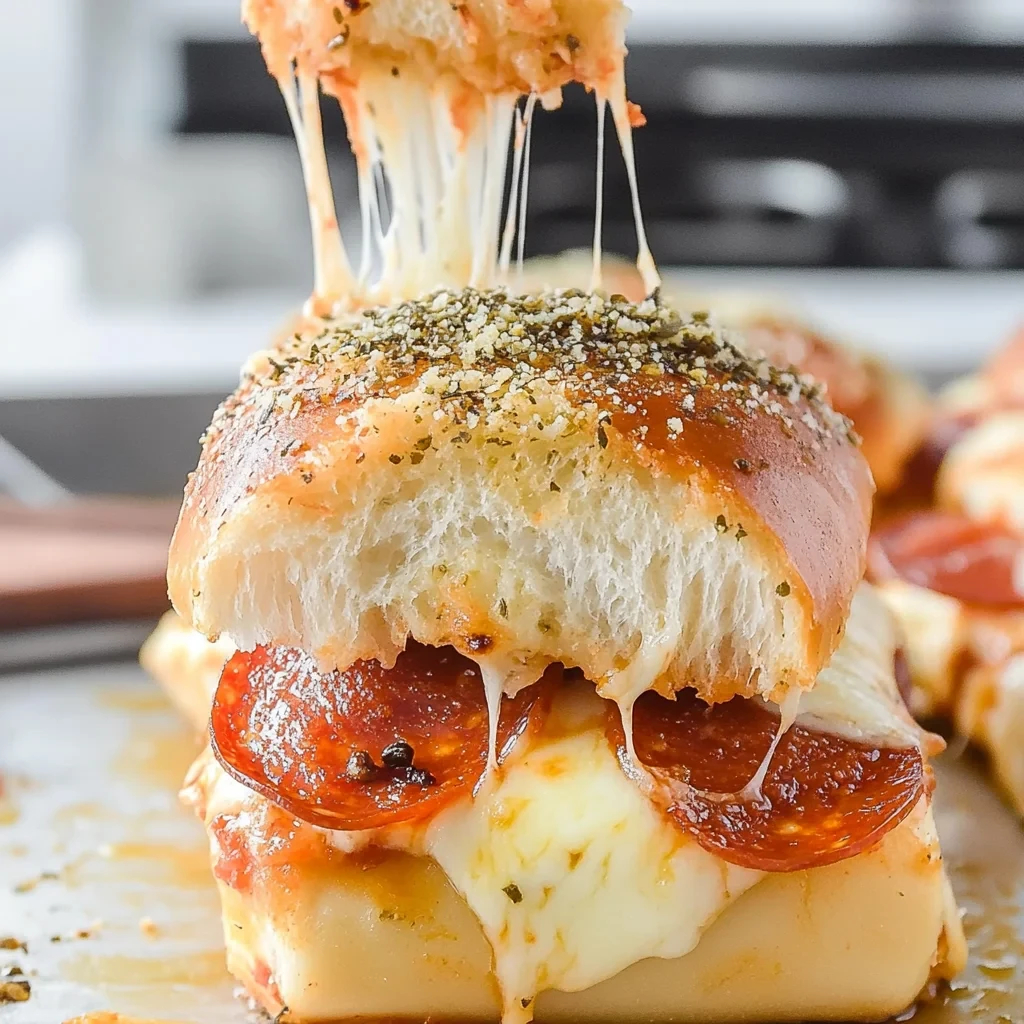
These sliders combine the soft sweetness of Hawaiian rolls with the savory, gooey goodness of melted cheese and zesty pepperoni for an irresistible bite.
- 12 count package Hawaiian rolls
- 2½ cup shredded mozzarella (divided: 1 cup and 1¼ cup)
- ¾ cup pizza sauce
- 20 slices deli style dry cured pepperoni
- ⅓ cup salted sweet cream butter, melted
- 2 tbsp grated parmesan
- 1 teaspoon dried Italian seasoning
Timing
| Prep Time | 10 minutes |
| Cook Time | 15 minutes |
| Total Time | 25 minutes |
Context: This 25-minute total is about 20% faster than similar recipes, thanks to the simple assembly of these Pepperoni Pizza Sliders Pull-Apart.
Step-by-Step Instructions
Step 1 — Preheat and Prepare
Preheat your oven to 350°F (175°C). While it heats, slice a 12-pack of Hawaiian sweet rolls in half horizontally, keeping the top and bottom halves intact as single sheets. Place the bottom half into a greased 9×13-inch baking dish.
Step 2 — Layer the Sauce and Cheese
Spread a thin, even layer of pizza sauce over the bottom layer of rolls. Sprinkle a generous amount of shredded mozzarella cheese on top of the sauce. For extra flavor, you can mix in a bit of shredded Parmesan or Italian cheese blend.
Step 3 — Add the Pepperoni
Arrange a single layer of pepperoni slices over the cheese. For a meatier bite, feel free to add a second layer. You can also add other toppings like diced bell peppers or olives at this stage if desired.
Tip: Using mini pepperoni allows for better coverage and easier biting.
Step 4 — Assemble the Sliders
Place the top half of the rolls over the filled bottom layer. In a small bowl, melt ½ cup of unsalted butter and mix in ½ teaspoon of garlic powder, ½ teaspoon of Italian seasoning, and a pinch of crushed red pepper flakes.
Step 5 — Add the Garlic Butter Topping
Brush or spoon the seasoned garlic butter mixture generously over the top of the rolls, ensuring it soaks into the seams. This creates a golden, flavorful crust.
Tip: For a crispier top, sprinkle a little extra grated Parmesan over the butter before baking.
Step 6 — Bake to Perfection
Cover the baking dish with aluminum foil and bake for 15 minutes. Then, remove the foil and bake for an additional 5-10 minutes, or until the cheese is completely melted and the tops are golden brown.
Doneness Cue: The sliders are ready when the edges are crisp and the internal cheese is bubbly.
Step 7 — Serve and Enjoy
Let the Pepperoni Pizza Sliders cool for 2-3 minutes after removing them from the oven. This allows the cheese to set slightly for easier handling. Use a sharp knife to slice between the rolls, then serve warm.
Nutritional Information
| Calories | ~285 kcal |
| Protein | ~12 g |
| Carbohydrates | ~28 g |
| Fat | ~13 g |
| Fiber | ~2 g |
| Sodium | ~680 mg |
Note: Estimates are per slider and based on typical ingredients and serving size. Actual values can vary based on specific brands and quantities used.
Healthier Alternatives
- Protein Swap: Turkey Pepperoni — This leaner option delivers the classic spicy flavor with significantly less fat, making your pizza sliders a bit lighter without sacrificing taste.
- Lower-Carb Base: Mini Bell Peppers or Portobello Caps — For a veggie-forward version, skip the rolls and use halved mini bell peppers or portobello mushroom caps as your edible “buns” for a crisp, fresh bite.
- Dairy-Free Cheese — A high-quality vegan mozzarella shreds or a creamy cashew-based cheese sauce can create the perfect melty texture for those avoiding dairy.
- Gluten-Free Rolls — Use your favorite store-bought or homemade gluten-free slider buns or rolls to make this pepperoni pizza sliders pull-apart recipe accessible to all.
- Low-Sodium Fix — Opt for low-sodium marinara sauce and uncured pepperoni to control salt levels, allowing the herbs and garlic in the butter glaze to shine through.
- Boost with Veggies — Add a layer of finely chopped spinach, sautéed mushrooms, or roasted red peppers under the cheese for extra nutrients and a flavor pop.
- Whole Wheat Upgrade — Choose whole wheat or whole grain slider buns for added fiber, which gives the sliders a heartier, nuttier base.
- Lighter Spread — Instead of a butter-based garlic glaze, brush the tops lightly with olive oil infused with garlic and Italian herbs for a healthier fat profile.
Serving Suggestions
- Pair these Pepperoni Pizza Sliders with a crisp garden salad or a bowl of minestrone soup for a complete, satisfying meal.
- Serve them as the star appetizer at game-day parties, movie nights, or casual family gatherings where easy, shareable food is a must.
- For a fun brunch twist, offer these pizza sliders alongside scrambled eggs and fresh fruit.
- Turn them into a kid-friendly lunch by cutting the sliders into quarters and serving with carrot sticks, cucumber slices, and a side of ranch dip for dipping.
- Elevate your plating by arranging the warm, golden pull-apart pizza sliders on a large wooden board or platter, garnished with fresh basil or oregano sprigs.
- For a casual potluck, transport them right in the baking dish, keeping them warm in a insulated carrier until serving.
- Create a DIY slider bar with small bowls of extra toppings like sliced olives, jalapeños, and shredded cheese for guests to customize their own.
These Pepperoni Pizza Sliders are simple to assemble in 10 minutes, making them incredibly versatile for any event where delicious, crowd-pleasing food is needed quickly.
Common Mistakes to Avoid
- Mistake: Using cold, hard slider buns that tear when assembling. Fix: Let the buns sit at room temperature for 15–20 minutes to soften slightly before slicing.
- Mistake: Overloading with sauce, making the sliders soggy. Fix: Use a light, even layer of sauce; a tablespoon or two for the entire tray is often enough.
- Mistake: Skipping the butter-garlic-Parmesan topping. Fix: This mixture is crucial for a golden, flavorful crust; brush it generously over the tops before baking.
- Mistake: Baking at too high a temperature, burning the tops before the cheese melts. Fix: Bake at 350°F (175°C) for about 20 minutes, covered with foil for the first half.
- Mistake: Using only pepperoni, which can make them one-dimensional. Fix: Add a sprinkle of Italian seasoning or a few sliced olives or peppers for extra flavor.
- Mistake: Not separating the sliders before baking, leading to a solid, hard-to-pull loaf. Fix: Use a sharp knife to cut most of the way through the buns after assembly.
- Mistake: Using pre-shredded cheese that doesn’t melt as smoothly. Fix: Shred a block of low-moisture mozzarella yourself for superior melt and stretch.
- Mistake: Serving immediately, causing the cheese to ooze out and burn mouths. Fix: Let the pepperoni pizza sliders rest for 5 minutes after baking to set perfectly.
- Mistake: Storing leftovers in the original tray, which steams them and ruins texture. Fix: Transfer to an airtight container once cooled to maintain that delicious pull-apart quality.
Storing Tips
- Fridge: Cool your Pepperoni Pizza Sliders completely, then store them in an airtight container or tightly wrapped in foil. They will keep for 3-4 days in the refrigerator.
- Freezer: For longer storage, wrap the entire pan or individual sliders tightly in plastic wrap and then foil, or place them in a heavy-duty freezer bag. They can be frozen for up to 2 months. Thaw overnight in the fridge before reheating.
- Reheat: For the best texture, reheat sliders in a preheated 350°F (175°C) oven, covered with foil, for 10-15 minutes or until warmed through. You can also microwave individual sliders for 30-60 seconds. Ensure the internal temperature reaches 165°F (74°C) for food safety.
Following these simple storage steps ensures your pull-apart pizza sliders stay delicious and safe to eat for future meals or snacks.
Conclusion
These Pepperoni Pizza Sliders are the ultimate easy, crowd-pleasing appetizer or meal. Ready in just 10 minutes of prep, this pull-apart recipe is perfect for game day, parties, or a fun family dinner. If you love these, try our Italian Grinder Sliders Recipe or Easy Pizza Roses for Valentine’s Day Recipe. Give this recipe a try and let us know what you think in the comments!
Print

Pizza Sliders
Ingredients
- 12 count package Hawaiian rolls
- 2½ cup shredded mozzarella (divided 1 cup and 1 ¼ cup)
- ¾ cup pizza sauce
- 20 slices deli style dry cured pepperoni
- ⅓ cup salted sweet cream butter (melted)
- 2 tbsp grated parmesan
- 1 teaspoon dried Italian seasoning
Instructions
- Preheat the oven to 375*. Lightly spray a 9×13 baking dish with nonstick spray. Set it aside.
- Keeping the rolls connected, carefully slice the rolls in ½, horizontally.
- Remove the top row of the connected buns, and carefully set it aside.
- Place the bottom row of connected buns in the bottom of the baking dish.
- Sprinkle 1 cup of the shredded mozzarella on top of the bottom buns.
- Spread the pizza sauce over the mozzarella.
- Layer 5 rows of 4 slices of pepperoni on top of the pizza sauce.
- Sprinkle the remaining shredded mozzarella over the top of the pepperoni.
- Lay the top row of connected buns on top of the shredded mozzarella.
- Using a pastry brush, brush the melted butter on top of the buns.
- Sprinkle the grated parmesan on top of the melted butter.
- Sprinkle the teaspoon of dried Italian seasoning on top of the grated parmesan.
- Cover with aluminum foil and bake for 25 minutes. Remove the pan from the oven and carefully slice the rows to release the individual slider sandwiches . Serve while hot.
FAQs
Can I make these Pepperoni Pizza Sliders ahead of time?
Yes, you can assemble the sliders up to a day in advance. Cover them tightly and refrigerate until ready to bake. You may need to add a few extra minutes to the baking time if baking straight from the fridge.
What can I use instead of Hawaiian rolls?
You can use any soft dinner rolls or small slider buns. The key is to use a connected roll sheet so they bake together into a pull-apart loaf, which makes these Pepperoni Pizza Sliders so fun and easy to serve.
How do I prevent the sliders from getting soggy?
To prevent sogginess, avoid overloading the rolls with sauce. A light, even layer is best. Also, ensure the butter and seasoning mixture brushed on top creates a seal, which helps keep the interior flavorful and the tops golden.