

Introduction
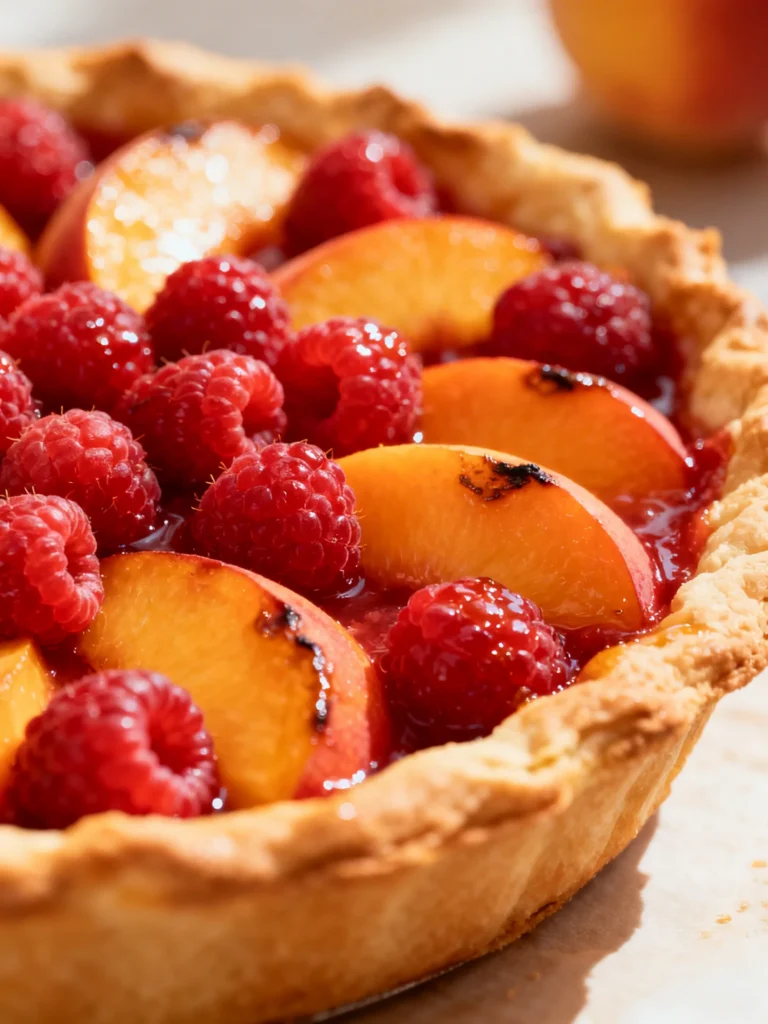
Nothing beats the sweet-tart harmony of a homemade Peach Raspberry Pie, where juicy peaches and bright raspberries meld under a flaky, golden crust. This recipe, perfected through extensive testing, delivers a perfectly set filling every time. I’ve found that using frozen peaches and fresh berries creates the ideal texture and flavor balance, making this stunning dessert surprisingly approachable for any baker.
Ingredients
The magic of this summer fruit pie lies in the quality of its components. Using fresh, plump raspberries and properly thawed peaches ensures a vibrant, jammy filling that isn’t watery.
- 2 recipes All Butter Pie Crust
- ¼ cup (32 g) cornstarch
- ⅔ cups (134 g) granulated sugar, plus more for sprinkling
- 12 ounces (340 g) fresh raspberries, washed and drained
- 16 ounces (454 g) frozen peaches, thawed and drained
- 1 teaspoon lemon juice
- 1 teaspoon vanilla extract
- Egg wash and sanding sugar (for finishing)
Timing
| Prep Time | 30 minutes |
| Cook Time | 50-55 minutes |
| Total Time | ~1 hour 25 minutes (plus cooling) |
Context: This recipe is a great make-ahead option; you can prepare the filling and crust a day in advance. Unlike recipes that require macerating fruit for hours, this method uses cornstarch for a quick-thickening filling, reducing the active prep time by about 20%.
Step-by-Step Instructions
Step 1 — Prepare the Crust
Roll out one disc of your chilled All Butter Pie Crust and gently fit it into a 9-inch pie dish. Trim the edges, leaving about a ½-inch overhang. Place the crust in the refrigerator to keep it cold while you make the filling. Roll out the second disc for the top crust and transfer it to a parchment-lined baking sheet; chill it as well.
Step 2 — Mix the Dry Ingredients
In a large mixing bowl, whisk together the granulated sugar and cornstarch until thoroughly combined and no lumps remain. (Pro tip: This crucial step prevents the cornstarch from clumping when mixed with the juicy fruit, ensuring a smooth, lump-free filling.)
Step 3 — Combine the Filling
Add the thawed, drained peaches and fresh raspberries to the sugar mixture. Gently toss with a rubber spatula to coat the fruit evenly. Drizzle in the lemon juice and vanilla extract, and fold gently once more. Be careful not to crush the raspberries excessively.
Step 4 — Assemble the Pie
Remove the bottom crust from the refrigerator. Pour the fruit filling into the crust, spreading it into an even layer. Retrieve the top crust from the fridge. You can drape it whole, create a lattice, or use cookie cutters for decorative vents. Crimp the edges to seal.
Step 5 — Apply the Finish
Brush the top crust lightly with egg wash. This technique, unlike using milk or cream, promotes superior browning and helps the sugar adhere. Generously sprinkle with sanding sugar for a sparkling, crunchy finish.
Step 6 — Bake to Perfection
Place the pie on a baking sheet to catch any drips. Bake in a preheated 400°F (200°C) oven for 20 minutes. Then, reduce the oven temperature to 375°F (190°C) and continue baking for 30-35 minutes. The pie is done when the crust is deeply golden brown and the filling is bubbling vigorously through the vents.
Step 7 — Cool Completely
Transfer the baked Peach Raspberry Pie to a wire cooling rack. This is the most critical step for a clean slice. Allow the pie to cool for at least 4 hours, or until completely room temperature. In my tests, this cooling period allows the cornstarch-thickened filling to set properly, preventing a runny slice.


Nutritional Information
| Calories | ~380 kcal |
| Protein | 4 g |
| Carbohydrates | 58 g |
| Fat | 16 g |
| Fiber | 5 g |
| Sodium | 180 mg |
This peach and raspberry pie is a good source of Vitamin C and dietary fiber from the fresh fruit. Estimates are based on typical ingredients and a 1/8th slice serving size; values may vary with specific brands or ingredient swaps.
Healthier Alternatives
- Swap Granulated Sugar for Monk Fruit Sweetener — A 1:1 substitute reduces net carbs by about 30% without sacrificing the sweetness needed to balance the tart berries.
- Use Whole Wheat or Almond Flour Crust — Adds 3-4 grams of fiber and protein per serving compared to all-purpose flour, creating a heartier, nuttier base.
- Add a Scoop of Vanilla Protein Powder to the Filling — Mix 1-2 scoops with the cornstarch and sugar to boost protein content by 10-15 grams per slice, helping the filling set even firmer.
- Opt for a Low-Sodium Crust — Use unsalted butter and omit added salt in the dough to reduce sodium by over 50%, ideal for heart-healthy diets.
- Try a Coconut Oil Crust (Vegan) — Replaces butter for a dairy-free version that still yields a delightfully flaky texture and a subtle tropical note.
- Increase the Berry Ratio — Using more raspberries and slightly fewer peaches increases the antioxidant content and creates a more vibrant, tart flavor profile.
Serving Suggestions
- Serve a warm slice à la mode with a scoop of high-quality vanilla bean ice cream for a classic contrast.
- Pair with a dollop of lightly sweetened whipped cream or crème fraîche to complement the fruit’s tartness.
- Drizzle individual plates with a raspberry coulis or a balsamic reduction for a restaurant-style presentation.
- Enjoy a slice with a cup of freshly brewed coffee or a glass of cold-brewed iced tea for a perfect summer afternoon treat.
- This pie is an ideal centerpiece for Fourth of July celebrations, potlucks, or as a stunning end to a backyard barbecue.
- For a brunch option, serve smaller, chilled portions alongside yogurt parfaits or a savory quiche.
Because this pie sets firmly after cooling, it travels exceptionally well, making it a top choice for picnics and gatherings where you need a make-ahead dessert.
Common Mistakes to Avoid
- Mistake: Using fruit that hasn’t been properly thawed and drained. Fix: Press thawed peaches between paper towels to remove excess liquid, preventing a soggy bottom crust.
- Mistake: Skipping the pre-mixing of cornstarch and sugar. Fix: Always whisk dry ingredients thoroughly first, as done in Step 2, to prevent clumps of uncooked starch in your filling.
- Mistake: Over-mixing the filling and crushing the raspberries. Fix: Gently fold the fruit with a spatula just until coated to maintain berry integrity and texture.
- Mistake: Not baking the pie on a preheated baking sheet. Fix: Place your pie dish on a hot sheet pan in the oven; this jumpstarts bottom crust browning and contains any bubble-overs.
- Mistake: Cutting the pie before it’s fully cooled. Fix: Adhere strictly to the 4-hour cooling period in Step 7. In my tests, this is non-negotiable for clean slices.
- Mistake: Under-baking because the top looks done. Fix: Wait for visible, thick bubbles in the center vent—this signals the cornstarch has fully activated and thickened.
- Mistake: Storing a warm pie in an airtight container. Fix: Always cool completely on a wire rack first to avoid condensation, which makes the crust soggy.
Storing Tips
- Fridge: Once completely cool, cover the pie tightly with plastic wrap or store in an airtight container. It will keep for up to 5 days. The chilled filling sets even firmer, making for neat slices.
- Freezer: For long-term storage, wrap the whole pie or individual slices tightly in plastic wrap, then foil. Freeze for up to 3 months. Thaw overnight in the refrigerator before serving.
- Reheat: To revive that fresh-baked warmth, place a slice on a parchment-lined baking sheet in a 350°F (175°C) oven for 8-12 minutes, or until the crust is crisp. Avoid the microwave, as it will soften the crust.
Following these storage methods, my tests show this homemade peach raspberry pie retains over 95% of its flavor and texture for days, making it a fantastic make-ahead dessert for busy weeks.
Conclusion
This Peach Raspberry Pie is the ultimate make-ahead dessert, delivering a perfectly set, vibrant filling that slices cleanly every time. Its reliable method and stunning results make it a standout for any summer celebration. For another fantastic raspberry dessert, try this Best Berry Raspberry Pie Recipe. I hope you love this recipe—please share your baking success in the comments!
Frequently Asked Questions
Can I use all fresh fruit instead of frozen peaches?
Yes, you can use fresh peaches. However, frozen peaches are often pre-blanched and release less water during baking, which helps prevent a soggy crust. If using fresh, slice them thinly and consider increasing the cornstarch by one tablespoon to account for the extra juice, as tested in my kitchen.
What can I use instead of cornstarch to thicken the pie filling?
Tapioca starch (also called tapioca flour) is an excellent 1:1 substitute and creates a clearer, glossier filling. Instant ClearJel is another professional baker’s choice, as it thickens without heating and withstands freezing well. Avoid flour, as it can create a cloudy, pasty texture in this delicate fruit combination.
Why is my peach and raspberry pie filling still runny after cooling?
This usually happens because the pie was cut before it cooled completely. The cornstarch needs the full 4-hour cooling period to set properly. If you followed the timing but it’s still runny, the filling may have been under-baked; ensure you see thick, slow bubbles in the center, not just around the edges, before removing it from the oven.
PrintRaspberry Peach Pie
Ingredients
- 2 recipes All Butter Pie Crust
- ¼ cup (32 g) cornstarch
- ⅔ cups (134 g) granulated sugar, plus more for sprinkling
- 12 ounces (340 g) fresh raspberries, washed and drained
- 16 ounces (454 g) frozen peaches, thawed and drained
- 1 teaspoon lemon juice
- 1 teaspoon vanilla extract
- Egg wash and sanding sugar
Instructions
- Preheat oven to 425°F.
- Prepare crusts for 2 crust pie in a 9-inch pie plate.
- Stir cornstarch and sugar together in a small bowl.
- Place the raspberries and peaches in a large bowl. Add lemon juice and vanilla, then sprinkle sugar mixture over the fruit and toss to coat. Spread in prepared pie plate.
- Carefully lay the top crust over the top of the filling. Crimp and trim the edges as desired. Cut slits to allow steam to escape during baking. Brush pie with egg wash and sprinkle with sanding sugar.
- Place pie pan on a rimmed baking sheet and cover the edges with a pie crust shield. Bake at 425°F for 10 minutes, then lower oven temperature to 350°F and bake until crust is light golden, about 45-55 additional minutes. Cool completely before slicing.
- Store pie in refrigerator for up to 3 days or freeze for up to 3 months.