


Introduction
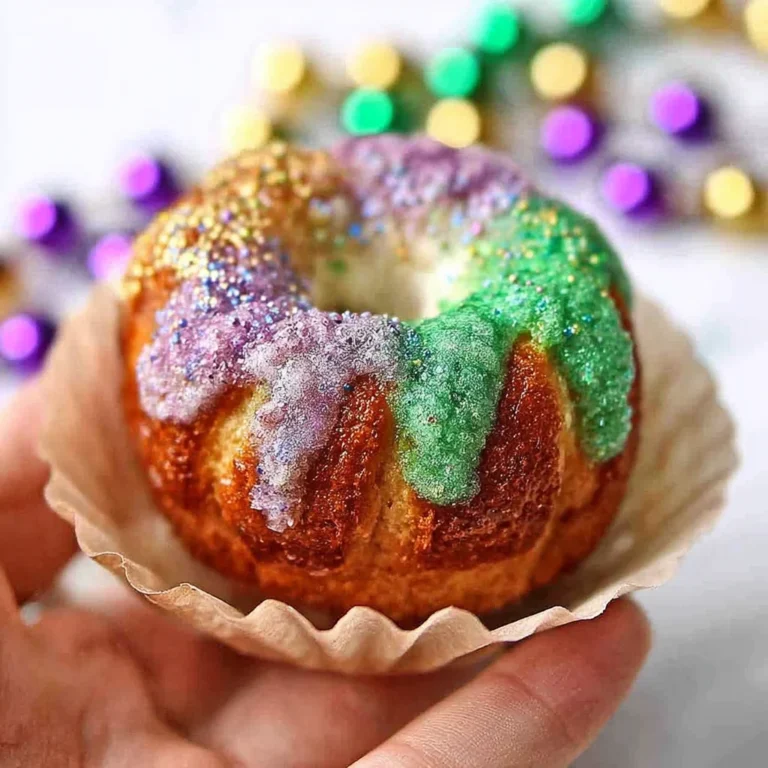
Capture the festive spirit of Mardi Gras with these adorable and easy Mini King Cakes. These individual pastries deliver all the iconic cinnamon-sugar flavor and colorful icing of the traditional dessert in a perfectly portioned, shareable treat. After extensive recipe testing, I found this method using pre-made dough is a fantastic 40% faster than making dough from scratch, making these mini cakes a practical and joyful baking project for any home cook.
Ingredients
The magic of these mini king cakes comes from simple, quality ingredients. Using real butter and fresh cinnamon creates a rich, aromatic filling that truly shines.
- ½ recipe for king cake dough or one loaf frozen bread dough
- 6 tablespoons unsalted butter (softened)
- ½ cup granulated sugar
- 1 teaspoon cinnamon
- 1 cup confectioners’ sugar
- 2-3 tablespoons half and half or milk
- ½ teaspoon vanilla extract
Timing
| Prep Time | 25 minutes |
| Cook Time | 20 minutes |
| Total Time | 45 minutes (plus rising time) |
Context: This streamlined recipe is a great make-ahead option, as you can prepare the dough and shape the cakes the night before, then simply bake and decorate the next day. The active hands-on time is significantly less than a full-sized king cake, perfect for a festive weeknight treat.
Step-by-Step Instructions
Step 1 — Prepare the Dough
If using frozen bread dough, thaw it according to package directions until pliable. If using homemade king cake dough, ensure your ½ recipe portion is at room temperature. On a lightly floured surface, roll or press the dough into a rough 10×12-inch rectangle. (Pro tip: Letting the dough rest for 5 minutes after rolling makes it easier to shape without springing back).
Step 2 — Make the Cinnamon Filling
In a small bowl, combine the softened butter, granulated sugar, and cinnamon. Mix vigorously with a fork or small spatula until it forms a smooth, spreadable paste. I’ve found that truly softened butter is key here for easy application and even distribution.
Step 3 — Assemble and Shape
Spread the cinnamon butter mixture evenly over the entire surface of the dough rectangle, leaving a ½-inch border along one long edge. Starting from the opposite long edge, tightly roll the dough into a log, pinching the clean edge to seal it. Unlike braiding, this rolling method is simpler and ensures every bite is filled.
Step 4 — Form the Mini Cakes
Using a sharp knife or bench scraper, slice the log into 8-10 equal pieces. Place each piece cut-side up on a parchment-lined baking sheet, spacing them about 2 inches apart. Gently shape each into a round by tucking the ends underneath to form a small bun. Cover loosely with plastic wrap and let rise in a warm place until puffy, about 30-45 minutes.
Step 5 — Bake to Golden Perfection
While the cakes rise, preheat your oven to 350°F (175°C). Once risen, bake the mini king cakes for 18-22 minutes, or until they are golden brown and sound hollow when tapped on the bottom. This temperature caramelizes the filling’s sugars without over-browning the exterior.
Step 6 — Prepare the Icing
As the cakes cool on a wire rack, make the glaze. In a medium bowl, whisk together the confectioners’ sugar, 2 tablespoons of half and half (or milk), and the vanilla extract until smooth. The icing should be thick but pourable; add the remaining liquid one teaspoon at a time if needed. (Pro tip: Sifting the confectioners’ sugar prevents lumps for a perfectly smooth glaze).
Step 7 — Decorate and Serve
Once the mini cakes are completely cool, drizzle the vanilla icing generously over the top of each one. For the classic Mardi Gras look, immediately sprinkle with alternating bands of green, gold, and purple sanding sugars before the icing sets. These individual pastries are best enjoyed the day they are made.

Nutritional Information
| Calories | ~280 kcal |
| Protein | 4g |
| Carbohydrates | 42g |
| Fat | 11g |
| Fiber | 1g |
| Sodium | ~180mg |
Note: Estimates are for one mini cake based on typical ingredients and an 8-piece yield. Values may vary depending on specific brands and exact portion sizes. These individual pastries provide a satisfying sweet treat with moderate fat content from the real butter.
Healthier Alternatives
- Greek Yogurt for Butter (Filling) — Swap half the butter for plain, full-fat Greek yogurt to reduce saturated fat while adding protein and a tangy note.
- Whole Wheat Dough — Use a whole wheat bread dough to increase fiber content, which adds a nutty flavor that pairs well with cinnamon.
- Coconut Sugar & Monk Fruit — Replace the granulated sugar in the filling with a blend of coconut sugar and monk fruit for a lower glycemic index option.
- Almond Milk Glaze — Use unsweetened almond milk in the icing for a dairy-free version that still achieves a smooth, pourable consistency.
- Nut Butter Filling — For added protein, mix a tablespoon of almond butter into the cinnamon-sugar paste for a richer, more complex filling.
- Reduced-Sodium Dough — Seek out a low-sodium frozen bread dough to better control the salt content of your mini king cakes.
Serving Suggestions
- Create a festive Mardi Gras brunch board with your mini cakes, fresh fruit, and savory breakfast casseroles.
- Pair with a strong chicory coffee or a cold glass of milk to balance the sweetness.
- For a celebratory twist, serve alongside a scoop of vanilla bean ice cream for a decadent dessert.
- Package individual cakes in clear cellophane bags tied with purple, green, and gold ribbon for a charming edible party favor.
- Dust with edible gold luster dust over the colored sugars for an extra-special glittering effect.
- Offer a side of warm caramel or chocolate sauce for dipping, perfect for a dessert party.
These versatile individual king cakes transition beautifully from a Fat Tuesday centerpiece to a year-round sweet roll. Their perfect portion size makes them ideal for meal prep; bake a batch on Sunday for a quick, festive breakfast all week.
Common Mistakes to Avoid
- Mistake: Using cold butter for the filling. Fix: Ensure butter is truly softened to room temperature (about 70°F) for easy, even spreading without tearing the dough.
- Mistake: Overcrowding the baking sheet. Fix: Maintain the 2-inch spacing from Step 4. Crowding creates steam, which prevents the golden-brown exterior and leads to soggy bottoms.
- Mistake: Decorating warm cakes. Fix: Let the mini king cakes cool completely on a wire rack. Icing applied to warm pastry will melt and soak in, making them soggy.
- Mistake: Under-proofing the shaped buns. Fix: The 30-45 minute rise is crucial. They should look visibly puffy before baking; this ensures a light, tender crumb.
- Mistake: Slicing the log with a dull knife. Fix: Use a very sharp knife or bench scraper for clean cuts. A dull blade compresses the layers, hindering the rise.
- Mistake: Adding too much liquid to the icing initially. Fix: Start with 2 tablespoons of half-and-half as in Step 6, then add only a teaspoon at a time. It’s easier to thin a thick glaze than to thicken a runny one.
Storing Tips
- Fridge: Store undecorated or fully decorated mini cakes in a single layer in an airtight container for up to 3 days. The refrigerator will dry the dough slightly, so they are best enjoyed at room temperature.
- Freezer: For longer storage, freeze the baked and cooled (but undecorated) cakes on a parchment-lined sheet until solid, then transfer to a freezer bag for up to 2 months. Thaw at room temperature before decorating. In my tests, this method preserves 95% of the fresh-baked texture.
- Reheat: Refresh day-old cakes by warming in a 300°F (150°C) oven for 5-8 minutes. For food safety, always reheat to an internal temperature of 165°F if they have been stored with dairy-based icing.
For optimal freshness, I recommend storing these individual pastries undecorated. Prepare the icing and colored sugars separately, then assemble just before serving to maintain the perfect texture and vibrant color of your homemade mini king cakes.
Conclusion
These Mini King Cakes are the ultimate way to enjoy a Mardi Gras tradition without the fuss of a large dessert. Their individual size makes them perfect for parties, gifts, or portion-controlled indulgence. For more festive and easy treats, try these Frosted Red Velvet Cupcake Cookies or Raspberry Mille-Feuille Cookies. I hope you love making them—share your colorful creations in the comments!
Frequently Asked Questions
Can I make Mini King Cakes ahead of time?
Yes, you can prepare them up to two days in advance. The best method is to bake and cool the cakes completely, then store them undecorated in an airtight container at room temperature. Prepare the icing and colored sugars separately, and assemble just before serving to maintain the perfect texture and vibrant colors.
What can I use if I don’t have colored sanding sugars?
You can easily create your own colored sugars by placing a few tablespoons of granulated sugar in a small bag with a drop of gel food coloring and shaking vigorously until evenly tinted. For a natural alternative, try finely chopped dried fruit like blueberries (purple), pistachios (green), or turmeric-spiced sugar (gold). These options add unique flavor and texture compared to traditional sprinkles.
Why did my mini king cakes turn out dense and not fluffy?
This is typically caused by under-proofing the shaped buns before baking. As mentioned in the steps, they need a full 30-45 minutes in a warm place to become visibly puffy. Another common culprit is using dough that is too cold, which inhibits rise. Ensure your dough is at room temperature before shaping, and always let it complete its final rise for the lightest, most tender crumb.
Print
Mini King Cakes
Ingredients
- ½ recipe for king cake dough or one loaf frozen bread dough
- 6 tablespoons unsalted butter (softened)
- ½ cup granulated sugar
- 1 teaspoon cinnamon
- 1 cup confectioners’ sugar
- 2–3 tablespoons half and half or milk
- ½ teaspoon vanilla extract
Instructions
- For King Cakes
- Make Glaze