


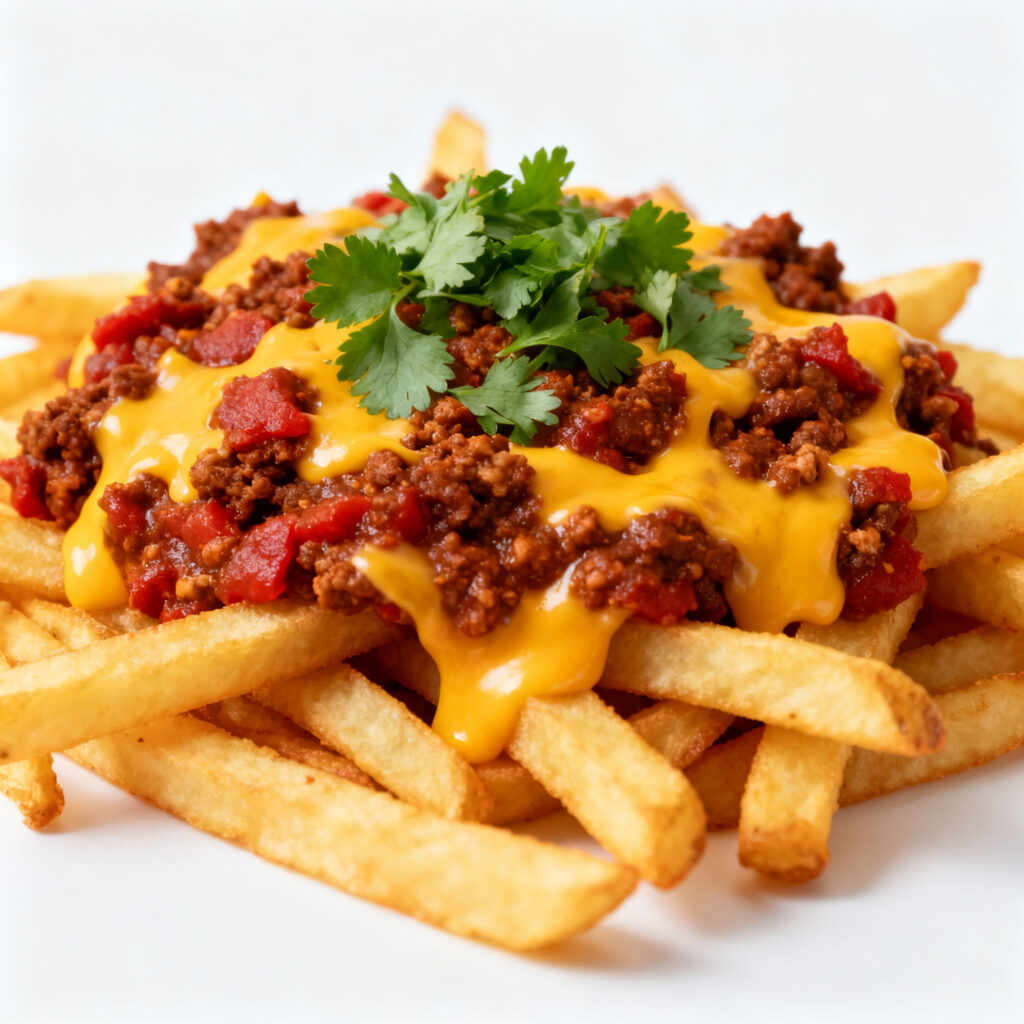
Most loaded fries recipes go soft under the chili within five minutes of hitting the table, and that's the whole problem this version fixes. By melting a sealing layer of cheese onto the fries before any chili touches them, and by cooking the chili down until it's thick enough to sit rather than soak, you get a plate that's still crackling at the bottom by the third bite. It's the same fries, the same chili, just built in the right order.
Simple, everyday ingredients and clear, step-by-step instructions — every recipe made in Dorothy’s kitchen before it reaches yours. Jump to the full recipe card below.
PrintLoaded Chili Cheese Fries (The Cheese-Barrier Method for Crispy Fries)
Extra-crispy loaded fries with a cheese barrier that seals in crunch before a thick, glaze-style chili goes on top.
- Total Time: 1 hour
- Yield: 4 1x
Ingredients
- 2 lbs russet potatoes, cut into fries (or 1 bag frozen fries)
- 2 tbsp cornstarch
- 2 tbsp neutral oil
- Salt, to taste
- 1 lb ground beef
- 1 small onion, diced
- 3 cloves garlic, minced
- 2 tbsp chili powder
- 1 tbsp ground cumin
- 2 tbsp tomato paste
- 1 (14 oz) can diced tomatoes
- 1/2 cup beef broth
- 1 (15 oz) can kidney or pinto beans, drained (optional)
- 2 1/2 cups shredded cheddar or Monterey Jack, divided
- 1/4 cup sour cream
- 2 scallions, sliced
- Pickled or fresh jalapeños, to taste
Instructions
- If making fries from scratch, soak cut potatoes in cold water 20 minutes, dry thoroughly, toss with cornstarch and oil, and bake at 425°F (or air-fry) 25-30 minutes, flipping halfway, until deeply golden and crisp. Season with salt immediately.
- While fries cook, brown the ground beef with onion and garlic in a skillet over medium-high heat, breaking it up, about 6 minutes. Drain excess fat.
- Stir in chili powder, cumin, and tomato paste; cook 1 minute until fragrant. Add diced tomatoes, beef broth, and beans if using.
- Simmer uncovered 20-25 minutes, stirring occasionally, until thick enough that a spoon dragged through leaves a trail that holds for a second — this is the key step, not a suggestion.
- Spread hot fries in a wide, shallow oven-safe dish. Scatter half the cheese over them and broil 1-2 minutes, just until melted into a sealed layer — do not skip this.
- Spoon the hot, thickened chili over the cheese layer. Top with remaining cheese and broil 1-2 minutes more until bubbling.
- Finish immediately with sour cream, scallions, and jalapeños. Serve within 2 minutes of assembling.
Notes
The cheese barrier and the thick chili are the two things that make this a loaded fries recipe that doesn’t turn to mush — don’t rush either one. If your chili still looks loose after 20 minutes, keep simmering; a watery chili will beat the barrier every time. Leftovers won’t stay crispy, so build only what you’ll eat immediately, and keep extra chili and fries stored separately if you’re serving in shifts.
- Prep Time: 20 minutes
- Cook Time: 40 minutes
- Method: Baked and broiled
- Cuisine: American
Here’s the flaw nobody talks about with loaded chili cheese fries: the fries are always the first thing to fail. Ladle warm, wet chili directly onto hot fries and you’ve built a steam chamber — in under ten minutes the bottom layer turns to potato mush, no matter how crispy they came out of the fryer. The fix isn’t a better fry, it’s a barrier. Melt a layer of shredded cheese directly onto the fries under the broiler first, so it sets into a thin, semi-waterproof shell, and only then spoon the chili on top. The cheese does the work a lid does in braising — it keeps two textures from touching until you want them to.
The second lever is the chili itself. A loaded fries recipe doesn’t need a chili you’d eat with a spoon on its own; it needs one that’s been reduced past that point, closer to a ragù than a soup, so it clings instead of pooling. I push mine another 10-15 minutes past where I’d normally call it done, stirring so it doesn’t catch, until a wooden spoon dragged through the pot leaves a trail that holds for a second before closing back in. If your chili looks glossy and loose, it’s not ready for fries yet — it’s ready for a bowl, which is a different dish.
For the fries, a light dusting of cornstarch before baking or air-frying gives you a shatter-crisp exterior that’s more forgiving of a few minutes under toppings than a plain-flour or naked fry. Spread them in a wide, shallow dish rather than piling them into a deep bowl — surface area is what keeps each fry in contact with air instead of trapped steam from its neighbors. Assemble at the very last second: cheese barrier melted, chili hot and thick, toppings on, served within two minutes. That window is short on purpose. This isn’t a make-ahead dish, and treating it like one is where every soggy version goes wrong.
Swap the beef chili for a well-seasoned black bean or turkey chili if you want it lighter — the barrier method matters more than what’s under it. Pickled jalapeños instead of fresh add acid that cuts the richness, and a cold ribbon of sour cream or a lime crema does the same job better than plain sour cream dolloped on top. If you’re making this for a crowd, build individual portions on small trays instead of one giant platter; it keeps the crispy-to-soggy timeline from starting the second the first tray leaves the kitchen.
Frequently Asked Questions
How do you keep loaded chili cheese fries from getting soggy?
Melt a layer of cheese onto the hot fries before the chili goes on — it seals the surface so the chili's moisture can't soak straight through. Pair that with a chili reduced until thick and glossy rather than soupy, and assemble right before serving.
Can I use frozen fries for this loaded fries recipe?
Yes. Bake them a few minutes past the bag's instructions for extra crispness, since they'll need to hold up under the cheese barrier and chili.
What chili works best for loaded fries?
A thick, simmered-down chili rather than a soupy one. If it pools or runs when you tilt the pan, simmer it longer until a spoon leaves a trail through it.
Can I make the chili ahead of time?
Yes, the chili can be made up to 3 days ahead and reheated until thick and hot. Assemble the fries only right before serving — that part shouldn't be made ahead.
Get our 10 best recipes — free
Join the Hurry Up Meals newsletter and we’ll email you our 10 most-loved recipes as a free PDF.
Free PDF + new recipes every week. Unsubscribe anytime.