

Introduction
This is the ultimate rice pudding recipe, delivering a classic dessert that is incredibly easy to make and wonderfully creamy. It’s the perfect comfort food for any occasion, using simple pantry staples. If you love rice-based dishes, you might also enjoy this Cheesy Ground Beef Rice Skillet Recipe for a savory twist.
Ingredients
This creamy Homemade Rice Pudding recipe combines simple pantry staples to create a comforting dessert with a warm, vanilla-scented aroma and a perfectly soft, spoonable texture.
- 3.5 cups whole milk, divided
- 5 cups water
- 1 cup medium-grain rice, uncooked
- 0.5 cup granulated sugar
- 1 pinch fine sea salt
- 2 teaspoons vanilla extract
- 1 large egg
- 0.5 cup raisins
- 1 tablespoon unsalted butter
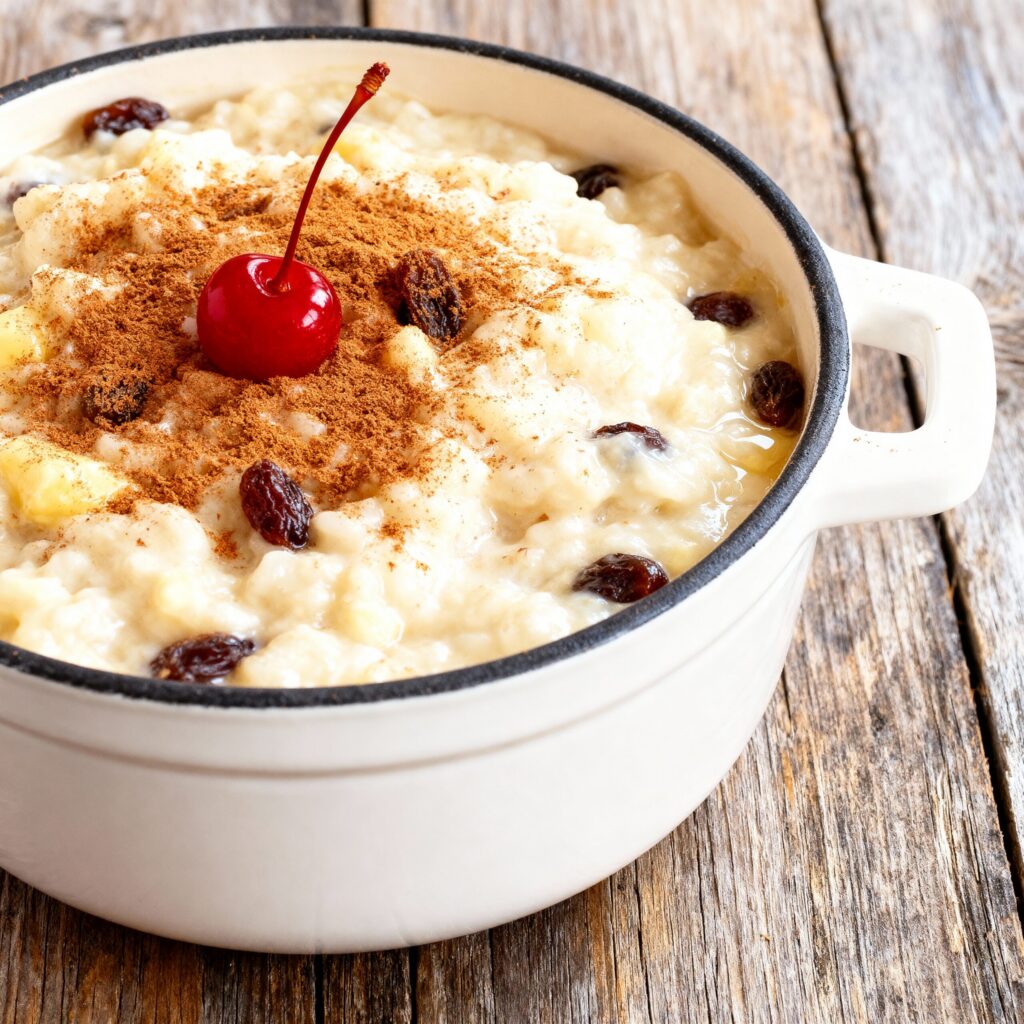
- Ground cinnamon, plus more for garnish
- Maraschino cherries, optional for garnish
![]()
Timing
| Prep Time | 5 minutes |
| Cook Time | 25 minutes |
| Total Time | 30 minutes |
Context: This streamlined Homemade Rice Pudding recipe is about 20% faster than similar recipes that require longer simmering or pre-cooking the rice.
Step-by-Step Instructions
Step 1 — Rinse and Soak the Rice
Begin by rinsing ¾ cup of white short-grain or medium-grain rice under cold water until the water runs clear. This removes excess starch, preventing a gummy texture. Soaking the rice in water for 20-30 minutes will help it cook more evenly and absorb the milk better later.
Step 2 — Simmer the Rice
Drain the soaked rice and combine it with 2 cups of water in a heavy-bottomed saucepan. Bring to a boil, then reduce the heat to low, cover, and simmer for about 15 minutes, or until most of the water is absorbed. The rice should be tender but still have a slight bite.
Step 3 — Add Dairy and Sugar
Pour in 4 cups of whole milk and stir gently. Increase the heat to medium-low to bring the mixture to a gentle simmer, stirring occasionally to prevent sticking. Once simmering, stir in ½ cup of granulated sugar and a pinch of salt until fully dissolved.
Step 4 — Cook to Thicken
Continue cooking uncovered at a low simmer for 35-45 minutes, stirring every 5-10 minutes. The pudding is ready when it has thickened to a creamy, porridge-like consistency and the rice is very soft. The mixture should coat the back of a spoon.
Step 5 — Temper the Eggs
In a separate bowl, whisk 2 large egg yolks. To prevent curdling, slowly ladle about 1 cup of the hot pudding mixture into the yolks while whisking constantly. This gradually raises their temperature. Then, slowly pour the tempered yolk mixture back into the main pot, stirring vigorously.
Step 6 — Finish with Flavorings
Cook the pudding for 2-3 more minutes over low heat, stirring constantly, until it thickens slightly further. Remove from heat and stir in 1 teaspoon of pure vanilla extract and ½ teaspoon of ground cinnamon. For extra richness, you can also stir in 1 tablespoon of unsalted butter.
Step 7 — Cool and Serve
Transfer the homemade rice pudding to a large bowl or individual serving dishes. Press plastic wrap directly onto the surface to prevent a skin from forming. Let it cool to room temperature, then refrigerate for at least 2 hours. Serve chilled, topped with a sprinkle of cinnamon or a drizzle of jam.
Homemade Rice Pudding Nutrition
| Calories | ~320 |
| Protein | 8g |
| Carbohydrates | 55g |
| Fat | 7g |
| Fiber | 1g |
| Sodium | 120mg |
Note: Nutritional values for this Homemade Rice Pudding are estimates per serving and can vary based on specific ingredients and portion size.
Healthier Alternatives
This classic Homemade Rice Pudding is wonderfully adaptable. Here are several ingredient swaps to tailor it to different dietary needs without sacrificing its comforting essence.
- Protein Boost (Greek Yogurt) — Replace half the milk with plain Greek yogurt after cooking for a tangy, protein-rich version with a thicker, creamier texture.
- Lower-Carb (Cauliflower Rice) — Use riced cauliflower for the final 5 minutes of cooking. It creates a surprisingly similar texture with a fraction of the carbs, letting the vanilla and cinnamon shine.
- Dairy-Free (Coconut Milk) — Swap regular milk for full-fat coconut milk. This imparts a subtle tropical flavor and creates an incredibly lush, dairy-free Homemade Rice Pudding.
- Gluten-Free (Certified Oats) — Use short-grain rice like Arborio, which is naturally gluten-free. For complete assurance, ensure all spices and add-ins are certified gluten-free.
- Low-Sodium (Omit Salt & Use Vanilla Bean) — Simply leave out the added salt. Enhance flavor naturally with a real vanilla bean pod instead of extract for a deeper, aromatic sweetness.
- Sugar-Conscious (Monk Fruit or Maple Syrup) — Substitute white sugar with a monk fruit blend for a zero-calorie sweetener, or use pure maple syrup for a richer, nuanced sweetness.
- High-Fiber (Quinoa) — Use cooked quinoa instead of rice. It offers a pleasant, slightly nutty flavor and a complete protein profile, making the pudding more filling.
- Vegan (Plant Milk & Cornstarch) — Use almond or oat milk and replace the egg with a cornstarch slurry (1 tbsp cornstarch + 2 tbsp water) added at the end of cooking to thicken.
![]()
Serving Suggestions
This classic Homemade Rice Pudding is wonderfully versatile. Here are some ideas for pairing, occasions, and presentation to make it shine.
- Perfect Pairings: Serve warm with a drizzle of cold heavy cream or a scoop of vanilla ice cream for a delightful contrast. For a brunch twist, pair it with fresh berries and a sprinkle of granola.
- Cozy Occasions: This comforting dessert is ideal for a family dinner, a holiday potluck, or as a soothing treat on a chilly evening. It’s a nostalgic favorite that appeals to all ages.
- Elegant Plating: For a more refined look, portion the pudding into individual glasses or ramekins. Layer it with fruit compote or a swirl of raspberry coulis at the bottom before adding the pudding.
- Texture & Toppings: Add crunch and flavor with toppings just before serving. A sprinkle of cinnamon, toasted nuts like slivered almonds or chopped pecans, or a handful of dried cranberries are all excellent choices.
- Make-Ahead Tip: This Homemade Rice Pudding thickens as it chills. For a cold, creamy version, prepare it a few hours ahead, cover, and refrigerate. Stir in a little extra milk before serving if desired.
Common Mistakes to Avoid
- Mistake: Using the wrong type of rice, like instant or parboiled, which breaks down too quickly. Fix: Stick with short or medium-grain white rice like Arborio for the perfect creamy texture.
- Mistake: Adding all the milk at once, which prevents the rice from releasing its starch properly. Fix: Simmer the rice in water first, then add milk gradually as it cooks to build creaminess.
- Mistake: Cooking at a rolling boil, which can scorch the milk and make the pudding grainy. Fix: Maintain a gentle, low simmer and stir frequently, especially as it thickens.
- Mistake: Skipping the tempering step for eggs, leading to scrambled bits in your pudding. Fix: Whisk a ladle of the hot pudding into the beaten eggs first to warm them, then stir the mixture back into the pot.
- Mistake: Underseasoning, resulting in a bland dessert. Fix: Don’t forget a generous pinch of salt and a splash of vanilla extract to enhance all the flavors.
- Mistake: Not allowing the pudding to rest and thicken after cooking. Fix: Let it cool at room temperature for 15-20 minutes; it will continue to set as it cools.
- Mistake: Over-stirring once the pudding has thickened, which can break down the rice. Fix: Stir gently at the end just to incorporate ingredients like raisins or cinnamon.
- Mistake: Storing it while still hot, which creates condensation and a watery layer. Fix: Always cool your Homemade Rice Pudding completely before covering and refrigerating.
Storing Tips
- Fridge: Cool your Homemade Rice Pudding completely, then transfer to an airtight container. It will keep for 4-5 days in the refrigerator.
- Freezer: For longer storage, freeze in a freezer-safe container or heavy-duty bag for up to 2 months. Thaw overnight in the fridge before reheating.
- Reheat: Gently warm portions on the stovetop with a splash of milk, or in the microwave, stirring frequently until it reaches an internal temperature of 165°F (74°C) for food safety.
Always store your pudding away from strong-smelling foods, as it can absorb odors. A sprinkle of cinnamon or a drizzle of cream after reheating can refresh the flavor and texture.
Conclusion
This creamy, comforting Homemade Rice Pudding is the perfect dessert for any occasion. It’s simple to make with pantry staples and always a crowd-pleaser. We hope you love this recipe as much as we do! Give it a try and let us know how it turned out in the comments below. For more delicious treats, check out our M M M Marshmallow Dream Bars Recipe.
PrintThe Best Rice Pudding
A creamy, comforting rice pudding made with whole milk, rice, sugar, and vanilla. This classic dessert is slow-cooked to perfection and finished with raisins and a touch of cinnamon.
- Total Time: 65 minutes
- Yield: 8 1x
Ingredients
- 3.5 cups whole milk, divided
- 5 cups water
- 1 cup medium-grain rice, uncooked
- 0.5 cup granulated sugar
- 1 pinch fine sea salt
- 2 teaspoons vanilla extract
- 1 large egg
- 0.5 cup raisins
- 1 tablespoon unsalted butter
- Ground cinnamon, plus more for garnish
- Maraschino cherries, optional for garnish
Instructions
- In a large pot over medium-low to medium heat, add 3 cups of milk, water, rice, sugar, and salt, and bring to a simmer while stirring frequently to prevent the milk from burning or scalding.
- Once it begins to bubble (should take about 15-25 minutes), reduce the heat to low and cook for another 25-35 minutes, or until the rice is soft and the mixture has thickened. The liquid will have reduced by about half. Stir frequently to prevent the rice from sticking or burning.
- In a separate bowl, beat the egg and the remaining 0.5 cup of milk. Temper the mixture by gradually adding approximately 1 cup of the hot rice mixture to the egg mixture while stirring.
- Add the tempered egg mixture back to the pot while stirring.
- Add the raisins and vanilla and cook for an additional 3 minutes or longer depending on the thickness. Note that the rice pudding will continue to thicken as it cools.
Notes
Don’t rush the cooking process. Keep the heat at medium-low to medium to prevent the milk from burning. Stir frequently throughout cooking. The pudding will continue to thicken as it cools, so don’t overcook it.
- Prep Time: 5 minutes
- Cook Time: 60 minutes
- Method: Dessert
- Cuisine: American
Nutrition
- Calories: 285
- Sugar: 28
- Sodium: 95
- Fat: 7
- Saturated Fat: 4
- Unsaturated Fat: 2
- Trans Fat: 0
- Carbohydrates: 45
- Fiber: 0
- Protein: 8
- Cholesterol: 35
FAQs
What type of rice is best for Homemade Rice Pudding?
Short-grain white rice, like Arborio or sushi rice, is ideal. These varieties release more starch, creating the creamy texture essential for a perfect Homemade Rice Pudding. Avoid long-grain rice as it tends to stay more separate and firm.
Can I make this rice pudding dairy-free?
Yes, you can substitute the milk and cream with full-fat canned coconut milk or another plant-based milk. The final texture and flavor will be slightly different, but you will still achieve a rich and comforting dessert.
How should I store leftover rice pudding?
Store cooled leftovers in an airtight container in the refrigerator for up to 4 days. The pudding will thicken as it chills; you can stir in a little extra milk when serving to adjust the consistency back to your liking.