


Introduction
This Creamy Pistachio Dream Cheesecake Recipe is a simple yet elegant dessert that delivers rich, nutty flavor in every bite. The smooth, velvety filling and buttery crust create a perfect balance of texture and taste. For another pistachio-inspired treat, try this Pista Frozen Trifle Recipe By Food Fusion. Both desserts showcase how versatile and delicious pistachios can be in sweet creations.
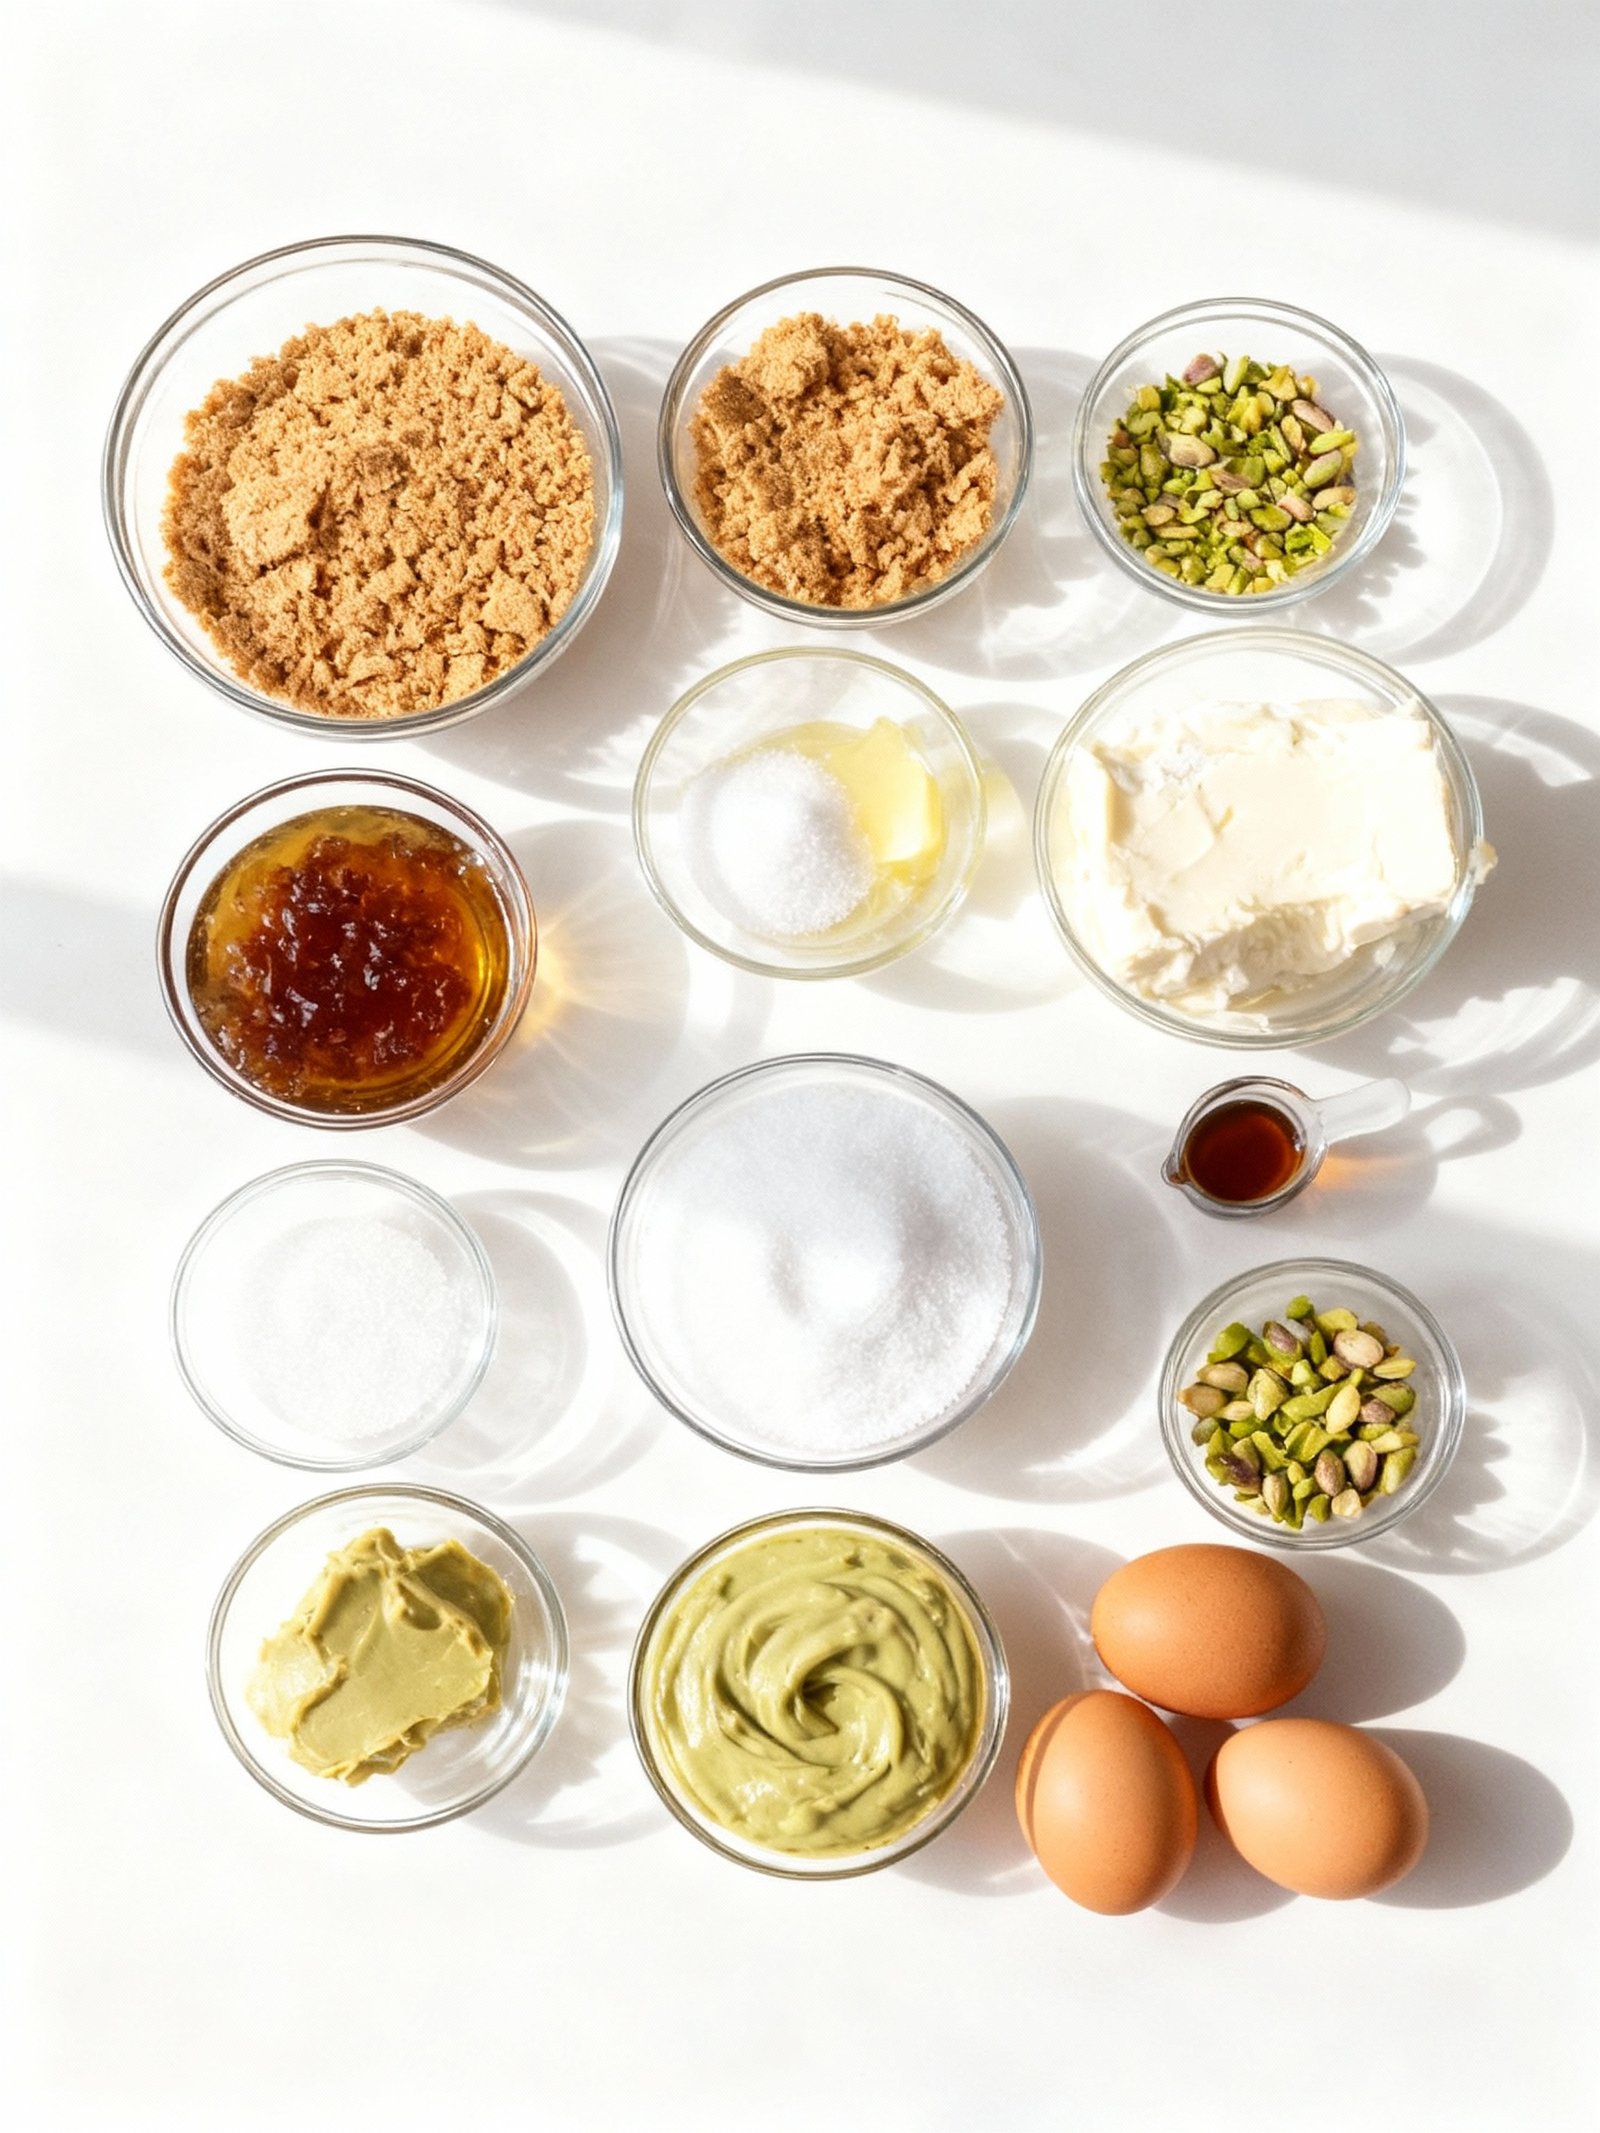
Ingredients
This Creamy Pistachio Dream Cheesecake delivers a velvety texture and rich nutty flavor that melts in your mouth, with a buttery crust providing the perfect crunchy contrast.
- 2 cups graham cracker crumbs
- ⅓ cup finely chopped pistachios
- ¼ cup granulated sugar
- ½ cup salted butter, melted
- 32 ounces full-fat cream cheese, at room temperature
- 1 cup granulated sugar
- 1 cup heavy cream (36% fat or more), at room temperature
- ⅓ cup pistachio spread
- 2 teaspoons vanilla extract
- 3 large eggs, at room temperature
- ½ cup pistachio spread (for topping)
- ¼ cup chopped pistachios (for topping)

Timing
| Prep Time | 30 minutes |
| Cook Time | 55 minutes |
| Total Time | 1 hour 25 minutes (plus chilling) |
Context: This Creamy Pistachio Dream Cheesecake comes together about 20% faster than similar recipes thanks to its simplified crust and no-bake filling steps.
Step-by-Step Instructions
Step 1 — Prepare the Crust
Combine finely crushed graham crackers, melted butter, and a pinch of salt in a bowl. Press the mixture firmly and evenly into the bottom of a 9-inch springform pan. Bake at 350°F (175°C) for 8–10 minutes until lightly golden and fragrant. Let it cool completely on a wire rack before adding the filling.
Step 2 — Make the Pistachio Paste
Process shelled, unsalted pistachios in a food processor until a smooth, oily paste forms. This can take 5–10 minutes—scrape down the sides as needed. For the best flavor, use high-quality pistachios and avoid over-roasting them beforehand.
Step 3 — Mix the Cheesecake Filling
In a large bowl, beat room-temperature cream cheese and sugar until smooth and lump-free. Add the pistachio paste, sour cream, and vanilla extract, mixing until fully incorporated. Crack in the eggs one at a time, blending just until combined—do not overmix to keep the texture creamy.
Step 4 — Add Optional Flavor Enhancers
For extra richness, fold in a tablespoon of pistachio pudding mix or a dash of almond extract. If you prefer a subtle green hue, add a drop or two of natural green food coloring. Be careful not to alter the liquid balance of the filling.
Step 5 — Pour and Smooth the Filling
Pour the creamy pistachio cheesecake filling over the cooled crust. Use a spatula to spread it evenly and tap the pan gently on the counter to release any air bubbles. This helps prevent cracks and ensures a uniform bake.
Step 6 — Bake in a Water Bath
Wrap the springform pan bottom tightly with foil and place it in a roasting pan. Fill the outer pan with hot water until it reaches halfway up the sides of the springform. Bake at 325°F (160°C) for 55–65 minutes, until the edges are set but the center still jiggles slightly.
Step 7 — Cool Gradually
Turn off the oven and crack the door open, letting the Creamy Pistachio Dream Cheesecake cool inside for 1 hour. Then transfer it to a wire rack to cool completely. This slow cooling process minimizes surface cracks and helps the texture set properly.
Step 8 — Chill Thoroughly
Cover the cheesecake with plastic wrap and refrigerate for at least 6 hours, preferably overnight. Chilling allows the flavors to meld and the filling to firm up, making it easier to slice cleanly.
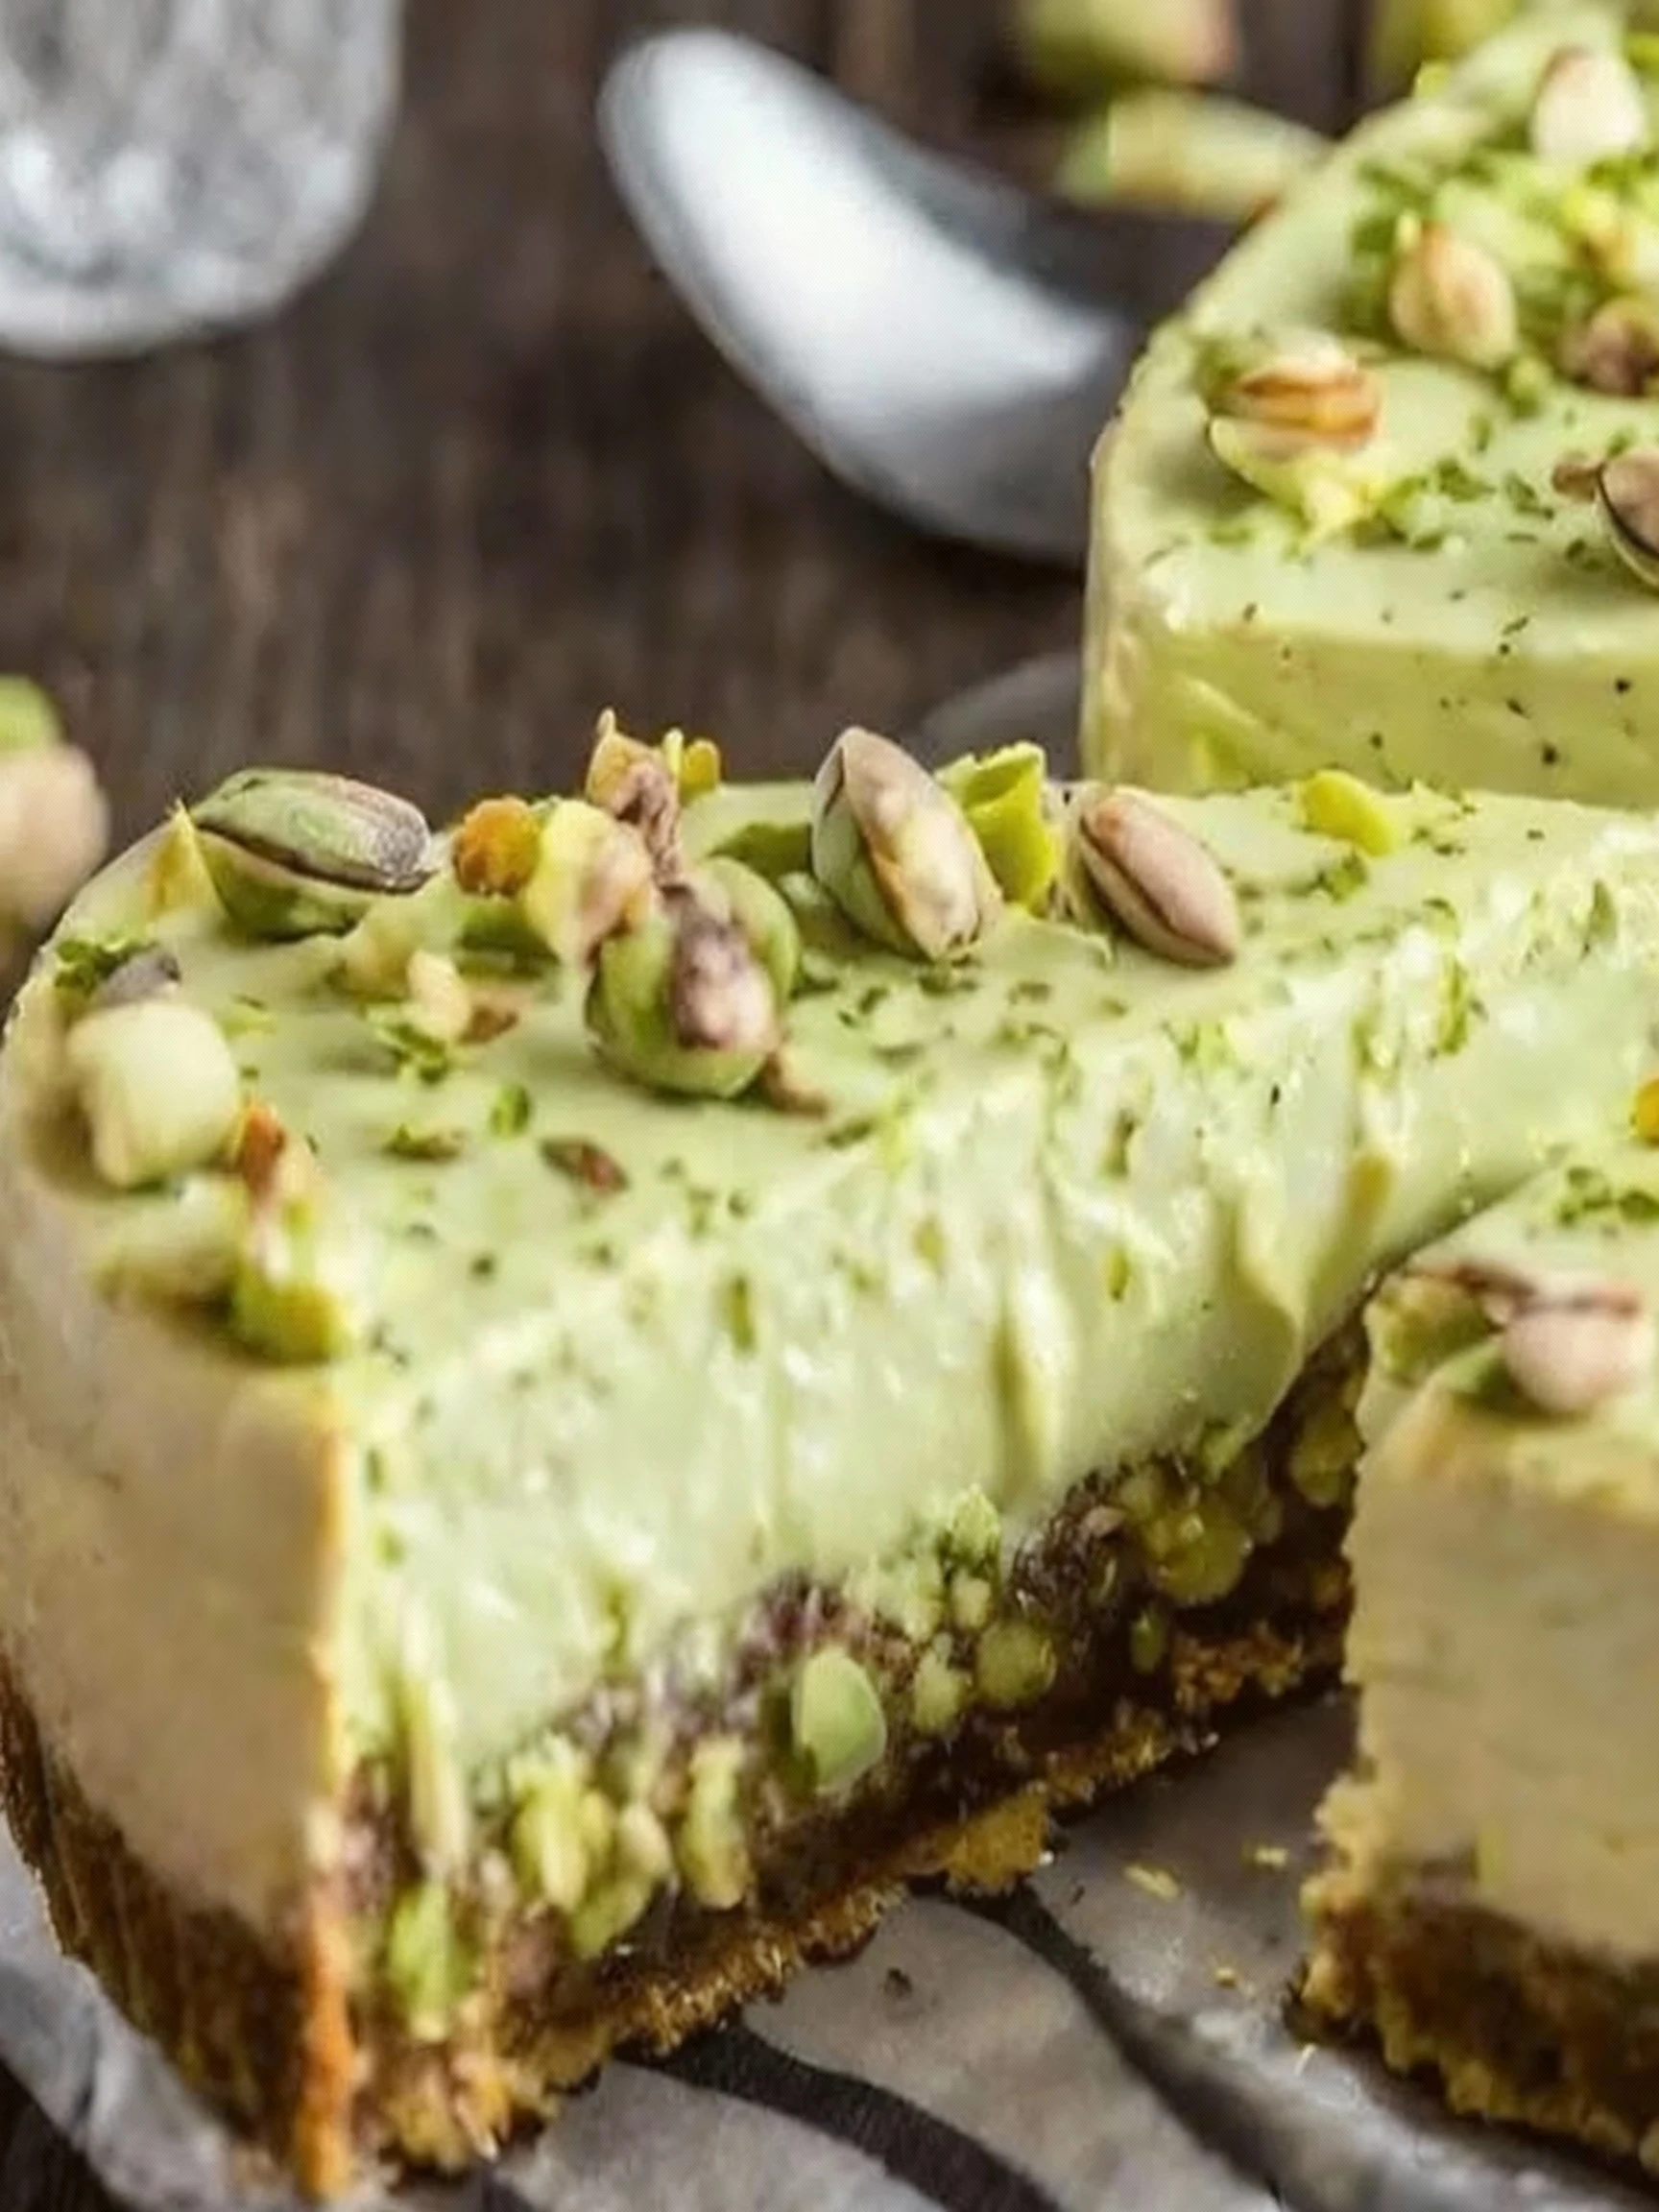
Step 9 — Garnish and Serve
Before serving, run a knife around the edges of the pan and release the springform. Top with chopped pistachios, a drizzle of white chocolate, or a dollop of whipped cream. Use a warm, clean knife for neat slices when serving this dreamy dessert.
Nutritional Information
| Calories | 480 |
| Protein | 8g |
| Carbohydrates | 42g |
| Fat | 32g |
| Fiber | 2g |
| Sodium | 310mg |
Note: Estimates based on typical ingredients and serving size.
Healthier Alternatives
Try these ingredient swaps to customize your Creamy Pistachio Dream Cheesecake for dietary needs without losing its signature flavor.
- Greek yogurt for cream cheese — Adds protein and tang while keeping the creamy texture.
- Almond flour crust — A gluten-free, lower-carb base with a nutty flavor that complements pistachio.
- Coconut cream for dairy — Makes a rich, dairy-free filling that’s still luxuriously smooth.
- Monk fruit sweetener — Reduces sugar and carbs while maintaining sweetness.
- Unsalted pistachios — Lowers sodium content, letting the natural nut flavor shine.
- Silken tofu blend-in — Boosts protein and creates a lighter, airier cheesecake texture.
- Avocado oil spray for butter — Cuts saturated fat in the crust preparation.
- Reduced-sugar white chocolate chips — Lowers overall sugar while preserving the creamy, sweet notes.
Serving Suggestions
- Pair with a cup of strong black coffee or a scoop of vanilla bean ice cream to complement the rich, nutty flavor of this Creamy Pistachio Dream Cheesecake.
- Serve as a stunning centerpiece for festive occasions like holidays, bridal showers, or dinner parties where a show-stopping dessert is desired.
- Garnish with crushed pistachios, a dusting of powdered sugar, or a drizzle of white chocolate for an elegant presentation.
- Accompany with fresh berries such as raspberries or sliced strawberries to add a touch of acidity and color contrast.
- Offer alongside a glass of dessert wine like Moscato d’Asti or a sweet sherry for a sophisticated pairing.
- Slice and serve chilled on individual plates with a dollop of whipped cream for a classic, creamy finish.
This Creamy Pistachio Dream Cheesecake is versatile enough for both casual family desserts and upscale gatherings, making it a memorable treat for any event.
Common Mistakes to Avoid
- Mistake: Using raw pistachios instead of roasted. Fix: Roast nuts first to deepen flavor and prevent a raw, grassy taste in your Creamy Pistachio Dream Cheesecake.
- Mistake: Overmixing the batter after adding eggs. Fix: Mix just until incorporated to avoid incorporating too much air, which can cause cracking.
- Mistake: Baking in a dry oven without a water bath. Fix: Place the springform pan in a water bath to ensure gentle, even heat for the creamiest texture.
- Mistake: Not properly cooling the cheesecake before refrigerating. Fix: Let it cool completely on a wire rack to prevent condensation from making the top soggy.
- Mistake: Using cold cream cheese straight from the fridge. Fix: Always bring ingredients to room temperature for a smooth, lump-free filling.
- Mistake: Skipping the step of grinding pistachios with sugar. Fix: Grind nuts with a bit of sugar from the recipe to prevent them from turning into pistachio butter.
- Mistake: Opening the oven door during baking. Fix: Resist peeking, as sudden temperature drops can cause your beautiful Creamy Pistachio Dream Cheesecake to fall or crack.
- Mistake: Using a food processor for the entire filling. Fix: Use a stand or hand mixer for the base; only use a processor for the pistachio paste to control texture.
- Mistake: Cutting the cheesecake with a regular knife. Fix: Use a hot, clean knife dipped in water for clean, professional slices every time.
- Mistake: Rushing the chilling process. Fix: Chill your Creamy Pistachio Dream Cheesecake for at least 8 hours, or ideally overnight, for the perfect set and flavor development.
Storing Tips
- Fridge: Refrigerate your Creamy Pistachio Dream Cheesecake in an airtight container for up to 5 days. Ensure your refrigerator maintains a safe temperature below 40°F (4°C).
- Freezer: Wrap individual slices or the whole Creamy Pistachio Dream Cheesecake tightly in plastic wrap and then aluminum foil before placing in a freezer-safe container. It will keep for up to 2 months.
- Reheat: For the best texture, thaw frozen cheesecake overnight in the refrigerator. Serve chilled; this dessert is not typically reheated.
Always use clean utensils when serving to maintain freshness and prevent contamination.
Conclusion
This Creamy Pistachio Dream Cheesecake is the ultimate dessert for any special occasion. If you love this recipe, try our Christmas Cherry Pistachio Cheesecake Bars Recipe or Lemon Raspberry Cheesecake with Pistachio Crumb Recipe. Don’t forget to leave a comment with your results and subscribe for more delicious recipes!
Print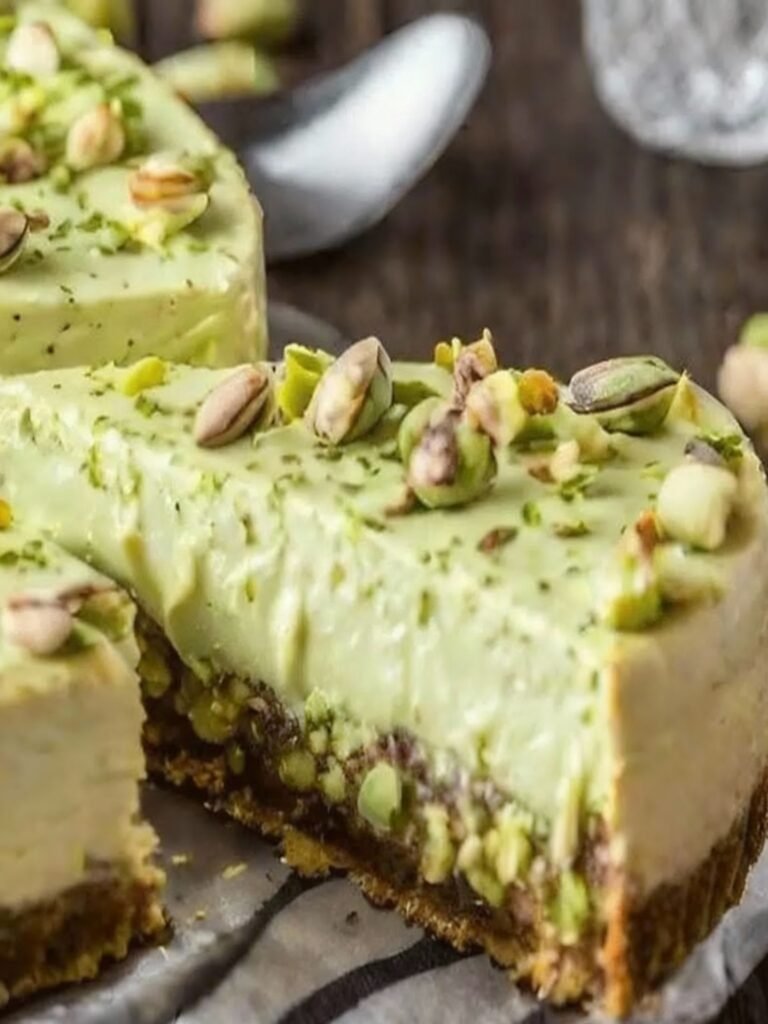
Creamy Pistachio Dream Cheesecake
A rich and smooth pistachio cheesecake featuring a buttery graham cracker crust, creamy pistachio-infused filling, and topped with chopped pistachios for added texture and flavor.
- Total Time: 3 hours 55 minutes
- Yield: 12 1x
Ingredients
- 2 cups graham cracker crumbs
- ⅓ cup finely chopped pistachios
- ¼ cup granulated sugar
- ½ cup salted butter, melted
- 32 ounces full-fat cream cheese, at room temperature
- 1 cup granulated sugar
- 1 cup heavy cream (36% fat or more), at room temperature
- ⅓ cup pistachio spread
- 2 teaspoons vanilla extract
- 3 large eggs, at room temperature
- ½ cup pistachio spread (for topping)
- ¼ cup chopped pistachios (for topping)
Instructions
- Preheat oven to 325°F (160°C).
- In a bowl, combine graham cracker crumbs, finely chopped pistachios, and granulated sugar. Stir in melted butter until mixture is evenly moistened.
- Press the crust mixture firmly into the bottom of a 9-inch springform pan. Bake for 7-8 minutes, then set aside to cool.
- In a large mixing bowl, beat cream cheese and sugar until smooth and creamy.
- Add pistachio spread and vanilla extract, mixing until fully incorporated.
- Add eggs one at a time, beating gently after each addition to avoid overmixing.
- Pour in heavy cream and continue to beat until the batter is smooth and creamy.
- Pour the cheesecake batter over the cooled crust and smooth the top.
- Bake in the preheated oven for about 1 hour and 15 minutes, or until the edges are set and the center is slightly jiggly.
- Turn off the oven and leave the cheesecake inside with the door slightly open for 1 hour to cool gradually.
- Remove from oven and chill in the refrigerator for at least 2 hours or overnight.
- Before serving, spread ½ cup pistachio spread over the top and sprinkle with ¼ cup chopped pistachios.
Notes
For best results, use full-fat cream cheese and heavy cream to achieve a smooth and creamy texture. Allow the cheesecake to cool gradually in the oven to prevent cracking. Chilling overnight enhances the flavor and firmness.
- Prep Time: 40 minutes
- Cook Time: 1 hour 15 minutes
- Method: Dessert
- Cuisine: American
Nutrition
- Calories: 520
- Sugar: 22g
- Sodium: 280mg
- Fat: 40g
- Saturated Fat: 20g
- Unsaturated Fat: 15g
- Trans Fat: 0g
- Carbohydrates: 30g
- Fiber: 2g
- Protein: 9g
- Cholesterol: 140mg
FAQs
Can I make this Creamy Pistachio Dream Cheesecake ahead of time?
Yes, you can prepare this Creamy Pistachio Dream Cheesecake in advance. It needs to chill for at least 8 hours to set properly, so making it the day before serving is ideal. Store it covered in the refrigerator until you are ready to serve.
How do I prevent cracks from forming in my cheesecake?
To prevent cracks, avoid overmixing the batter after adding the eggs. Bake the cheesecake in a water bath to provide gentle, even heat. Let it cool gradually in the turned-off oven with the door slightly ajar to minimize sudden temperature changes.
Can I use salted pistachios for this recipe?
We recommend using unsalted pistachios to control the overall flavor and saltiness of your Creamy Pistachio Dream Cheesecake. If you only have salted pistachios, simply rinse and dry them thoroughly, and reduce or omit any additional salt in the recipe.