


Introduction
This Cotton Candy Cookies Recipe creates simple and delicious treats that bring the fun flavor of the fair right to your kitchen. For another colorful sweet, try these Easy Cotton Candy Cookies – Fun & Colorful Homemade Treats. They are perfect for parties, baking with kids, or whenever you want a whimsical dessert that’s sure to impress.
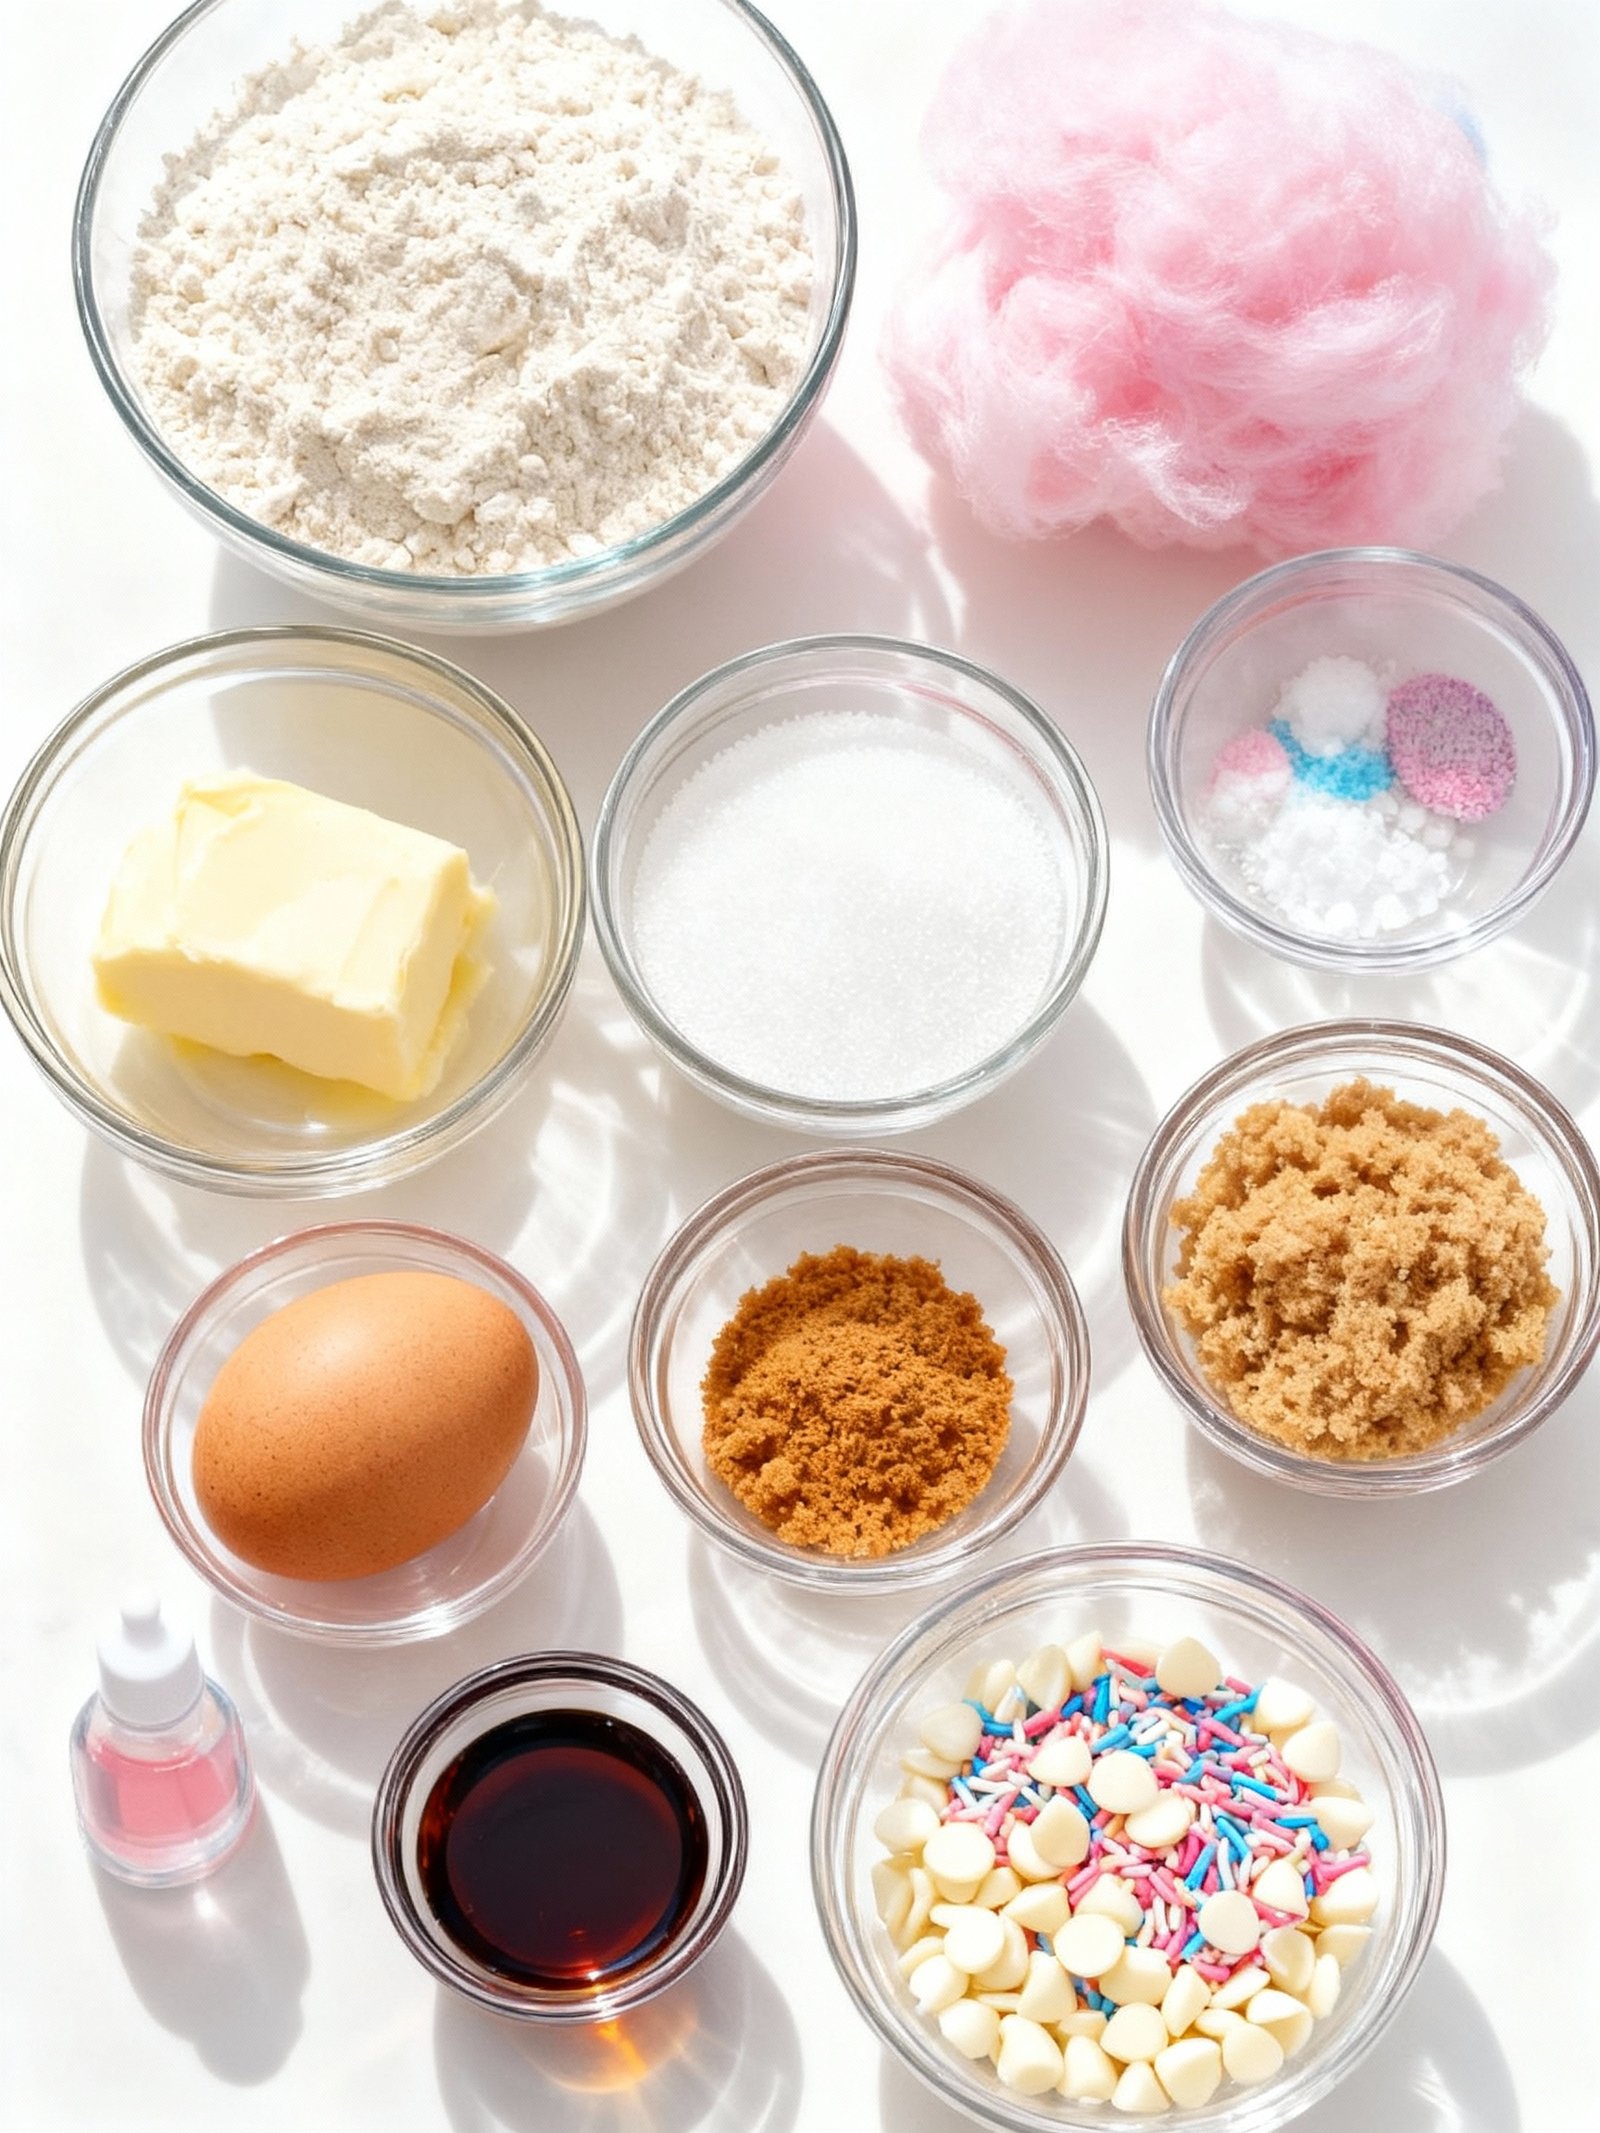
Ingredients
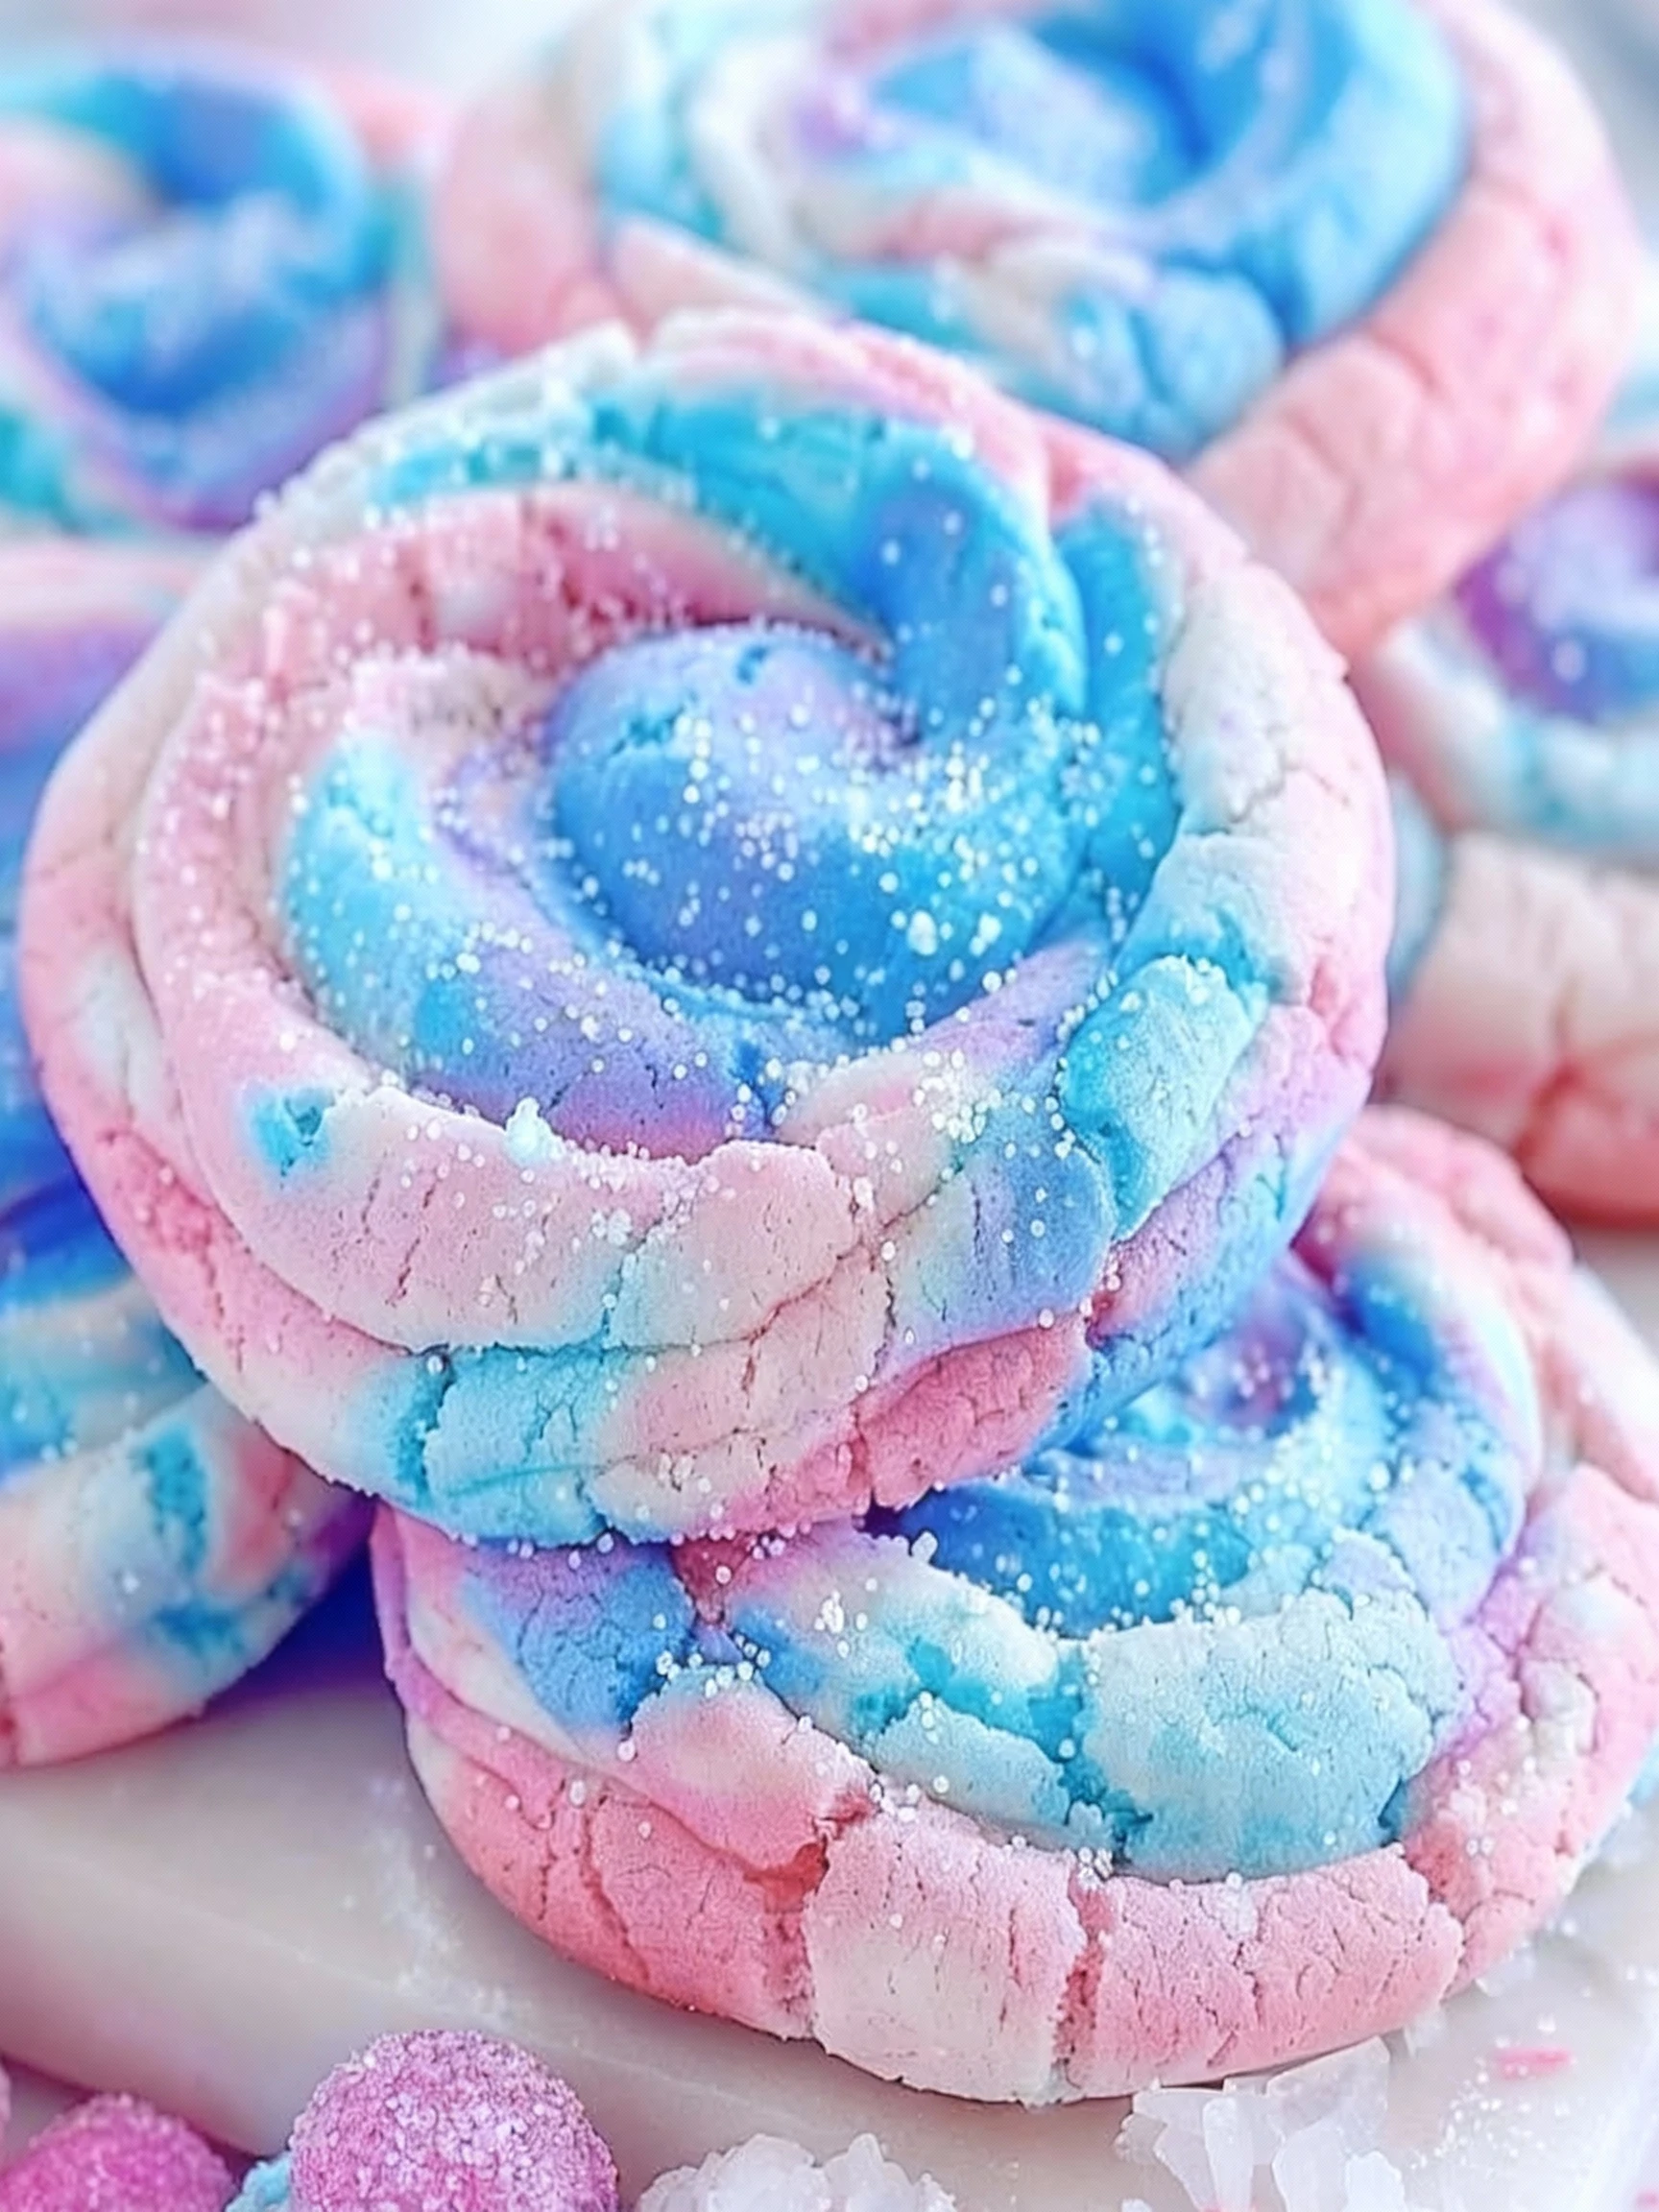
These whimsical cookies deliver a burst of nostalgic carnival flavor with their soft, chewy texture and vibrant cotton candy essence that melts delightfully in your mouth.
- 2 1/4 cups all-purpose flour
- 1 teaspoon baking powder
- 1/2 teaspoon baking soda
- 1/2 teaspoon salt
- 1 cup unsalted butter, softened
- 1 cup granulated sugar
- 1/2 cup brown sugar
- 1 large egg
- 1 teaspoon vanilla extract
- 1 teaspoon cotton candy flavoring
- Optional: pastel pink and blue food coloring, cotton candy sprinkles or white chocolate chips

Timing
| Prep Time | 15 minutes |
| Cook Time | 10 minutes |
| Total Time | 25 minutes |
Context: This Cotton Candy Cookies Recipe is about 20% faster than similar recipes, making it a great choice for quick baking sessions.
Step-by-Step Instructions
Step 1 — Prepare Your Ingredients
Gather all ingredients for your Cotton Candy Cookies Recipe: butter, sugar, eggs, flour, cotton candy flavoring or extract, and pink food coloring. Ensure your butter is softened to room temperature for easy creaming.
Measure your dry ingredients—flour, baking powder, and salt—into a separate bowl and whisk to combine. This ensures even distribution and prevents overmixing later.
Step 2 — Cream Butter and Sugar
In a large mixing bowl, beat the softened butter and granulated sugar together on medium speed until light and fluffy, about 2–3 minutes. Scrape down the sides of the bowl as needed.
Proper creaming incorporates air into the dough, which helps the Cotton Candy Cookies rise and achieve a soft, tender texture.
Step 3 — Add Wet Ingredients
Beat in the egg and vanilla extract until fully combined. Then, add the cotton candy flavoring and a few drops of pink food coloring, mixing until the color is uniform.
Start with a small amount of coloring; you can always add more to reach your desired shade of pink or blue for these whimsical cookies.
Step 4 — Incorporate Dry Ingredients
Gradually add the flour mixture to the wet ingredients, mixing on low speed just until no dry streaks remain. Overmixing can lead to tough cookies.
If the dough feels too sticky, chill it for 15–20 minutes to make it easier to handle when scooping.
Step 5 — Scoop and Shape Dough
Use a cookie scoop or tablespoon to portion the dough into rounded balls. Place them about 2 inches apart on a parchment-lined baking sheet to allow for spreading.
For extra flair, you can roll the dough balls in sanding sugar or sprinkles before baking to add a sparkling finish.
Step 6 — Bake to Perfection
Bake the Cotton Candy Cookies in a preheated 350°F (175°C) oven for 9–11 minutes, or until the edges are lightly golden and the centers look set.
The cookies will continue to firm up as they cool, so avoid overbaking for a soft, chewy result.
Step 7 — Cool Completely
Let the cookies cool on the baking sheet for 5 minutes before transferring them to a wire rack to cool completely. This prevents breakage and allows flavors to settle.
Store your finished Cotton Candy Cookies Recipe creations in an airtight container to maintain freshness and softness for several days.
Nutritional Information
| Calories | 145 |
| Protein | 2g |
| Carbohydrates | 22g |
| Fat | 6g |
| Fiber | 0g |
| Sodium | 85mg |
Note: Estimates based on typical ingredients and serving size.
Healthier Alternatives
- Protein Powder — Replace ¼ cup flour with vanilla protein powder for a protein boost without overpowering the cotton candy flavor.
- Almond Flour — Use almond flour instead of all-purpose for a lower-carb, gluten-free version with a subtle nutty note.
- Oat Flour — Swap regular flour with oat flour for a gluten-free, fiber-rich alternative that keeps the cookies soft.
- Coconut Oil — Substitute butter with coconut oil for a dairy-free option that adds a light tropical hint.
- Applesauce — Replace half the butter with unsweetened applesauce to reduce fat while maintaining moisture and a mild fruit sweetness.
- Monk Fruit Sweetener — Use monk fruit in place of sugar for a lower-carb, zero-calorie sweetener that doesn’t alter the cotton candy taste.
- Reduced-Sodium Baking Powder — Opt for low-sodium baking powder to cut salt content without affecting the cookie’s rise.
- Greek Yogurt — Swap some butter with plain Greek yogurt for added protein and a tangy contrast to the sweet cotton candy flavor.
Serving Suggestions
- Pair these whimsical Cotton Candy Cookies Recipe with a tall glass of cold milk or a scoop of creamy vanilla ice cream for a delightful contrast.
- Serve at birthday parties or carnival-themed events where their vibrant colors and fun appearance will be the star attraction.
- Create a magical dessert board by arranging these cotton candy cookies alongside other pastel-colored treats like macarons and cake pops.
- Package individual cookies in clear cellophane bags tied with colorful ribbons for charming party favors or edible gifts.
- For an elegant presentation, dust the serving platter with edible glitter before arranging your freshly baked cotton candy cookies.
- Add a festive touch to ice cream sundaes by crumbling these cookies over the top as a colorful and crunchy topping.
These cotton candy cookies make particularly memorable treats for baby showers, unicorn-themed parties, or any celebration where a touch of magic is desired.
Common Mistakes to Avoid
- Mistake: Overmixing the dough, which develops too much gluten. Fix: Mix just until the flour disappears for a tender, cake-like cookie.
- Mistake: Using cotton candy flavoring oil instead of extract. Fix: Opt for a cotton candy extract, as oils can separate and create a greasy texture.
- Mistake: Skipping the chilling step for the cookie dough. Fix: Chill the dough for at least 30 minutes to prevent excessive spreading in the oven.
- Mistake: Adding food coloring too late or inconsistently. Fix: Mix gel food coloring into the wet ingredients first for a uniform, vibrant hue.
- Mistake: Baking at too high a temperature, which can burn the sugar. Fix: Bake at 350°F (175°C) as recommended to achieve a soft, pale cookie.
- Mistake: Overbaking, which makes the cookies dry and crumbly. Fix: Remove them when the edges are just set; they will firm up as they cool.
- Mistake: Using cold butter, which doesn’t cream properly with sugar. Fix: Ensure your butter is at room temperature for a light and fluffy cookie base.
- Mistake: Measuring flour incorrectly, leading to dense cookies. Fix: Spoon flour into the measuring cup and level it off for accuracy.
- Mistake: Storing warm cookies in an airtight container. Fix: Let cookies cool completely first to avoid steam making them soggy.
Storing Tips
- Fridge: Store cooled Cotton Candy Cookies Recipe in an airtight container for up to 5 days.
- Freezer: Freeze baked cookies in a freezer-safe bag or container for up to 3 months.
- Reheat: Warm cookies in a 300°F oven for 5–8 minutes or until they reach an internal temperature of 165°F.
Always cool cookies completely before storing to prevent moisture buildup and maintain texture.
Conclusion
These Cotton Candy Cookies Recipe are a fun, colorful treat perfect for parties or a sweet snack. I hope you enjoy making them as much as we do! Try the recipe and share your results in the comments. For more delightful desserts, check out our Best Fluffy Cotton Candy Cupcakes Ready in 30 Minutes and Ultimate Unicorn Swirl Cheesecake – No-Bake Delight. Don’t forget to subscribe for more quick and tasty recipes!
Print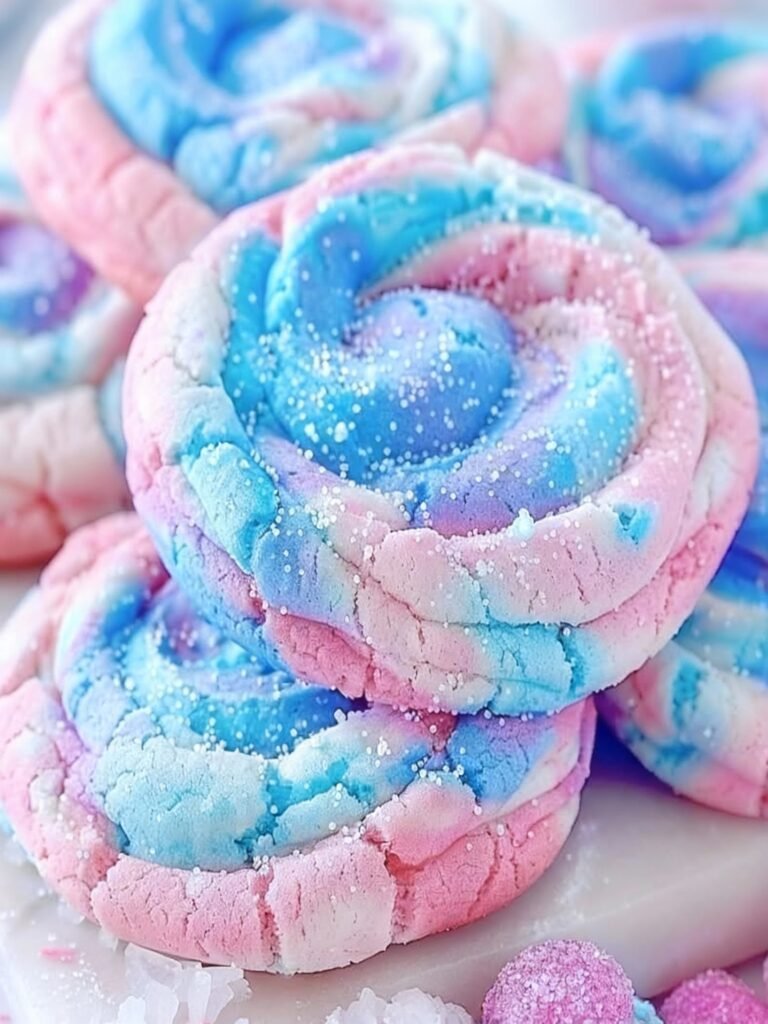
Cotton Candy Cookies
Soft, colorful, and fun, these cotton candy cookies are a sweet treat that tastes just like the carnival favorite in cookie form.
- Total Time: 23-25 minutes
- Yield: 12-15 cookies 1x
Ingredients
- 2 1/4 cups all-purpose flour
- 1 teaspoon baking powder
- 1/2 teaspoon baking soda
- 1/2 teaspoon salt
- 1 cup unsalted butter, softened
- 1 cup granulated sugar
- 1/2 cup brown sugar
- 1 large egg
- 1 teaspoon vanilla extract
- 1 teaspoon cotton candy flavoring
- Optional: pastel pink and blue food coloring, cotton candy sprinkles or white chocolate chips
Instructions
- Preheat the oven to 350°F (175°C) and line a baking sheet with parchment paper.
- Whisk together flour, baking powder, baking soda, and salt in a bowl.
- Cream the butter with both sugars until light and fluffy in another large bowl.
- Beat in the egg, vanilla extract, and cotton candy flavoring.
- Slowly mix in the dry ingredients until just combined.
- If desired, divide the dough into two bowls, tint one pink and one blue, then gently swirl them together.
- Scoop tablespoon-sized portions of dough onto the baking sheet, spacing them apart.
- Bake for 8–10 minutes, just until the edges set but the centers are soft.
- Let them cool on the baking sheet for a few minutes before transferring to a rack.
Notes
These cookies are perfect for themed gatherings or parties. You can customize them with pastel colors and add cotton candy sprinkles for extra fun.
- Prep Time: 15 minutes
- Cook Time: 8-10 minutes
- Method: Dessert
- Cuisine: American
Nutrition
- Calories: 120
- Sugar: 10
- Sodium: 50
- Fat: 6
- Saturated Fat: 4
- Unsaturated Fat: 2
- Trans Fat: 0
- Carbohydrates: 20
- Fiber: 0
- Protein: 2
- Cholesterol: 10
FAQs
Can I use regular food coloring instead of cotton candy flavoring in this Cotton Candy Cookies Recipe?
Yes, you can use regular food coloring, but it will only change the color and not the flavor. For the authentic taste, cotton candy flavoring or extract is essential for this Cotton Candy Cookies Recipe.
Why are my cotton candy cookies spreading too much while baking?
This usually happens if the dough is too warm. Chill your dough for at least 30 minutes before baking. Also, ensure your baking powder is fresh for the best results in this Cotton Candy Cookies Recipe.
How should I store these cookies to keep them soft?
Store your Cotton Candy Cookies in an airtight container at room temperature. Placing a piece of bread in the container can help maintain their soft texture for several days.